24 June 2011
Blight Danger
Minimizing Die-Back When Cutting Back Geranium (pelargonium) Stems
 Cutting back geranium (pelargonium) stems is not so straightforward as it sounds. Firstly, not every node will produce side shoots unless an axillary bud is visible. But geranium stems are often devoid of axillary buds, and any dormant buds are invisible. So we cannot just cut back to any node and expect new shoots to appear where we want them. Quite often, unsightly die-back (pink) left protruding into nowhere is the result of our efforts, try as we might.
This is why I recommend waiting till a strong new shoot is growing before cutting back to it see 'Cutting Back Geranium Stems'.
And even then I leave a good margin of error (red). This can be carefully cut away once our new branches are growing (lime - best if they're growing stronger than this). New cuttings can be taken from the off-cuts.
WHAT IF NO SHOOTS ARE AVAILABLE?
If a stem needs to be shortened and there are not side shoots, cut back about half way and hope for the best. After a few weeks, new shoots might have developed lower down the stem; if not, let them die back, then remove. We can't win them all . . ..
Inducing Bushiness In Dahlias
 Removing a dahlia's apical (terminal) bud(s) soon produces new side shoots (red). This plant was pinched out (stopped) a couple of weeks ago.
Although stopping produces more flowering stems initially, there is some forfeit (a few weeks) in terms of delayed flowering.
Rooting Tuberous Begonia Cutting In Perlite
TAKING THE CUTTING
 Select a healthy young stem with one medium-sized leaf (about 4 to 5mm (2 inches)); also including a smaller, opening leaf bud.
Cut stem with clean sharp knife about 5mm (3/8inch) below base of small bud
 Note: this photo taken after rooting; as you can see, small leaf has grown somewhat.
- Fill container with perlite and water so all perlite it wetted
- Trim loose bracts from base of cutting and insert into perlite* until base of lower leaf is below surface (be very careful not to damage base of stem). Base of lower leaf will be in contact with top of perlite.
- Pour out water until level is just beneath stem (ensures perlite damp but stem not actually immersed).
- Ensure damp perlite is contacting stem all way around.
- No need to cover.
- Place in a cool light spot, out of direct sunlight.
- Ensure container does not dry out too much.
- After 21 days check rooting by giving a gentle tug - if rooted, will be firmly set into perlite.
- Carefully remove. If perlite sticks to root hairs, leave it alone; it will give plant a better start.
 This cutting rooted after 24 days. It would have been better left another week. But placed it in damp multi-purpose and kept light and cool.
* Rooting powder not necessary
See also: 'What Is A Semi-Ripe Cutting?'
Small Geranium Leaves
 These are leaves on the geranium I re-potted in March. (see 'Re-Potting Root-Bound? Geranium (Pelargonium)')
As the leaves gradually became smaller and paler, it seemed feeding might be necessary (plant had received no feed until about three weeks ago). I say this because plants reduce the size of their leaves in bright sunlight, so this could have been the cause (it's amazing that just one or two small leaves like these can support flowering).
However, as you can see, feeding has darkened the leaf colour, indicating it was necessary, and leaf size has slightly increased. I have been feeding 'Phostrogen' (14-10-27) at a pinch per half litre (should be 3 per litre) at every watering. Dark colour indicates even this could be too much. Might cut it down to every other watering and see what happens. A general basket feed (7-7-7) could be used, but this might cause long-jointed growth. 'Phostrogen' worked fine last year - it contains more nitrogen than a normal high potash feed such as tomato feed, so will not make the stems as woody.
Although it took the plant some while to get going after re-potting, probably because it was budding up for a flush of flowers, it has flowered extremely well and is just getting ready to start again.
White Patches On Geranium Leaves
 Had I not seen it with my own eyes, I never would have believed geraniums (pelargoniums) could catch sunburn (sun scorch). Apparently so. This raises an interesting question; what has happened to the thick cuticle (see 'Plant tissues') which protects against the sun?
Kept in low light conditions for a long time, the plant will have adapted itself to these - probably reducing (or even almost removing) its waxy cuticle (sun and water-loss protection). It would be interesting to confirm this by taking a leaf section and viewing under a magnification. I say this because leaf size has also increased in low light (leaves do this, and vice versa). It might be that the cuticle is still in tact, but the plant has itself jettisoned some chlorophyll and perhaps mesophyll tissue for reasons best known only to itself. In other words, this reaction is the plant's way of reducing its leaf area.
Plant Tissues
Plants possess three main tissue groups: GROUND, VASCULAR, and DERMAL.
PARENCHYMA CELLS - These are 'typical cells'. Most common type of cell and tissue. Progenitors of all other tissues. Form bulk of most edible foods.
Function - bulky packing material; sites of food storage (e.g.starch, oil); mechanical support (when turgid) in herbaceous plants; gaseous exchange; transport of materials through cell walls (aerenchyma); photosynthesis (chlorenchyma); plus virtually all other metabolic processes in plant; can become meristematic when injured or damaged, forming a cork cambium – extremely important for recovery from adverse conditions (this property is used in propagation).
Where Found - cortex of roots; pith of stems; leaf mesophyll; medullary rays in wood; packing tissue in xylem and phloem. Cell Shape - basically round, but appear polyhedral when in contact with other cells; large vacuole and nucleus.
Cell Wall Material - thin primary wall only, composed of: cellulose; pectins; hemicelluloses.
Cell Status - alive
Function - support; because it is so flexible, plants can grow upwards and compete for light.
Where Found - often as long strands near stem surfaces and along midrib of leaf; strings of celery (petiole of leaf) composed of collenchyma. Cell Shape - elongated and polygonal with tapering ends.
Cell Wall Material - primary wall only, thickened at corners to provide support; composed of cellulose, pectins, hemicelluloses; cells tightly-packed together.
Cell Status - alive.
SCLERENCHYMA CELLS - present as FIBRES; SCLEREIDS. Each has both primary cell wall and a thick, lignified secondary wall (gives support). Cells are non-living at maturity and lack protoplasts.
FIBRES
Function - support; strength; protection.
Where Found - outer regions of cortex; pericycle of stems; xylem and phloem; abundant in wood and bark of flowering plants; occur in strands or bundles (e.g. flax, hemp, jute) Cell Shape - elongated and polyagonal with tapering, interlocking ends.
Cell Wall Material - mainly lignin; cells start off as normal cells with cellulose walls, but as lignin (which is impervious to air and water) is laid down, cell suffocates and dies leaving hollow ligin fibres with tapering ends.
Cell Status - dead.
Function - support; mechanical protection (e.g. seed coat).
Where Found - cortex; pith; phloem; common in shells of nuts; pits of stone fruits (e.g. cherries, peaches); give pears their gritty texture.
 Cell Shape - roughly spherical or irregular.
Cell Wall Material - mainly lignin - also cellulose; hemicellulose; pectins.
Cell Status - dead.
VASCULAR TISSUE SYSTEM
2 types: xylem and phloem - these form the plant's 'plumbing system' - may be primary or secondary in origin.
XYLEM - Occurs as TRACHEIDS (found in all xylem tissue) or vessel VESSEL MEMBERS (found in flowering plants (angiosperms), not in conifers); tracheids also sometimes present in angiosperms, but always in conifers (gymnosperms)). Fibres and parenchyma cells also present.
Function - conducts water and dissolved mineral salts from roots to leaves and stems; also provides structural support.
Where Found - embedded in ground tissue; runs continuous system through whole plant.
Cell Shape - TRACHEIDS are long, tapering cells with overlapping ends; water passes from one tracheid to another through pits - thin areas in tracheids' cell walls where a secondary wall did not form.
 VESSEL ELEMENTS are hollow, but unlike tracheids, they have holes in their end walls called perforations - these might be completely dissolved away, giving easy passage to water; vessel elements stack (like barrels) on top of each other to form ELEMENTS, which also have pits; wider than tracheids, so more efficient.
Cell Wall Material - Thick walls, mostly lignin. Like sclerenchyma fibres, they start life as living cells containing cellulose, pectins and hemicellulose. As lignin (impervious) is laid down in cell walls, cells lose contents and die, leaving hollow lignified tubes.
Cell Status - dead at maturity (though parenchyma cells are live)
PHLOEM - Consists mainly of unlignified living cells called SIEVE TUBES, adjacent COMPANION CELLS, fibres and parenchyma.
Function - sieve tubes, with help of companion cells, transport organic solutes (food) throughout plant.
Cell Shape -
SI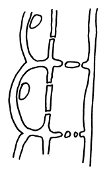 EVE TUBES are long and tubular (comprised of stacked SIEVE TUBE ELEMENTS). Ends of cell walls connected by perforations called SIEVE PLATES.
COMPANION CELLS are long and narrow and possess nuclei and all other components of a normal cell.
Cell Wall Material - Both types have normal composition: cellulose; hemicellulose; pectins.
Cell Status - living.
DERMAL TISSUE SYSTEM- epidermis and periderm
 EPIDERMIS - Consists mostly of parenchyma cells. Leaf epidermis impregnated by GUARD CELLS and STOMATA (pores). Apart from guard cells, no chlorophyll is present, so epidermis is transparent. To prevent damage and water loss, epidermal cells of stems and leaves are covered by a waxy layer of cutin, called the CUTICLE.
Function
Provides a covering ('skin'), usually one cell thick, over primary plant cell body to prevent water loss and protect against infection. Hairs and glands have various functions e.g. root hairs increase absorptive area of roots; others cut down water loss, or provide defence (nettle). Cell Shape - as parenchyma (leaf epidermal cells have wavy edges fitted together like a jigsaw; guard cells sausage-shaped with thin outside walls).
Cell Wall Material - cellulose; hemicellulose; pectins; cutin
Cell Status - living.
PERIDERM - Cork layer. Formed by CORK CAMBIUM, it makes up bark and replaces epidermis in older woody plants.
Function - Protection and prevention of water loss; LENTICELLS (loose groups of cells) allow aeration. Cell Shape - cells small and spherical as they develop; later SUBERIN, a fatty substance, laid down in walls, making them impervious to water and air; hairs and glands have various shapes.
Cell Status - dead.
17 June 2011
Slug Eggs
 Found this group of presumably over-wintered slug eggs in a container. Slug eggs resemble little dark yellow pills about 3mm diameter. Although laid in groups in a damp spot just beneath the soil/compost surface, they are also laid amongst the roots and tubers of over-wintering plants and are a particular problem with dahlia tubers because the slugs hatch out just as the tender young shoots are emerging from the tuber. Slugs can do massive damage to young plants in a very short space of time - they need watching, especially in damp, warm conditions.
If buying plants from a nursery, do not confuse slow-release fertilizer granules with slug eggs. They are about the same size, but slug eggs are definitely dark yellow.
Tomato Surface Roots
 After carefully scraping beneath compost surface, I found this root about 2cm (3/4 inch) down. Didn't want to disturb it more than necessary, so could not tell if it had come up from below or had grown from top of stem (seems more likely). Still, it means things are still going to plan - a miracle in itself.
Will continue with light waterings (1 pint per gallon of compost) when top of compost just starts to change colour. Should encourage good root system.
 Although there's a truss of flowers forming, these are not yet open. Will only step up watering and begin feeding once first tomatoes have set and are about pea-size.
Hopefully things will speed up with recent warmer weather.
Potato Surface Root Proliferation
 Over the past week or so, fine curly roots have proliferated just beneath soil surface (some are ringed red). However, it's not clear where these are originating. And this activity seems to be mostly above troughs in main root wave. But where main root comes closer to surface, there is little sign of it (right). Although these new roots are clearly visible through side of pot, they cannot be seen from above. i.e. they do not seem to penetrate soil surface.
PURPOSE OF ROOTS
 Not sure what purpose these roots serve, but presumably they gather water from light rain showers, which hardly penetrates into soil. Should think they can also extract condensation formed overnight at soil surface from water vapour rising from below. Probably quite a lot of water to be had this way.
Had no idea potatoes were so efficient at extracting water (if that's what these roots are for). But concerned about:
- what happens if surface dries out - do roots survive and remain effective?
- what happens when roots disturbed by surface weed control - how quickly do they re-grow, if at all?
- what happens when potatoes earthed up - how quickly can they reach new surface?
- do they make mulching less effective (not so much in potatoes but in other crops)?
- implications for top dressing
WHEN SURFACE DRIES OUT
Very few commercial soils have constantly damp surfaces. Are these roots damaged by drying? Presumably not - not if their purpose is to harvest rare showers in dry soil.
WEED CONTROL
Surface hoeing could be a real problem and present much damage, at least in the short term. But most of weed control in potato drills is done by covering small weeds during 'earthing up' process. Would seem essential not to let weeds get too large to be covered this way.
MULCHING - IS IT ALWAYS EFFECTIVE?
Because mulching materials tend to be coarser than soil, it's likely these roots cannot proliferate to same extent, if at all, perhaps leaving a dry barrier between soil surface and atmosphere - one which light rain showers could not penetrate.
As already outlined, if the top couple of centimetres (inch) or so of soil surface is loosened by cultivation it forms a natural barrier (mulch) to water loss (see posts on weeding and water conservation). Therefore, all mulching really does is delay the drying process; it is probably not much more effective than the soil's own natural mulch (formed when loosened surface insulates and reduces loss due to wicking). Bearing in mind surface roots, we need to ask the question: 'Are there are circumstances where mulching might be ineffective?'
TOP DRESSING
It's always assumed feeds need working into surface. Might do more harm than good.
Any views about all of this?
Coriander Severed Roots After 11 Days
 These brand new roots, complete with root caps, have appeared sooner than expected (see 'Coriander 'Multi-Plant' Matted Root Trim').
Plant has been kept un-watered, at about 17 deg C, indoors and in good light. Compost still quite moist, so should not need watering for perhaps another week (provided it remains indoors); it's just about at right stage for root and foliage growth right now.
 Flowers seem to be developing quite well, for now. Newer growth looks fresh and healthy. Not sure if stems are becoming wavy (below)? Wait and see . . ..
Sun Scorch (Sunburn) On Begonia Leaf
 This is sun scorch (sunburn) on a begonia leaf, common at this time of year (midsummer) when moving plants too quickly from shade into strong sunlight.
Although plants are classified according to their light preferences - e.g. shade-loving; sun-loving etc - this is not absolute. We saw last year that, given time, plants can adjust to almost any environment (see posts on 'light').
PLANTS TAKE IMMEDIATE AVOIDING ACTION
Although begonias do not seem to be able to do this very well, plants can often react quickly by altering leaf turgo pressure (there are different ways of doing this), causing them to either follow or avoid the sunlight. For example, begonias (shade-loving plants) flute their leaves (common with many plants).
LONG-TERM ACTION TAKES TIME
However, they also GROW into their new environment and develop a thick waxy cuticle on the leaf surfaces to protect against damaging ultra violet rays; leaf size is also reduced in bright sunlight, and vice versa.
REMEDY
Leaf structural damage is permanent; they will not recover. However, if the disfigurement can be tolerated in the short term, it is worth leaving the damaged leaves in position because:
- there will usually be some undamaged tissue left which will speed growth of new leaves
- they offer shade to young tender leaves
Tomato Blight Protection
Contact fungicides are effective over a much wider range of diseases than systemic ones, but must be applied BEFORE disease spores come in contact with plant. They work by preventing spore germination on plant surface and need applying every two or three weeks. Systemics prevent spore germination but also block active metablolism inside plant - so should also be effective AFTER infection has occurred. See also: 'How Fungicides Work'.
Not sure if 'Systhane' (myclobutanil) can be used on tomatoes. It can be a bit fierce. Tested on a single leaf, which seemed to change colour, though not sure if this was due to chemical or to other causes. Bordeaux mixture (copper sulphate) is also effective on potatoes, though again not sure if it can be used on tomatoes. Does anyone know?
How Fungicides Work
What is a Fungicide?
An agent which will kill, repel or prevent, or otherwise mitigate a fungus.
It may be PREVENTATIVE or CURATIVE in nature
It may be naturally derived or synthetic
Biological
Soil contains beneficial fungi and bacteria which afford biological control by attacking and destroying pathogenic (disease-causing) fungi.
Synthetic
These are comprised of various chemical treatments concocted by technicians in a laboratory.
HOW DO FUNGICIDES WORK?
- Direct competition
- Antibiosis
- Predation or parasitism
- Induced resistance of host plant
Protectant
Must be present BEFORE infection. Includes Carbamates (includes Mancozeb)
Curative
Tend to work on specific metabloic process. Blocks a part of pathway. Therefore more limited in action. And because they only work at one point, fungus more able to build up resistance.
How Contact Fungicides Work
- Multi-site activity (therefore effective against a wider range of fungal diseases).
- These fungicides act to kill fungus by overwhelming it with substances which are poisonous to it (e.g. copper).
- These fungicides primarily based on inorganic chemicals such as copper, aluminium, sulphur. Also upon the dithiocarbamates combined with zinc and manganese ions.
- Low risk of resistance build-up.
- Must be present before infection begins
FUNGAL INFECTION PROCESS (from Fungicides_McManus.pdf)
- Inoculation - fungal spore lands on plant surface
- Adhesion - fungal spore exudes a glue so that it sticks to plant surface even in rain
- Germination - fungal spore takes up water and germ tube emerges
- Penetration - germ tube enters plant, either by poking through epidermis or by entering stomata or wounds
- Plant-pathogen recognition - chemical or molecular signals are exchanged between fungus and plant so fungus knows it has infected suitable host
- Infection - fungus invades plant by growing in or between cells, and releases spores from plant surface
Fungicides must be applied at suitable times to be effective. Contact protectives must be applied before infection. Systemics must be applied at right stage of plant development (eg at bud break).
How Systhane (example of systemic fungicide) Works From IntroToFungicides.pdf
Systhane is a Triazole, which is a sterol inhibitor (DMI). Demethylation inhibitor fungicides (DMI) inhibit the biosynthesis of sterols (enzymes used by fungus) in fungal membranes.
So Systhane works by inhibiting the biosynthesis of sterols (enzymes used by fungus) in fungal membranes.
10 June 2011
Coriander 'Multi-Plant' Matted Root Trim
 These matted coriander roots are on a plant from a 200ml plastic cup found under bench. Discarded when it began going to seed, it has not been watered for some time. Compost was virtually bone dry and foliage had almost - but not quite - gone. Original intention was to confirm Ken Pilkington's findings that 'Multi-Plant' (his name for a plant community in a pot) roots remain fine and fibrous, not thick and tap-root-like.
 After severing and removing matted base roots, plant was placed in a 4.5 inch pot of plain compost to same depth it was in 2.5 inch cup. Note how much inner compost is unused. Idea is to utilize this as well as new compost.
 I know photo is not very good, but a few flowers already forming on stems in pot. Should be interesting to see if it will revive (plants do not usually thrive if they have suffered a severe setback) and how efficiently it can produce flowers. I think a 'Multi-Plant' has great potential in this area (certainly has in the fuchsia area), capable of easily producing many flowers and seeds on relatively compact, stable plants.
Potato Laterals Not Just At Surface
 Just after stating that 'potato laterals are mostly at surface' of the half litre plastic cup (see 'Why Are Potato Lateral Roots Mostly At Surface?'), more have appeared further down. These new laterals also at 'crest' of 'root wave' with little in gullies either side (this photo actually shows two roots, but seems to illustrate the point). Only this time new lateral growth is mostly upward and is more extensive. It is also comprised of only the finer roots, at the moment, though these possess root hairs, so might thicken up to be like those described last week.
THESE LATERALS NOT ON ROOT AT SURFACE
Far from being just beneath the surface, this root is nearly two thirds way down the cup. And it is unlikely that this part of the cup has been watered in the same way as the surface. This might indicate:
- perhaps potato roots grow in a wave fashion wherever they are, independent of soil water levels
- perhaps laterals at crest of roots are not responding to being near soil surface
It seems amazing that roots actually grow so close to the soil surface. This means that any sort of mechanical weeding is certain to damage them and impair the plant's ability to take up water.
Do Dahlia Roots Come So Close?
Dahlia feeder roots also come up to the surface. I wonder if they also come so close?
NO RESPONSE TO SYRINGE WATER
Still early days, but water applied by syringe to gully of root at top of cup does not seem to have produced a response, perhaps indicating laterals are not produced in response to moisture levels. Seems unlikely.
Troubleshooting Holes In Rose Leaves
 Never ever seen holes in my rose leaves before. Leaf cutter bees bite large chunks out of leaf edges. But this? A complete mystery. The way some of the leaves have holes chewed in their centres upto the veins (these have been left intact), resembles slug, snail, chafer beetle, or sawfly damage (see last year's sawfly problems on euonymus).
Rose slugworms are the yellow-green larvae of a sawfly. But they only usually feed on the lower leaf surface and cause light brown patches to develop. There is no such evidence. It really is a mystery.
 Anyway, whatever the cause, healed edges of holes indicate pests have gone - at least for now. Sprayed with thiacloprid 'Provado', anyhow - a systemic (travels around plant within sap) insecticide which gives protection against most rose pests for upto two months. Situation needs watching closely.
Advantages Of Storing Begonia Tubers As Root Balls
 Many begonia growers brush their tubers off before storage. I have never had much luck with this method. I always store mine as a root ball complete with soil or compost, and find it has advantages.
ADVANTAGES FOR STORING
Although I stop watering my begonias in pots around the start of October, I still find they do not really dry out. Consequently, it is for me almost impossible to clean them without breaking the tubers or damaging them in some way. So I just place them in an airy spot to dry them as much as possible before storage, then don't cover until the really severe weather comes. They seem to store well this way with little or no disease problems. We covered lifting begonias last year.
ADVANTAGES FOR PLANTING
Once it becomes clear in early spring that tubers are showing signs of growth, root balls can be watered lightly and placed in a light frost-free place. This helps them along and avoids the need to pot up the larger tubers which are almost impossible to fit into almost any pot.
 BEWARE OF VINE WEEVIL GRUBS
The tuber above has been treated as described and can now be planted as it is. However, it will need some treatment for vine weevil grubs which will almost certainly have overwintered with the tubers and will be hiding in the roots somewhere. I use 'Provado Vine Weevil Killer', a stronger dose of thiacloprid.
Feed Dahlias If They Look Pale
 Once dahlia leaves start looking pale, it's time to give a feed. Used 'Phostrogen' (14-10-27) liquid feed, normal strength, but could have used a balanced (e.g. 7-7-7) liquid feed. Liquids act faster because they are also taken in by leaves. Granules could be used, but 'Growmore' takes about 2 weeks to work. Pleased at how many dahlias have survived in beds over winter; haven't given any extra protection.
Blackfly On Dahlia Bud

 It doesn't pay to let aphids - such as the blackfly seen here on a dahlia bud - get out of control; they multiply incredibly quickly, as you can see from the infestation (right) of a black bean aphids on an elderberry branch. Is it any wonder a plant has difficulty coping? And that's aside from the fact that aphids also bring virus and other diseases.
CONTROL
Only certain varieties of dahlia seem to be affected by blackfly. Control as per greenfly and all other aphids, by organic or inorganic methods (see 'Troubleshooting Aphids On Rose Bud').
Pinching out the tip will remove most of the aphids and induce bushiness in this single-stemmed plant. The downside is that it delays flowering. Flowering in dahlias takes about 8 weeks from stopping (pinching out).
Troubleshooting Aphids On Rose Buds
 Aphids, especially greenfly, are a real pest on juicy rose buds during a hot spell at this time of year (roses open around the time of the summer solstice). Although there is one adult here (bottom right), we have mostly young greenfly, which are born live (viviparous) and develop through several stages, often shedding cuticles or skins which fall down to leaves below (see 'Old Cuticles Are Sure Sign Of Pest Trouble')
Young blackfly are also present
Aphids need controlling because they spread viral diseases and cause structural damage to flowers and leaves. They also excrete honeydew as they feed (you have probably experienced this when walking beneath the canopy of summer trees) which drops onto the lower leaves and attracts black sooty mould (this is not in fact harmful, just disfiguring).
Also in other colours:
Aphids also come in many other shades and colours

CONTROL
Control with 'Provado' (thiacloprid) for long-lasting systemic action, or organic fatty acid sprays, or soap and water, or water, or remove by hand or . . . there are many treatments.
See also 'Lonesome Greenfly'; 'Blackfly On Dahlia Bud'
6 June 2011
Leggy Tomato Plant First Watering
Foliage now darker in colour, so roots have found new compost after re-pot. Plant seems to be growing quite well, so far. First truss now has some unopened flowers.
3 June 2011
Dealing With Moss In A Summer Lawn
Treating a lawn for moss is rather like a doctor treating a sick patient. The first thing to do is control the suffering - usually with drugs or other chemicals - then work on changing, if possible, the conditions which caused it. And just like any sickness or ailment, treatment can be applied AT ANY TIME. It's just that some times are more cosmetically amenable than others. Now, the summer, is such a time.
Before I go any further, can I apologise to those of you who tried my autumn moss treatments described last year (click 'moss' link at side), but have found moss re-growing in their turf this year. It's my fault, not yours. I should have made things clearer. In case you are sick of hearing about moss and don't want to read further, here is a quick prognosis:
- keep zapping moss as soon as visible, any time of year
- rake out some of moss if it looks bad
- apply liquid lawn feed (usually all that is necessary)
MOSS NEEDS REPEATED TREATMENTS
Consequently, moss is difficult if not impossible to eradicate AT ONE ATTEMPT; it has to be ground down over a period of time with REPEATED TREATMENTS. But hold on. I'm not talking about all the hard work you did to aerate and loosen your turf. I'm talking about another dose of ferrous sulphate in water.
NIP IT IN THE BUD
I'm sorry I didn't make clear that you need to watch the turf closely for signs of regeneration, then nip it in the bud. This is what I did with my lawn. The moss problem reduced significantly, right from the off. But I then wanted to change the conditions to eradicate it completely.
AUTUMN TURF TREATMENT HAS NOT BEEN WASTED
This is where the turf aeration and top-dressing comes in. It hasn't been wasted. And it's not even absolutely necessary to contain rampant moss - another dose of ferrous sulphate will do this.
As the battle continues, moss is contained to a smaller area of lawn, perhaps just the odd patch or two. This happens fairly quickly. So what I did then was apply ferrous sulphate with a hand sprayer; but if it had spread too far, I treated the whole lawn (this is what I did early last November). Having said this, however, always bear in mind that there will always be much more moss in a lawn than that which is visible. This always seems to be the case. So watch that it doesn't become rampant again once your back is turned.
MOSS USUALLY STOPS GROWTH IN SUMMER
Because moss usually thrives in wet conditions (some mosses thrive in dry ones), as the lawn surface dries, it dies back because, unlike the grass, it has no root structure to access water deeper in the turf. This is why you should never water a lawn too frequently with small doses. Water heavily at longer intervals (see last year's lawn posts). It gets the water deeper down for the grass roots, but allows the surface to dry.
HIGH NITROGEN FEEDS USUALLY KILL MOSS
After recent rainfall in parts of the UK, lawn recovery can be enhanced by applying a summer feed. Although this can incorporate a mosskiller (ferrous sulphate), it should not be necessary unless the weather (and turf) is very wet for prolonged periods. To give you some indication, I don't think I have ever used a summer lawn feed with mosskiller.
WHICH TYPE OF FEED
The choice is between granular or liquid feeds. (See 'Choosing A Lawn Feed')
Liquids
Liquids are ideal at this time (they can also contain ferrous sulphate mosskiller), because they soak the grass leaves. When wet, the feed is taken into the plant, so starts working almost immediately (granules take about 2 weeks). But there's another benefit. As they dry on the moss, it tends to be killed (due to plasmolysis).
Liquid feeds also have the benefit that they are more controllable, especially if the weather suddenly turns dry. All this was dealt with last year.
WHAT ABOUT THE UNSIGHTLY DEAD MOSS?
Mosskiller instructions and gardening programmes always advise removing the dead moss by raking. But this is hard work and is usually not necessary.
Many believe that this removal prevents the moss re-establishing from spores (moss's equivalent of seeds) left on the ground. This is not true. Only the heavier metal salts (such as mercuric chloride (no longer available)) will kill the spores (it also kills almost all your soil micro-organisms, as well).
Others say removal makes room for air and light to enter the turf. Well. Maybe it does. But lawn grass will almost always grow through it very quickly. And because moss is soft tissue, it soon breaks down in the turf (unless it's a dry summer, or the turf is very acid).
GIVE IT A LIGHT RAKING
I found that a compromise works well. Rake out some. But you don't need to be too thorough. And only do this if it looks unsightly. It's really determined by cosmetics.
So, starting now, follow last year's moss posts through from beginning, just like last year. Otherwise:
- keep zapping moss as soon as visible, any time of year
- rake out some of moss if it looks bad
- apply liquid lawn feed
Why Are There Two Types Of Potato 'Lateral Roots'?
 Something else interesting about the new laterals developing from the potato root we saw last week are the two apparently different types of 'root': thick ones (pink) and thin ones. Are they both roots or just the thicker ones with the root hairs? Can't see how they could be tuber* rhizomes, since these arise from stems. I know adventitious roots also come from stems. But not from the same source, surely. But the two types seem to be attached to the parent at different angles.
Too soon to determine any of this. Not even clear whether each of these types of 'root' is attached to the main root. See what develops.
* A potato tuber is a bulky short terminal part of an underground stem (rhizome) whose 'eyes' are really buds at nodes. Shoots and roots grow from these eyes upon planting. We often see these on old potatoes in the cupboard which have started to grow. The main bud is at the end of the tuber and exerts dominance over the other lesser 'eyes' in the way expected in stem terminal buds.
Why Are Potato Lateral Roots Mostly At Surface?
 This is the same root you saw last week, rising and falling beneath the soil surface. More interesting developments this week:
Secondary (lateral) roots have suddenly developed, but only where the original root is nearest to the surface. It's hard to get a photo because of the shape of the pot, but the root is almost devoid of laterals either side where it is lower in the soil, so farther away from the surface. Why?
- Perhaps laterals responding belatedly (it takes lateral roots some time to appear, because they have to grow from the 'pericycle', deep inside the root) to the water applied to the surface some time back.
- or Perhaps, being principally feeder roots, they just grow when roots come up near the surface (feeder roots do this to gather water from rain showers, among other things)
 Just out of interest, I inserted some water around the lower root (where it is furthest from the surface) with a syringe, so that the soil is just moist. Will this water induce lateral roots to form?
Fixing A Broken Lupin Stem Complete With Basal Buds
 About a week later, new shoots coming up from basal buds. Wasn't sure if they would or not, as buds could have been dormant. Need keeping in good light now till roots are evident.
NOT ONLY LEAVES CONTAIN CHLOROPHYLL
 Note there are no leaves (normal basal cuttings contain some basal plate complete with buds, stem and two or three leaves) to provide food by photosynthesis to support the growth process. However, there is about 15 cm (6 inches) of green stem - green because it contains the pigment chlorophyll - so this will supply the food. i.e. Green stems (or any green plant tissue) can photosynthesise, as well as leaves. Not everyone understands this.
 I haven't got a photo of the original broken stem. And I don't want to disturb the cutting till it's rooted. So here is the base of another stem, complete with basal bud (marked red) and base plate material (marked pink). It does look rather like a heel cutting, produced when a woody shoot tears away from a shrub or tree.
ROOTING MATERIAL
Although I have used perlite and water, moist soil or potting compost (either multi-purpose or special potting compost) can be used, especially if perlite or sand is added to aid aeration. I would insert the cutting near the edge (not too near or it will dry out) of the pot, with its bud(s) just beneath the surface; then carefully keep moist (I usually dribble water down the stem, so the base is kept damp after the excess is taken up by the rest of the compost (because it is drier)).
ROOTING STEMS IN WATER
 Many stem bases will also root in water. After leaving base of stem above in a cup or beaker of water (level shown by green arrow) for fift
 een days, new shoots (pink) and a new root (red) have developed. Water-rooted cuttings can be more brittle than perlite-rooted ones, but young plant can now be carefully transferred to moist soil or compost, so soil is at same level as water. Imperative to keep out of direct sunlight.
Fixing A Broken Branch Or Stem
- woody perennials (trees, shrubs e.g. forsythia)
- tender perennials (will grow all year but frost-susceptible e.g. geraniums)
- herbaceous perennials (everything else which comes up from roots year after year e.g. lupins, delphiniums)
WOODY PERENNIALS
Branches rarely break away completely from the parent. They usually hang in limbo looking untidy, leaving the dilemma as to whether to bind it back in position or remove it completely and go from there. Some advice:
BIND IT BACK
Broken limbs, not completely severed, are rather like broken human limbs. Setting and binding them back into position early enough will usually work well. Of course, we don't use plaster of Paris on plant stems; we use garden twine, or wire - or even a pin or two - even splints, if necessary. The binding must be tight enough to bring the surfaces back into contact and to provide firm support. This is essential. Remember to remove binding once healing has occurred, or lateral secondary growth (stem thickening) will be impaired.
PROPAGATE NEW STOCK
Not so easy with woody tissue, but new plants can be propagated by layering (not covered yet) or by taking hard wood cuttings, or semi-ripe (even soft wood, in some cases) cuttings. It's a matter of using whatever method you are familiar with that works. These either are or will be dealt with elsewhere (use search box).
Because there is no secondary thickening (I'll be telling you about this later), these don't heal like woody plants. So they can't be bound and left. So must propagate new stock. Fortunately there are several options:
- shoot tip cuttings (used for tips of non-flowering stems (sometimes will work if flowering))
- basal cuttings (used if stem broken away from base (needs a bit of base plate with dormant buds)
- seeds (used when too late to propagate by other methods. problem that they might not come true, if from hybrid stock)
Surprising how often pushing a shoot tip into garden soil produces results (e.g. geraniums, fuchsias, dahlias). It's always worth a try. Works very well on broken branches torn away from stem and containing a heel (base of stem includes a little bark from main stem where it was torn away).
Perlite and Water
Gives results for most occasions. Very useful for semi-ripe tissue (starting to turn brown). Seems to work with almost anything. This was described last autumn when used to propagate flowering fuchsias.
Water
Plain water often gives results, especially on woody tissue. It can give brittle roots which are slow to establish when later potted into soil or compost. We used this last year to propagate a triphylla fuchsia. It can even be used on geraniums.
Compost
Although potting compost might be best, just ordinary multi-purpose seems to work quite well, especially if some sand or perlite is added to give aeration. Though, until recently, I have always used plain compost. This method has been described several times, especially propagating dahlias and fuchsias.
- Always use as sharp a knife as possible (preferably a razor blade or craft knife) to cut a shoot tip cutting below a leaf node. A clean cut helps prevent cell damage, which induces rotting.
- Hormone rooting powder is often useful, though not usually necessary
- Keep cuttings in good light, out of sun and not too hot
Tomato Plant: No Water For 5 Days
 Haven't had much luck with growing tomatoes. This is the third try after two disasters (tomato blight) caused by weather, several years apart. Thought it might be different this year . . .. Perhaps not.
Sure enough, true to form, the weather turned on me. Within hours of potting up, a cold wind arrived, temperatures were plunging towards 14 deg C (57 deg F) and heavy rain clouds were forming. It could only happen to me.
As outlined last week, further wetting of the compost could have been fatal. So moved plant to dry spot close to house. Not much sun there. But at least it was warmer and more sheltered. After staking stem to a small cane to prevent it breaking off in wind, went away for a few days, full of hope.
Expected leaves to curl up, or turn blue - or both. Not so. Plant doesn't look too bad and actually seems to have grown a little .... Astounding . . .. The compost is just about right for growing - surface turning a nice light shade of brown. Moved plant back to a draughty but sunny spot - the only one available.
WATERING
No water given yet. Should encourage roots to spread out in the compost.Don't expect to water for a while yet; depends on weather.
Several Geotropic Shoots From Nodes Of Horizontal Dahlia Stem
 This is the dahlia stem we planted horizontally three weeks ago to make it more drought-resistant. Shoots, being positively geotropic, grow upwards towards the light. Here we have several shoots, each springing from a node of the horizontal stem. Because these nodes are all at the same height, just below the soil surface, they have more equal access to its water reserves.
Dahlia Tuber Wheels Produces Several Shoots
 Several shoots are now visible on one of the dahlia tuber wheels planted in April (see 'Can A Dahlia Tuber Wheel Produce New Plant Vigour').
Although we now know the technique works, there have been two problems:
- slugs
- poor nutrition in deeper holes
Wet warm weather is perfect for all kinds of slugs and snails. I had earlier treated the bed with organic slug pellets and therefore assumed it was clear of the pests. Unfortunatley not. Small garden slugs did great damage in the deeper holes, almost from the off. Had to revert to Metaldeyde pellets, which cured the problem (although, in fairness, I have to say that organic pellets seemed to work on the delphiniums earlier. a problem with organic pellets is that because the slugs go away to die, it's impossible to tell whether or not they have worked - until it's too late.)
POOR NUTRITION IN DEEPER HOLES
It's very easy to become too enthusiastic when trying out new concepts and ideas. This was such a case. As you can see, the leaves are rather pale, so this could indicate a lack of nutrients (it could also be other things, such as cold - or just because it's new growth).
I think this is because I got clever and failed to place the tubers on multi-purpose compost (I was short of it at the time), as recommended. This would have supplied all the nutrients necessary for healthy strong growth, as it did last year. Soil is most fertile in the upper 'A' horizon, usually within the first 15 to 20 centimetres (6 to 8 inches) where the micro-organisms are most active (due to adequate air).
THE GOOD NEWS SO FAR
Because several shoots are now growing up through this fertile 'A' horizon, the adventitious roots produced on the new stems will have easy access to soil nutrients in this area, something they otherwise would not have done. Thus, using this technique offers a kind of insurance policy against poor conditions.