Learning how to water plants to increase growth in pots, container or garden - especially how to water roots and tubers. Specialities: root growth or tuber growth of lawns, fuchsias, geraniums, dahlias and begonias.

25 September 2010

Is it Friable? - The Ideal Soil State for Lawn Aeration

It makes things an awful lot easier if we can work with Mother Nature instead of against her. This is brought home nowhere clearer than when working with soil: It can be either a dream (well, almost), or a nightmare.

And I think all gardeners and growers understand why a soil's water content plays a major role:

  • too wet, and it turns into sticky 'plasticine', impossible to control
  • too dry, to dust

However, there is a very narrow window of opportunity which presents itself as a soil dries out (thank goodness).

At this point, it forms into a ball when squeezed in the hand. And this ball breaks up easily when poked with a finger. This happens to all soils and composts which contain some structure to bind them (it is that same condition, ideal for propagating cuttings, described earlier). At this stage, the soil is said to be FRIABLE.

THIS IS THE IDEAL CONDITION FOR LAWN AERATION, especially by hand fork.

FABULOUS DRYING DAY
Today's weather came right out of the blue. The cold north-east wind is really drying things up, especially the lawn.


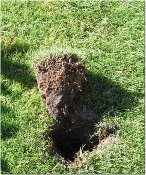
I rturf divotushed out with my trowel and removed this divot. Can you see what I mean about thatch? It starts at the top and goes about two thirds down, to a depth of about 5 cm (2 inches).

But it's not the thatch we're interested in at this stage; it's the dark soil beneath it. I'm not sure if you can see, but it's still rather wet, but becoming rapidly drier. And because this weather is set to continue tomorrow, this would be a good opportunity for aerating the heavier ground (who knows what the weather might do next; and for how long?).

AERATING WITH A FORK

hollow-tining a lawnThe rows are similar to hollow-tining (shown here), but wider apart. However, the process is different.

Using my fork with the finest (thinnest) tines (a border fork), I drive it full depth into the turf, at a slight angle back from vertical.

On pulling the fork handle back towards me about 30 cm (1 foot), a layer of turf, at least 10 cm (4 inches) thick, is prised up on the tines. When the fork handle is raised and the tines withdrawn, this turf does not fall back completely (since it has been stretched), but remains slightly arched. Since the fork holes are in rows, the effect is to produce something like shallow drills of turf across the lawn, separated by the rows of fork holes.

It is the ARCHING which is important. The fine tines break a friable soil up easily, including any compaction (this technique is especially useful for areas of heavy traffic).

Aeration is achieved, firstly from the holes made by the fork; and secondly by the newly-formed cracks in the turf (caused by stretching).

IDEAL FOR LIQUID AUTUMN FEED
The holes are at the bottom of the ridges. So liquid feed can run straight into the soil, down to the roots. This is important for root formation, since phosphates (essential for root production) are, within a short time, nearly completely immobilised upon entering the soil.

And things get even better: rainwater can also get through the turf.

SPACING
About 25 cm (10 inches) between rows, for a small border fork, seems ideal.

FEEL THEM ROOTS
The idea is to get the fork in deep enough to reach beneath the roots. What I find is that this is easy in the heavier parts, where root formation has been limited by poor aeration. But one can feel the roots really resisting where the conditions for growth have been ideal. At this point, forking is not necessary; pricking will do, just so the water and feed can get through the turf.

LEAVE UNCUT
I really prefer to do this after the last cut, since it is important not to re-compress the turf. However, I find a small hover mower ideal, especially since the grass is best left longer so it has maximum length to produce food to fuel root production. I know it can thin the turf, but it is worth it at this stage.

HIGH POTASH FEED
Do not use summer feed; use a high potassium autumn feed. If you can't get a liquid (tomato feed will do), get a good brand of granules (this might contain a mosskiller and weedkiller).


P.S. Good news, thatch-wise: It's a lot softer than it was - the woody rhizomes have almost broken down (probably thanks to our early summer feeding).

23 September 2010

Grey Mould (Botrytis) on Fuchsia Stem?

grey mouldThe furry substance on this fuchsia stem looks like Grey Mould (Botrytis cinerea) thriving on sugars in the sap which is still bleeding from the cuts I made last week. It has run down the stem and is keeping it permanently wet. And, since the fungus threads (hyphae) now seem to be entering the internal tissue, the outcome could well be fatal - little can be done apart from removing the infected part and hoping for the best.

Botrytis is probably the biggest disease problem in cold, humid growing rooms (especially greenhouses). The problem here is that the compost was too wet at the start. Had the weather been a bit warmer, it would have dried things up a bit, so I might have got away with it. In fact, if you look carefully near the tip, you should see a new red bud developing; it almost made it.

This disease is particularly dangerous to weakened plants such as this triphylla fuchsia (because we trimmed its roots and cut off all its leaves), especially during winter storage.

This is why I am usually so fastidious about keeping compost and plants as dry as possible (and free of old loose dead plant material, which is where it is usually first noticed.


Some of you might have thought my treatment of overwinterning geraniums a little severe.


But, like fuchsias, they too are highly susceptible (never keep the geranium stems wet in winter - if you have to water, do so by standing the plant in a saucer of water for 15 mins) to botrytis.

Most books will tell you to cut plants back before storing. I have had a problem with this disease every time I have done this. And I try never to water them till growth commences in the new season. Once this occurs, Botrytis loses its potency.

To help avoid the disease, remove all dead material (e.g. leaves) from top of the compost, so it can't get a hold, and give plenty of fresh air. You can use a contact fungicide such as mancozeb (e.g.'Systhane') to help prevent infection. But note that you must treat the whole plant, since contact fungicides cannot enter the vascular system in the same way systemic ones can. But they do kill a wider range of diseases.

sulphur powderI have dusted the fungus with sulphur powder, because I don't have any 'Systhane'.

Of course, there is a possibility that, if the plant dies, it will will be more to do with cutting it back too far. I don't think so. Have a look at this.

The Problem With Lawn Sand for Moss Control

If you're wondering whether you can use lawn sand as a source of ferrous sulphate to control your moss, I would say 'Yes - but there are considerations'.

Several have asked why I make such a big thing about using 'ferrous sulphate'. Why don't I just say 'Lawn Sand'?

Simple. Ferrous (iron) sulphate can be bought in various forms:

  • as the chemical - ferrous sulphate, sulphate of iron, or iron sulphate

  • combined with sand and feed as spring or autumn lawn sand - often with a weedkiller thrown in


I know it seems to be getting complicated. But it's not really.


Basically, if you can, I recommend you buy it on its own, not as lawn sand. This is not because lawn sand will not kill moss. It will - very well (don't forget to use the autumn lawn sand at this time of year; you can use spring lawn sand up till the end of August). And with the feed and the weedkiller, it is good value-for-money. But there is a problem:

GIVING SEVERAL APPLICATIONS

Because it is difficult to kill moss completely at one application (some of the dormant spores germinate later), the lawn might need more than one treatment, maybe even more.

Obviously, if the ferrous sulphate comes complete with feed (as it does in lawn sand), then this too will be added more than once. This is the problem, especially at this time of year. And of course, even if the lawn could cope, there is still the cost of the feed (and probably weedkiller) to be considered.

FANTASTIC HEALTHY TURF
greenupI have found Vitax 'Green Up Mossfree' (based on ferrous sulphate crystals) to be especially effective, not only at killing moss, but also in conditioning the lawn. Although it looks bad for a day or two, it soon becomes fantastic healthy turf.

In previous years, I have used it in August at the first sign of moss (as already outlined elsewhere). Because there is no feed, it can be given at this time and the blackened moss raked out.

This is a great plus. Because in August the lawn is still growing strongly. So even if there is much moss, the turf will green over again before the winter. Otherwise it means staring at something resembling the dark side of the moon until next spring.

And there is still time to re-seed if necessary (this should be left one month after treating moss). If moss is treated in September or October, seed might not germinate till the following year.

So the pluses so far are:

  • It can be used as early as necessary to nip moss in the bud before it becomes too established and unsightly
  • Further treatments can be given right through the winter, if necessary, without further raking (since there won't be much moss)
  • Re-seeded turf will rapidly green up the same year, usually within a few weeks


And there's more:

  • easy to store
  • can be applied by watering can (you don't need a spreader)
  • can be used at any time of year, even in the summer (and you don't need one for spring and another for autumn)

CAN ALSO BE USED AS A SPOT MOSSKILLER
Once I have treated the whole lawn, I treat the odd re-emerging patches with some of the mixture in a hand spray. This kills the moss without leaving dark green feed patches.

Some have said that 'Green Up Mossfree' is not available in their local garden centre. Can ferrous sulphate be bought in any other form apart from as a component of lawn sand?

SEVERAL FORMS
Yes. It can. Ferrous (iron) sulphate is the same chemical as 'sulphate of iron' (used as a plant tonic). However, as you'll see, we need to watch the strengths, which differ for different products (wouldn't life be simpler if manufacturers made their products uniform? I suppose that would be too easy).

If you're lucky and have a horticultural supplier nearby, you can buy ferrous sulphate in 25kg (55lbs) bags. But you will need to ask about the application rate. It is not as strong as 'Green Up Mossfree' (I often feel this can be diluted anyway - 'Green Up' contains 55.5% w/w ferrous sulphate, more than twice as strong as some products).

THE NEGATIVES
There don't seem to be many:

  • this way works out more expensive because you will then have to buy an autumn lawn feed. I would say it is getting rather late now for weedkiller
  • Green Up contains no sand to help keep the turf open


If you can't buy 'Vitax Green Up Mossfree' ask your supplier to get it for you. You won't regret it. It really is that good.

Fuchsia New Growth After Cutting Back

fuchsia new growthThis fuchsia was cut back a few weeks ago, down from about 30 cm (12 inches) to a height of 5 cm (2 inches). Before you sharpen the secateurs, can I say that I don't recommend you treat your plants this way, not yet anyhow. I did it because I suspected Red Spider Mite on the lower leaves (this is virtually impossible to eradicate - hence the drastic treatment to remove all the leaves and most stems).

It is in a 3.5 inch (9 cm) pot and rooted in soggy slimy compost. Yet, despite all these negatives, it looks as if it is starting to thrive. Why?

I don't know. But it must have a lot to do with being kept outside for the past few weeks. In fact, it almost certainly is this, because I have a similar plant which is doing even better (although that one is in a pot containing garden soil).

When we remove plants from their natural environment, we seem to be courting trouble. So this result is not exactly unexpected. But I find it amazing that fuchsias indoors (and even in other pots) seem very intolerant to over-watering.

The difference is probably the temperatures. Fuchsias seem to be much more water-tolerant at lower temperatures (which is logical when you think about the seasons - most springs and autumns are wetter than summer).

However, it is not all rosy. If you look at the branch in the top left corner, you might see our new friend 'Botrytis' making an appearance. I have dusted it with sulphur for now, trying to avoid the new growth.

Black Leg Disease on Geranium

black leg disease on geraniumRecent cold damp weather has caused Black Leg (a grey furry Botrytis mould on black canker) on this geranium (pelargonium) cutting. This happens at the stem base where it is touched by too damp compost. Once it has reached this stage it is eventually fatal. There is no way back.

Have disposed of it before it starts releasing spores (a fungus's equivalent of seeds) into the air.

Botrytis on Dead Plant Material

botrytis on dead plant materialLooks like Botrytis (the fungus disease also called 'Grey Mould') is going to present a real problem this year. I don't know whether it is just the cold damp weather, or because I have brought in new stock from outside.

This is often the source of new problems, and is often more trouble than it's worth. Because, once obtained, pests and diseases are usually very difficult, if not impossible, to remove - or even control.

But this disease is also in the air. It is found in fridges in the house, and suchlike.

The picture shows the fungus getting its spores ready for release into the surroundings. So best to remove all dead material before then, to keep down the spore concentration in the air and thus reduce the likelihood of further plant infections.

18 September 2010

Problems With 'Beginners'

Reply to comment:

'You mention something about roots needing air in this post. Could you put something about this in the beginners area
By Claire on
Summer Waterlogging on 14/09/10'


Yes. You are quite right, Claire. There is nothing about roots needing air in the 'Beginners'' section. My mistake. Sorry. I shall rectify this as soon as possible.

But there is a problem: The structure of the blog is confusing. Can I explain?

When I first started, I intended to teach people enough to avoid those pitfalls which result in almost instant destruction of their plants (namely bad watering and feeding techniques).

The 'Beginners' link was intended to lead new visitors to a SAMPLE of those posts on watering and feeding which I considered necessary. I thought that reading these might also give them some idea as to whether or not to explore further posts.

However, on reflection, I can see this is misleading, since many visitors suppose that the posts with the 'Beginners' tags are all they need read to grow plants successfully. This is not the case. It would be much better to begin reading the archives of the blog from the beginning. This might present a more complete picture. (see March posts)

FURTHER COMPLICATIONS
I must admit that I don't like classifying readers (especially growers) by referring to them as a different group such as a beginner. I realise this might sound odd. But I have my reasons. Consider the following:
  • What are the boundaries? I still think of myself as a beginner in many ways. The challenge of growing is to recognise and solve new problems and situations which occur on an almost daily basis. Plants have a way of humbling us all, especially when we start to think we know anything at all about how they grow.
  • Categorization (through the amount of teaching received) is an anathema to the learning process. In my opinion, and as already mentioned elsewhere, growing is more of an art than a science (despite what we may have been led to believe). It cannot really be taught. Yes, we can be programmed with various aspects of it. But the real essence of a good grower - the type who might be said to possess 'green fingers' - is an indefinable (and somewhat mysterious) quality. I believe that we can all achieve this. But not through reading books or blog posts (I'm still trying to work out how to do it - any ideas?).
  • In my lifetime, I have known some of the top growers in the country, most of whom are now deceased. None of them had received much formal education (indeed, I am fairly certain that at least one grower I knew never ever picked up a book - not even a magazine - nor did they watch gardening programmes). They had taught themselves through observation and experimentation.
  • Growing needs a completely open child-like mind with a curiosity willing to question everything from first principles in an unbiased way. Any form of teaching or training, whilst producing people who can to some extent grow, seems to produce those who do so as automatons, accepting everything without question.

I could go on and on (you will have to forgive me for this).

Having just read through what I have just written, I am left asking myself where I fit in (probably nowhere). Nevertheless, I cannot say I disagree with any of it - not at this stage, at least.

However, neither can I say that an accumulation of knowledge of any kind is ever wasteful. I suppose the answer is to put it in the background. Put yourself in the position of the plant. Believe that you are this plant. Then, what's that they say: 'Do unto others . . ..'

Best wishes,

Jimini

P.S. Typical of me. After just convincing myself that I am completely unnecessary, what do you think about a separate growing course especially for beginners? After all, I'll have to do something.

17 September 2010

Dealing With Moss

Reply to comment:

'Can u please tell me that how can we treat this disease.....
By Acidity on
Testing the Soil Acidity on 12/09/10 '

Thank you for your comment.

Moss control in my lawn has been covered in several posts throughout the year. I used to have a really bad problem, but after applying the treatments outlined it has almost disappeared. In fact, it hasn't made any appearance this year so far.

If you click the 'moss' link at the side, you will see some of the posts. But to give you an indication of the techniques, they are really concerned with the following:

  • controlling acidity
  • preventing waterlogging and creating aeration (spiking)
  • starting treatment at an early stage
  • chemical control with ferrous sulphate
  • removal of dead moss by raking
  • thatch control
The standard way to deal with moss is with a mosskiller such as ferrous sulphate. This can be bought commercially as 'Greenup'; it also sold as a component of lawn sand, which is used as a spring feed.

Now is a good time to start with moss control, if it is present in a lawn. Have a read of the posts and let me know if I can help you further.

Best wishes,

Jimini

16 September 2010

Increasing Daffodil Stock

How to Propagate Daffodils

A bulb is not a root, as many suppose, but a compressed underground stem with scales representing the leaves. These scales are formed around the basal plate and arranged in an onion-like (another bulb) fashion. They hold a food supply to sustain dormancy and the development of the new shoot which develops from the centre of the bulb.

There are two kinds of bulbs:
  • tunicate
  • scaly
Daffodils are tunicate bulbs.


scoring a daffodil bulbIf the basal plate is cut through so that the base of the scales is also cut, the development of new offsets is stimulated. Scoring a cross is an ideal way to do this.

However, it is important to ensure that the bulb is not infected with disease, such as blue mould, which could be carried on the knife and infect other clean bulbs (fungal diseases often gain entrance through wounds).

If in doubt, sterilise the blade with a flame, or similar, between operations.

Dealing With Leatherjackets

I have seen a few daddy long legs (crane flies) attached to window panes, this week - a sure sign of leatherjacket trouble next year.

For anyone who has just seen a leatherjacket (thick rubbery brown-grey grub about 4 cm (inch and a half) long) for the first time, it is hard to believe that it represents the larval stage of the daddy long legs, let alone the sort of devastation these grubs can do to a lawn.

When you see the adult flies hopping over the lawn, they are laying hundreds of eggs in the damp turf. These quickly hatch into grubs which immediately commence feeding on young tender grass roots (exactly those we have nurtured for next year).

The damage goes undetected until the weather gets drier, the following year - the lack of roots causes premature browning and dying of the grass, which can then be easily pulled out in handfulls leaving almost bare earth. Further trouble is caused by starlings (and even animals such as badgers) and the like which scratch up the turf looking for the grubs.

Although both cultural and biological controls are possible, the worst of the damage will have already been done over the winter and spring months. So, even though the grubs can be killed, the lawn will not recover.

Provado Lawn Grub KillerAlthough expensive, I have found 'Provado Lawn Grub Killer' to be an excellent product for dealing with leatherjackets (it can also be used for chafer grubs). My lawn always used to have dead patches each summer before I started using it.

However, it is not the easiest of products to use, since it needs to be washed through the turf (to get to the grubs) without being diluted too much, or even washed right through the soil. Furthermore, because it is a powerful insecticide, it can only be applied once per year without affecting the balance of soil micro-organisms.

The best way to apply it is to wait until the soil has drained, then apply and wash it in with half an inch (1.5 cm) water from a sprinkler. You need to be confident that the weather will remain dry for two or three days to give the plant roots time to take it up, from whence it acts as an effective systemic insecticide.

If only the weather would settle down.

Bulbs in Pots

Since I have some 2 litre (6 inch) black pots doing nothing, I thought I might try some daffodil bulbs in pots this year.

I usually plant daffodils after the first frosts. But this can be as late as November, which means they flower later in the spring, thus making it impossible to replant with dahlia tubers before early summer (unless they are planted between the daffodil clumps).

bulbs in pots
  • Place about 5 cm (two inches) of soil in the bottom of the pot
  • Add and mix in about 5 mls (a teaspoonful) of bone meal
  • Add another 2.5 cm (inch) of ordinary soil
  • Place bulbs (leaving some room for growth) on the soil
  • Cover bulbs to just over top, leaving room for watering
  • Place in a cool place
These should be fine until the ground is cleared and prepared (even much longer, if necessary). They can then be buried, pot-and-all, so that the top of the bulbs is about 10 cm (4 inches) below soil level. This can be done gradually if new shoots have developed - it will speed up the growth process (because green shoots are kept in daylight).

More Cutbacks

triphylla fuchsia in full flowerThis was the lovely Gartenmeister Bonstedt triphylla fuchsia a few days ago (as you can see, it's grown somewhat since we got it in May.


after cutting back

And this is how it looks now.

Do you think I might have overdone it? We shall soon see - it's kill or cure, once more.

The idea is to get more new shoots to spring up from the base.

What I have actually done is trimmed off the outside roots and the root base to sink the plant nearly 5 cm (2 inches) deeper into its pot, then covered the surface and sides with new compost.

P.S. As insurance, I've taken lots of cuttings.

Blue Mould on Bulbs

mould-infected daffodil bulbThis daffodil bulb is infected with Blue Mould, caused by a penicillin mould (fungus). A dark rot, usually at the base of the bulb (it can also be on the side), causes softening of the tissue.

The mould usually enters the bulb from the soil (often from a wound), but symptoms only develop during storage at too high a temperature in damp conditions. Infected bulbs rot in the soil after planting, and infect the surrounding soil with the disease.

So always plant only firm healthy bulbs and discard any which are suspect. If you damage any bulbs, dust each wound with sulphur powder.

9 September 2010

Begonia Flower Size

smaller flowers on warm-grown begoniaThis is the begonia which was placed in the propagator in early spring to bring it on. The flowers are smaller and the stems are longer than the other plant which was allowed to grow naturally. Both plants are in 38 cm (15 inch) pots.


larger flowers on cool-grown begoniaOf course, this could be because there are more flowers on one plant. But it usually happens that cool-grown plants turn out best (are stronger and have larger flowers).

Die-Back on Conifer Hedge

die-back on conifer hedgeAfter a recent cutting, this Leyland Cyprus (Cupressocyparis leylandii) hedge is showing signs of die-back (the brown bits), a problem for a few years now. It hasn't grown much this year; this is the first cut.

However, the other half (about 2/3 actually), which was cut just before the end of the hot dry spell, is clear of die-back.

I gave the complete hedge a couple of foliar feeds of 'Phostrogen Plant Food (14-10-27)' - one in March, then another in April. I think this has hardened the foliage enough (because of the high potassium (K) to nitrogen (N) ratio) to make it less attractive to aphids (which I am told cause the die-back problem, though I have never actually seen any - they seem to have disappeared by the time the damage is noticeable).

To some extent, the treatment has worked. But why on one part but not another is a mystery. There seem to be lots of these, this year.

I have found that if I cut out the dead back to the wood (but careful not to go too far), the hedge grows back into the hole within about 18 months. It would be really good to have a full cure.

Hollow-Tined Lawn

hollow-tine holes in lawnBefore top-dressing the complete lawn, I hollow-tined a small part comprised of wet heavy soil.

My lawn is a problem because the soil varies in texture from almost clay at one end, to almost sand at the other (yes, I know it's just right in the middle, and I can't have everything; but it's still difficult to manage).

I don't know if you can see (probably not) that the spacing between rows varies from about 10 cm (4 inches) to about 12.5 cm (5 inches). I only tined a few yards. I would have done more, but the tiner kept clogging up.

However, I feel that, provided water can get into the turf, the best time to aerate the lawn is after the end of cutting: and there's still over a month of this left, yet.

Nevertheless, I have found that deliberate aeration greatly enhances root growth. This is important, because I believe that the grasses grow a new root system each season. We are always starting each year afresh, so to speak.

Re-seeding
I added about 17.5 grams per sq metre (1/2 oz per sq yd) of grass seed before I applied the top dressing.

Geranium Cutting Update

geranium cutting growing wellThis geranium cutting has done really well since it was taken about a month ago - much better than if it were shorter, I am sure. This definitely seems like the way to go.

Testing the Soil Acidity

testing soil pHBefore applying the top-dressing, I added some limestone to remove the soil acidity after testing the pH (acidity level) with an electronic meter. This is not an exact science. But it does give some indication, especially when the average of a few samples is used.


pH 7.0 is neutralA ph of 7 indicates neutral. As the pH goes lower, soil becomes more acid; and vice versa.

About pH 6.5 suits most (but not all) plants. Calcifuges (lime-hating) plants, such as rhododendrons, azaleas, etc. grow best at pH levels below 5.5 (because the pH scale is logarithmic, a one unit drop represents a tenfold decrease, so pH 6 is ten times more acid than pH7; but pH 5 is 100 times more acid). Calcicoles (lime-loving) are generally found on limestone soils, where the pH is above 7.0.

Lawns are slightly complicated. Normal utility lawns (which are often comprised of only perennial ryegrass) like a neutral to slightly alkaline soil (pH6.5 to 7.5). However, if the turf contains luxury grasses (as most do), these prefer a lower pH of about 6.5.

Persistent moss is often an indication of a too acid soil.

4 September 2010

Making a Thatch Sandwich - Part 2

I have just top-dressed the lawn. If you read this, you will see why:

We have seen that reducing lawn thatch can be achieved by:
  • minimising thatch and mat production
  • enhancing the natural breakdown of thatch and mat

MINIMISING THATCH AND MAT PRODUCTION
  • remove mower clippings
  • avoid high doses of nitrogen feeds during first half of season - slow steady growth seems best
I don't want to deal with cutting and feeding here. These have been referred to elsewhere.


ENHANCING NATURAL BREAKDOWN OF THATCH AND MATT
  • reduce acidity
  • use organic nitrogen feeds
  • improve aeration
  • control water content

Natural breakdown is undertaken by micro-organisms in the soil. Enhancement of this process is achieved by producing an appropriate environment.

acidity
We have already seen that the lawn has been limed to reduce acidity.

organic nitrogen feeds
Using nitrogen feeds in ammonium form (and feeds which can be easily converted to ammonium (e.g. urea)) rather than in nitrate form greatly helps the build up of micro-organisms.

aeration
Aeorbic micro-organisms (which are beneficial to our purpose) need oxygen to function. Pricking the turf facilitates this. Tining and hollow-tining has the same effect.

water content
Micro-organisms need the thatch to be damp if they are to break it down. They cannot work on dry thatch. Pricking also facilitates this. Top-dressing also helps to prevent the thatch from drying out.


TOP-DRESSING

Making the sandwich
Top-dressing involves covering the thatch surface (after raking) with a layer of soil - mixed with sharp sand and organic matter - which is worked into the turf and levelled. This helps prevent the thatch and mat from drying out, allows it to be attacked from both top and bottom (since it contains micro-organisms), and levels out any hollows.

Effectively, a new false soil layer is created, kept open by the sharp sand (not builders' sand). The organic matter (use of this is optional; it helps improve soil structure) can be garden compost sieved through a 1/4 inch sieve. The soil can be garden soil, also passed through a 1/4 inch sieve. The mixture is applied at the rate of about 1 to 1.5 kg per sq metre (about 2.5 to 3.5 lbs per square yard). Apply two or three times as much if you have hollow-tined.

Although it is easy to buy top dressing, it is better to make your own if possible. This way you can adjust it to suit your lawn conditions. For example, for a heavy, poorly-drained clay soil, you could use about 75% sand. On the other hand, a sandy soil might only need about 20% sand. It's up to you. You have much more control.

To level the surface, drag a straight piece of 2 inch by 4 inch timber over it, once you have applied the dressing.

  • If your soil is really heavy, hollow-tine or deep-tine first, then brush sandy mix into holes.
  • Always make sure that the dressing is worked in: Do not leave it on top of the grass.
  • This job is best done when both the grass and the dressing are as dry as possible.

Top-dressing not only levels the surface and improves breakdown of thatch and mat; it will stimulate the grasses to produce new side shoots, thus thickening the turf.

Making a Thatch Sandwich - Part 1

Ask most gardeners what lawn thatch is, and they'll tell you it's a layer of loose dead material on the soil surface comprised of old leaves, dead grass and other miscellaneous rubbish collected over the years. Furthermore, the way to deal with it is to give a good hard raking (with a hand rake) in the autumn and, 'Bob's your uncle', problem solved.

Really?

I wouldn't like to tell you just how hard I raked my lawn, blisters and all. Barrow loads of dead material. But no good. Problem still there. It took years to discover why.


JUST WHAT EXACTLY IS 'THATCH'?

Yes, my lawn did have a loose layer of dead material. And this could be removed quite easily. But I was always frustrated to discover that I could never see the soil surface; I had imagined that if I raked hard enough, this would eventually show through. No. All that was there was a dry corky substance.

I don't know why I didn't think of removing a divet of turf (probably because I always thought it would disfigure the lawn). However, when I finally did, I could see quite clearly that this corky layer was about 3 cms (over 1 inch) thick. And it wasn't only comprised of old leaves - it contained dead and live wiry rhizomes (underground stems) twisted into a dense mat. No wonder I was getting nowhere with the hand rake.

A mechanical raker helped somewhat. But unfortunately there was virtually nothing left of the lawn. Yes, it seemed to recover (though I doubt that all lawns would recover without re-seeding). But it looked awful for much of the year. And the problem never seemed to improve.

Now I am trying a new approach:
  • minimise thatch and mat production
  • enhance natural breakdown of thatch and mat
This way, the lawn can be kept looking as good as possible for much longer.

So, to recap, the term 'thatch' is confusing. Apart from loose dead material on the surface, there is often a dense mat beneath the surface, which is much harder to deal with.

1 September 2010

Getting the Light Right - Part 3

Choosing the Window Sill

Window sills make ideal growing platforms, provided a few things are considered:
  • Light
  • Humidity
  • Temperature
Light
It takes a very brave plant to face the world on a south-facing sill, especially from late spring onwards when the sun is becoming strong. Only pot geraniums, of the pot plants I possess, are able to withstand the intense heat and low humidity; they are adapted to do this. Nevertheless, even these plants suffer in mid-summer - they too would prefer some shade during these days.

Conversely, few plants can tolerate the low winter light levels of a north-facing sill. I find this position ideally suited to cyclamens, especially in a cooler room. North-facing sills are better if they receive some morning and evening sun. This greatly increases their usefulness.

Both east and west-facing sills are good and will each accommodate a wide range of plants.

Turn the plants daily
The only problem with window sills is that the light is uni-directional, so plants always grow towards it. For this reason, they need turning either each or every other day to keep them growing upright. However, provided this is done, things are fine.

Humidity
Radiators positioned beneath windows should be turned down if we wish to grow plants near them because they lower humidity levels too much, thus drying the plants. Since plants develop stronger at lower temperatures, it might be best to turn off the radiator completely.


Temperature
In winter, it is important that delicate plants are not left too near to the glass when it is freezing outside. Leaving the curtains open is a big help here, since temperatures can drop rapidly after dark behind heavy curtains.

Window sills make ideal spots for small propagators, which can be used to get seeds and cuttings off to an early start. But it is necessary to watch out for the sun. Cover with fleece or half-thickness kitchen roll, so the plants get light but not heat.