Learning how to water plants to increase growth in pots, container or garden - especially how to water roots and tubers. Specialities: root growth or tuber growth of lawns, fuchsias, geraniums, dahlias and begonias.

27 January 2011

How Can Cuttings Survive In A Sealed Propagator?

After partially venting the fuchsia cuttings in the coffee jar propagator for a couple of weeks , they should be hardened enough to remove the lid. As you can see, after removing the diseased dead flower buds there is now no sign whatsoever of any botrytis. The cuttings do seem to be growing slowly, though I am not yet sure they will all survive. However, what I cannot understand is that, given what we have seen about the compensation point, how can cuttings even survive for any length of time in a sealed propagator?

PERMANENT COMPENSATION POINT
When both photosynthesis and respiration proceed at the same rate, there is no sugar left over for plant development (i.e.growth). In a sealed container, photosynthesis (which produces oxygen and uses carbon dioxide) and respiration (which produces carbon dioxide and uses oxygen) must reach an equilibrium point where each complements the other with the necessary gases with which to function. In other words, a sealed propagator must be permanently at compensation point.

This could explain the lack of development of the fuchsia cuttings over the ten weeks they were sealed in the propagator. Any development could well have occurred during the time taken to reach this gaseous equilibrium, or compensation point. Of course, we cannot ignore the fact that temperatures were very low, so even if gas concentration levels were adequate for growth, it would be much reduced anyhow. However, things would be very different in summer when temperatures are higher. This might be why venting seems necessary at this time.

Not Thrilled With Multi-Purpose Compost

Although I have been growing with multi-purpose compost for several years now, I have to say I am not thrilled. Things don't seem to have gone nearly so well as they did with the old sphagnum peat-based stuff (this was considered environmentally unfriendly).

Of course, I could be imagining all this, but results now seem patchy and inconsistent. And it doesn't seem to change colour evenly as it dries, so it makes watering more difficult. And it's full of lumps and bits of debris . . ..

STICK TO ONE TYPE: KEEP IT SIMPLE
If you are new to growing and wondering what type of compost to buy, I would say buy a small bag of a branded multi-purpose; then, once you are satisfied, buy a larger one. Although there seems to be a type of compost for every purpose, thus making for more successful growing, I find it best to keep it simple and stick to one type (see below), then thoroughly get familiar with using it. This policy is also good financially, since it will save a small fortune; it will also avoid much waste. As far as this blog is concerned, for normal growing, each time I refer to 'compost', I am referring to 'multi-purpose'.

WATCH OUT FOR LIME-HATING PLANTS
You need to be aware that there are those lime-hating plants such as azaleas, camellias, rhododendrons etc. which will not thrive in ordinary multi-purpose. Should you wish to grow these, use 'ericaceous' compost. This is multi-purpose without the added lime.

Cut Back Fuchsias In Store

fuchsias in a mess in storeThe fuchsias in store in the unheated garage are in a bit of a mess. They haven't been touched since October. I was surprised that they hadn't died back completely; and there are signs of new growth. Trouble is, there's also botrytis on some of the old flowers. I decided to remove this along with all the old dead leaves before the air is thick with botrytis spores.


fuchsias cut backI have cut them all back by between two thirds to three quarters and removed all the debris from the compost surface. Then I dusted with sulphur powder to protect the new wounds from botrytis. Sulphur will prevent any spores from germinating.

Compensation Point And Potato Tuber Yield

We probably all know that photosynthesis is the process, using energy from sunlight, whereby plants manufacture their own food (as sugars) from carbon dioxide and water. However, plants are continuously using up this sugar in respiration, whereby energy is released to fuel various life processes.

SIGNIFICANCE OF COMPENSATION POINT
If more sugar is produced than is used in respiration, the surplus can be used in various syntheses (e.g. growth), or stored (usually as starch). However, if less is produced, then the plant cannot survive without taking drastic measures to curtail respiration, such as jettisoning leaves or entering dormancy. The point where both photosynthesis and respiration proceed at the same rate (the point where the graphs intersect - see diagram) is called the 'compensation point'. As you will see, this compensation point is highly significant both to potato tuber yield, and to the growing of all plants.


compensation point for Irish potatoesThe compensation point is not static but varies according to light intensity and temperature. This diagram, taken from W.H. Muller(1979) - who cites the work of H.G Lundegardh - shows approximately the relative rates of photosynthesis and respiration in potato leaves during ten minute exposures to both shade (1/25 sunlight) and full sunlight. As you can see, as temperature and/or light levels vary, respiration and photosynthesis react in slightly different ways, causing the compensation point to also vary.

HOW IT AFFECTS GROWING TECHNIQUES
Since, as growers, we are interested in producing optimal results, we can use the graph to determine the optimum temperature for this. For example, in full sunlight and with no other limiting factor, 20 deg C should produce the greatest surplus of sugars (almost 13 milligrams, the difference between the respiration and photosynthesis curves). If temperatures rise too high (above 40 deg C), then the compensation point is passed and death will ensue.

But there is more to it than this. Because only photosynthesis is dependent upon daylight, a plant will require a far higher rate of photosynthesis than respiration, since enough sugar must be produced to sustain 24 hour respiration. Muller states that the rate of photosynthesis is normally 8 to 12 times higher than respiration during daylight hours.

Furthermore, Muller also cites Irish potatoes kept continuously at different temperatures. Large tubers were produced at 20 deg C, whereas no tubers were formed on plants kept at 29 deg C. Clearly this is highly significant. It goes to show that we need to watch temperatures, especially in glasshouses in the summer months.


Reference: Muller, W.H.(1979) Botany - A Functional Approach (Lond: Collier Macmillan Publishers; and New York: Macmillan Publishing Inc.)

25 January 2011

Cleaning And Trimming Begonia Tubers

Most growers dry off their begonias at the end of the season, then clean and trim them before storing in sand or dry peat over winter. I have always had a problem with cleaning and trimming my begonia tubers before winter, and I don't store them in anything.

TUBERS EXTREMELY BRITTLE
I find that begonia tubers are extremely brittle, especially when full of water at the end of the season. If I could dry them off at this time, fine. But I can't. Mine just don't seem to want to dry out before the frost (even more so this year). So they survive the winter surrounded by damp compost. I could force the issue by prising away the old compost, but if the tuber is damaged there is a greater risk of fungal infection getting hold and destroying it. So I have found it best to wait till planting time.

CLEANING REMOVES PESTS, ESPECIALLY VINE WEEVILS
You saw last year how vine weevil larvae overwinter with begonia tubers. Vine weevils love containers, and, unless treated with insecticide (e.g. 'Provado Vine Weevil Killer') will hitch a ride into storage. Unless these larvae are spotted and removed before new growth starts, they will play havoc with young tender roots, thereby destroying the plants.
Cleaning the tubers helps us spot and remove any unwanted pests, especially vine weevils.

Propagating the tubers for a week at low humidity has dried off the tubers nicely, thus making them easier to clean. It has also ensured dormancy has been broken, and has revived any overwintering pests. Now we can risk breaking the tubers during cleaning, since if damaged they will not be as vulnerable.

A GENTLE BRUSH AND SHAVE IS ALL THAT IS REQUIRED
trim straggly roots off begonia tubers before plantingAfter gently brushing to remove old compost or soil, the old straggly roots can be trimmed off. This will help water get to the tuber and will induce branching in the new roots (roots behave like stem tips when removed).


PLANT THEM THE RIGHT WAY UP
In the case of old tubers, it is easy to tell which way up to plant them, since the old stem scars and roots provide clues. However, new tubers from the garden centre can be confusing. There is a great temptation to plant them upside down.

Remember that the hollow side is the top. If you look carefully, you should be able to see the old stem scar; the new stems will develop from buds around this scar.

Potting Old Begonia Tubers In Propagator

this begonia tuber is too dry
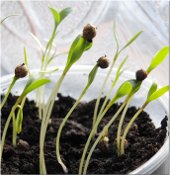
Raising the heat and lowering the humidity in the propagator creates its own problems. This old begonia tuber (the half tuber which had developed buds) is now too dry.

potted begonia tuber with neck exposedAfter carefully removing any old compost with a brush, I sprayed the dry roots and base of the tuber with lukewarm water, then re-potted into multi-purpose compost in a 5 inch half pot.

Although everyone seems to advocate placing tubers onto damp compost and then potting up when buds appear, I prefer to pot up at the start, and to cover over the tuber with compost as soon as possible. Were I not after cuttings, I would have used a deeper pot and covered the tuber to a depth of at least half an inch (1.25 cm). I don't like the idea of disturbing the delicate new roots unnecessarily, once they have formed. And my begonias have always grown well this way.

The compost is not as wet as it looks in the photo - the same wetness as used for propagating cuttings (just so that water does not run out between the fingers when squeezed hard in the hand).

Temperature can be kept at 18 -21 deg C (64 -70 deg F), and vents left open. Might have to cover with fleece overnight.


24 January 2011

Botrytis On Begonia Tuber In Propagator

too much humidity in propagatorI thought there might be a problem of too much humidity in the propagator for the begonia tuber which had the stem infected with botrytis. It only took a day or so to show itself.

Although this stem was removed and the wound dusted with yellow sulphur powder, placing it in a too-humid cool propagator was asking for trouble. Still, it was worth a try.

begonia tuber dusted with more yellow sulphur powderAfter rubbing off the botrytis with my thumb and adding some more sulphur powder, I opened the vents wide and turned up the heat to about 64 - 70 deg F (18 - 21 deg C). I had hoped to avoid this, since it tends to produce thin shoots, but I'll just have to manage. At least the botrytis seems to have been stopped - for now, at least (botrytis thrives in cool over-damp conditions).

20 January 2011

Strangest of Years: Cyclamen Three Months Behind

cyclamen flowers late arrivingThis is the strangest of years. Things used to run like clockwork. Plants used to grow and flower on time each year. Not this year, it seems. This cyclamen is only just coming into flower, nearly three months behind.

If you remember, it was late starting off. For some unknown reason, it wouldn't develop roots. This has never happened before. I don't know if the roots have now fully developed, because I am afraid of damaging the young flower buds by removing the plant from its pot.

All this does not seem to have affected the number of flowers; there seem to be lots of new buds waiting to spring forth. Trouble is, it might be spring before they do.

Begonias and Busy Lizzies Ideal For Beginners

Those who would like to try their hand at growing flowering plants but are devoid of not just a garden but even a sunny window sill, should consider begonias and busy lizzies grown in pots. Each will grow and flower all summer long in low-light conditions at room temperatures, and each is tolerant of over-watering. I shall be showing you how to grow them from tubers over the next few weeks - starting next week. It is still a little bit early, so don't be in too much of a rush.

As you have probably gathered, my particular favourite would be a begonia, preferably one grown from a tuber. I have found these plants, grown in either pots or containers (if you're really ambitious, ask about basket trailing begonias), to be extremely rewarding. And if properly cared for, can produce wonderful blooms and/or foliage.

If this idea appeals to you, then get down to the garden centre and choose something to your taste. Although there are various types, you will see details on the boxes indicating the most appropriate one(s) for you. Get a 5 inch (127mm) pot and some multi-purpose compost as well.

P.S. I am still using last year's compost. I always do. And I don't think it has ever caused problems. Of course, there is no guarantee. But buying the stuff in bigger bags makes it much cheaper. If you have some compost left over from last year, you could try it out. After all, it can only fail, in which case you would still have time to transfer the tuber to fresh compost. It's upto you.

Planting Begonia Tubers: Beware of Personality Change When Watering

Great care is needed when planting begonia tubers, since they have a personality change at this stage. Normally thriving on wet conditions, they hate them at germination time. Too much water at planting will rot the tubers. Watering should be done before planting to ensure correct wetness of compost.

HOW WET SHOULD COMPOST BE?
The same as required for germinating cuttings: so that water just appears between the fingers when squeezed hard in hand, but is drawn back into compost when grip released. Think of a freshly-wrung-out face cloth.

PREPARING TUBERS
tiny begonia tuberThis tiny begonia tuber is all that is left of the one you saw recently in a 5 inch pot.

After removing the old diseased (grey mould - botrytis) stem and treating wound with yellow sulphur powder, I also carefully removed the old dry compost from around the tuber. Now there is hardly anything left. I now regret doing this; it might have been better to leave the old compost on.

begonia tubers in compostPrepared some fresh compost in a 3.5 inch pot as described above and planted tuber up to neck. Placed in propagator with others.

Will have to watch out for botrytis re-appearing in humid conditions.

Perfect Geranium Branch Ideal For Specimen Plant

perfect geranium branch idealBalanced plants with tight growth tend to make the best specimens. The even stem thickness and shape of this geranium cutting, combined with the short internodes (distance between leaf pairs) makes it ideal.

Have removed the terminal leaves (fresh developing leaves at end of stem, where the meristems are) to induce branching and therefore bushiness. These tiny new leaves - plus any young flower buds, if present - can just be rubbed off with the thumb.

The cutting has been grown in unsterilised garden soil. Once season really gets going, will re-pot into multi-purpose compost.

Shocked By New Buds on Begonias In Store

begonia budsAfter being caught unprepared by the plummeting temperatures in December, I thought it a good idea to try to propagate some new begonias in case any have been lost. I was shocked to find new buds on one begonia tuber in store.

begonias in propagator showing budsAlthough fresh, these buds look as if they have been growing for a week or two. But why have they appeared? The tuber has been in an unheated garage, subjected to freezing conditions whilst only covered loosely by a few sheets of newspaper. It doesn't make sense.

The only reason I can give is that the tuber might think it's spring. But although temperatures have been mild this past week or so (about 10 deg C (50 deg F)), this is hardly high enough, or long enough, to sustain so much development. Another mystery.

Will run propagator at about 15 deg C (59 deg F) for a while and see what happens. Have packed tubers with garden soil. Need to watch out for any slugs hatching out.

Starting Begonia Tubers Without Heat In A Propagator

window sill propagatorAny sort of propagator can be useful to start begonia tubers in a cool room, and it doesn't have to be heated. This unheated window sill propagator consists of a container holding three half-size seed trays (8" x 6.5" (20mm x 17mm?)), each complete with a ventilated lid. It seems ideal for use on a window sill - especially since it is selling for £10 (incl.V.A.T.) complete.

I must admit I am not a big fan of propagators, since unless full they are inefficient on space. But they nevertheless have their uses. Covered trays like these make it possible to grow tender young plants in dry atmospheres without desiccation. If careful not to get too hot, they can even be used near a radiator, which will supply any bottom heat to get things going. But try a dry run first, just to be sure - and radiators almost invariably need turning down.

Begonia Tubers, now available in stores and garden centres, can be placed on top of some damp multipurpose compost in small pots and kept at about 18 - 20 deg C to get them rooting. Tubers from storage can also be treated this way.

P.S. Don't forget that 200g coffee jars, old cake containers etc. and freezer bags attached to pots all make ideal window sill propagators - and they don't cost a penny!

Frosty Weather Best For Growing In January

Thank goodness the recent dull warmer days seem to be behind us. They have played havoc with the fuchsias, creating leggy growth. This is not too good if the object is to produce compact short-jointed plants. Frosty weather, caused by clear skies, definitely produces the best light for growing in January. And the cold should kill off a few slugs which have hatched out in the milder weather.

The sun is producing more heat now and can be readily felt behind glass. The growing season will soon be in full swing.

13 January 2011

Fuchsias Definitely On The Up. Why Now?

fuchsias on the upThe fuchsias are definitely on the up, as this strong new growth illustrates. Although those kept over 4 deg C have never shut down - despite a couple of false alarms - and have been growing very slowly, growth seems to be much faster and stronger since the winter Solstice. I don't know why this should be. They seem to know better conditions are on the way, that we are gradually coming through winter.

It can't just be day length or temperature, since until recently temperatures have been fairly constant (within a range), and the days were the same length or longer at the end of last year. Why were they not growing as strongly then?

CAN FUCHSIAS DETECT CHANGE IN DAY LENGTH?
Most living things have an internal biological clock called a 'Circadian Rhythm' which they use to measure time. Is this the case with fuchsias? Or perhaps they are measuring the CHANGE in day length and thus know that day length is increasing. There doesn't seem to be any evidence that plants can do this (they just measure day length, the 'photoperiod' (actually, they measure the length of uninterrupted darkness)), unlike animals such as domestic fowl and other birds, for example, which lay eggs in spring (increasing day length) and moult in autumn.

Leggy Fuchsias Cut Back

leggy fuchsias cut backAlthough these fuchsia cuttings have survived the winter so far, I want to cut them back to the new buds closest to the compost. This will remove any leggy growth which developed in the warm dull autumn days. Growth is a lot shorter and stronger now. This should produce a better plant. more like a shrub than a tree.

I am a bit worried about botrytis getting hold on the cut ends. If it does, there will be little plant left to save. Will just have to take the risk.

Horse Manure Wonderful For Spring Flowers

If you want to give your flower beds a real treat this year, if you want polyanthers as big as footballs (well, perhaps not quite), well-rotted horse manure is the stuff. Although many would disagree, I have found it to be absolutely wonderful.

I used to (I can't get it at the moment) apply it towards the end of January so that its goodness had time to soak in before growth commenced in earnest in February. It doesn't seem to burn the roots at this time, because they are still dormant or partly dormant, or because there is more moisture in the soil, or perhaps even because there is less free ammonia - anyway, whatever the reason, it's good stuff.

Just scatter it around the plants without actually touching them, so that the ground is just covered. The easiest manure to use is that based on wood shavings rather than straw. This is both easier to spread and more attractive to the eye. You don't need to dig it in, although you can do. If left on the surface, it will gradually become accommodated. The lignin in the shavings is good for soil structure since it helps build humus. Now, if only I could find another supply . . ..

Hardening Off Fuchsia Cuttings in Coffee Jar Propagator

propagator lid on matchsticksAlthough there is no visible sign of disease apart from on the old buds, I have supported the lid of the coffee jar on matchsticks to let in some air and reduce the humidity. This should dry things up a bit.

I don't want to do this too quickly, because the cuttings, having been sealed up for over 10 weeks, will be very tender. A humidity of about 85% should be ideal to start. At this level, the wet sides of the jar should dry out in about 24 hours at 15 deg C. It will probably take much longer at 10 deg C.

Ideally I would like to have seen more signs of strong new growth before hardening off, but I'm afraid of the 'Botrytis' taking hold. It is still not absolutely certain that all the cuttings have survived. Once I am sure growth has really started, I will remove the lid for a few hours per day, for a few days, then remove it completely after about a week.

Why Did This Coffee Jar Propagator Not Need Venting?

fuchsia cuttings sealed in propagatorThese fuchsia shoot tip cuttings have been sealed in a 200g inverted coffee jar since 23rd October last year, over 10 weeks ago. They are just starting to show signs of growth, so should be about to take root. Since the propagator has been on a window sill kept at low temperatures (5 to 10 deg C (40 to 50 deg F)), I thought it wise to have a look inside.

fungus on fuchsia cuttingRemoval of lid produced a sharp intake (or outtake, I'm not sure which) of air, indicating the seal had been better than expected. The cuttings seemed disease-free apart from the dead flower buds infected with a fungus, presumably 'Botrytis' (one bud has been removed and placed on compost surface). With temperatures having run closer to 5 deg C for most of the time, I am surprised to see so little damage.

I don't understand how these cuttings could be sealed up completely, whereas dahlia cuttings taken last summer and covered with a freezer bag had to be vented by cutting a hole in the bag to prevent rotting. Presumably it has something to do with the temperature, though not sure what. It is certainly not humidity; condensation has been on the cooler side (the one nearest the window) of the jar since day one.

Is 'Systhane' Necessary in a Coffee Jar Propagator?

fuchsia cuttings sealed in coffee jar propagatorThese fuchsia cuttings in a 200g coffee jar propagator were treated with 'Systhane' (myclobutanil) at full strength. Strange how there is no leaf damage, whereas the established cuttings kept in open pots suffered considerable damage, as reported earlier.

Since both varieties are the same ('Annabel'), it might be the high humidity which has saved them. In other words, perhaps the damage was done to the established cuttings by the tender leaves drying out with fungicide on them.

And, as mentioned elsewhere, it is interesting that these unvented coffee jar cuttings have not suffered with 'Botrytis' like the others did even after being treated with 'Systhane'. I wish I'd had enough cuttings to have taken an untreated control. I have had another jar of untreated cuttings running for two weeks without signs of disease. Is 'Systhane' treatment therefore necessary, or even effective?

Mice-Damaged Crocus

mice-damage on crocusThis is almost certainly mice damage on the remains of these sprouted crocus corms. Pity. They were just about to break through the soil surface. The mice must have smelled them.

Put some bait under an upturned plant saucer to protect the birds. A bit late now, though - nearly all crocus are gone. First year this has happened.

6 January 2011

Feed Geraniums When New Buds Show Winter Break Over

geranium new budWhilst geraniums are resting - indeed, whilst ALL plants are resting - I stop feeding and cut watering back to bare essentials. Most plants need a rest at some stage. This geranium, just discussed is producing new flower buds, indicating its winter break is over and feeding can be resumed, with watering as appropriate.

The plant will not yet be in full growth. But it should appreciate a snack to keep it going whilst it prepares for the year ahead. Best not to feed at full strength. Have given a small amount of 'Phostrogen' liquid feed at quarter strength. This will supply minerals and vitamins, plus some nitrogen to help growth.

You can give a high nitrogen feed like 'Baby Bio', but you need to be careful not to change things too quickly. Remember the geranium from last year?

Just give it a sniff (1/8 strength) and see what happens. You can always add more.

When Should We Plant Seeds?

Is now a good time to plant seeds? How do we know the best time to plant them? How should we do it? (click seeds category for last year's notes). These are the sort of questions which might be troubling novice growers (is it any wonder with all the marketing hype). And not just novices; seasoned growers are even more concerned, though bitter experience has usually provided the answer - that there is no correct time, provided you are properly prepared.

If you want the biggest and often the best plants, it pays to grow them for as long a season as possible. In the U.K. this means extending the season, usually at the beginning when plants are young and can more easily be controlled. From this point of view, getting seeds off to the earliest start obviously makes sense. But take care.

What novices need to understand is that extending the season is not easy.
  • Light levels on a window sill can be too low in January and early February - special growing lamps would be required

  • Winter temperatures are too low for most seeds - a heated propagator (not the airing cupboard) is usually needed

  • Plants grow quickly, so sufficient space must be available to keep them growing free from frost - a point often overlooked by most novices. Protection will be needed until the risk of frost is gone, usually towards the middle or end of May. A greenhouse, or at least a cold frame is almost an essential
Even if you have all the necessary equipment and lots of enthusiasm, there is still another consideration:

Forcing plants usually results in weak growth. I find it far better to let them grow in their own time. And they will if you can be patient. Growing is difficult for those in a hurry.

Coriander Canary Detects Low Light

etiolated coriander seedsAll seedlings will etiolate (stretch) if the light intensity is too low. The coriander here is no exception. I have been germinating seeds at room temperature (a cool room), then cooling down to 7 to 8 deg C (44 to 46 deg F) during December (see growing coriander notes).
normal coriander seedsAs you can see from this photo, things were going fine until last week when the mild foggy weather reduced light levels and increased temperatures to 10 deg C (50 deg F). The etiolation (shown above) happened overnight.

This tells me three things:


  • coriander will actually grow at low temperatures - far lower than I expected

  • most of the winter light is acceptable at these temperatures - it is just the odd fluky day (fog and heat) that can cause problems

  • it is still too early to plant most seeds - best wait till the light improves
Because of coriander's tendency to bolt (start forming seeds) during the summer months, if you want just the leaves it is best to plant seeds in small numbers at weekly (depending upon how much you require) intervals. The technique of growing seeds in plastic cups which I introduced last year has proved an ideal way to do this (have a look at the 'seeds' category or read the March 2010 posts).

The etiolated seedlings will still develop and will not be wasted. So it is worth planting a few seeds, just to be sure of adequate light levels.

P.S. I would love to know what fungus is growing on the compost. It doesn't seem to affect the coriander.

Geranium's Winter Flowering Break A Mystery

Although geraniums (pelargoniums) give fantastic value in the sense that they will flower all year round, nevertheless they do like to take a short break during the winter months (don't we all?).

These two plants were photographed on the same day. They are siblings raised from cuttings taken from the same parent plant (i.e. they are identical twins so far as their genetic makeup is concerned - hence we would expect them to behave in the same way). Since they are both kept in a similar environment, it is surprising they have rested (each for about a month) at different times.

flowering geraniumThis plant unexpectedly took its break back in October, causing me to over-water it. It hasn't looked back since recovering and is now budding up for another flush of flowers. It was not thinned out.

budding geranium

This one is the one you saw last month. which was thinned out.


If you remember, I only cut back one or two stems to maintain appearance. Had I known that it would stop flowering, I would have cut them all right back. I thought that thinning out would release food to the rest of the plant and thus help maintain flowering. So why did it stop? Was this caused by thinning out? And why did it not break in October when its sibling did? I said plants were a mystery.

Why Has Old Begonia Stem Not Fallen Off?

begonia stem stumpIt's not the Botrytis creeping all over this old broken begonia stem that's the problem. This has already been treated with kitchen bleach (carefully so as not to get any on the compost), a treatment which worked a treat on the Triphylla Fuchsia back in October. No. It's the fact that it's still firmly attached to the tuber; it has not fallen off as it should have done.

Normally these old stumps can be found lying on the compost some time in December, leaving behind a nicely-healed wound (I'm not sure this is formed in the same way as an abscission layer in a leaf petiole (stem)). Had this happened, fungal infection would not be a problem, since the scar (scab) would prevent entry of spores (a fungus's equivalent of seeds). However, tearing away the stump could open the wound which, in the moist warm conditions needed for germination, could create problems.

It's as if the tuber has been forced prematurely into dormancy before it could finish its work, probably by the sudden influence of plunging temperatures. Even worse: the tuber could have been frozen - it might be dead.

I don't know what will happen now things have warmed up a little - I was hoping to start propagating some begonias later this month. If there's no improvement within a couple of weeks, I might gently break it off and treat the wound with yellow sulphur powder to kill any unwanted disease spores. But I don't want to do this. There is always a chance things could go wrong.