The increasingly heavy overnight autumn dews in the UK create ideal conditions for moss establishment (or re-establishment!). Spores which have lain dormant during the summer months become active and can soon overpower even the healthiest of lawns. So we need to beware. Now is an ideal time to get down close to the turf and examine it carefully for strands of moss.
If moss has previously been a problem, I recommend an application of ferrous sulphate (19% soluble sulphate of iron) at 1 ounce per gallon of water per 10 square yards (35g per 4.5 litres water per 9 square metres). With the right rose, it doesn't take long to apply with a watering can (you might need to experiment with different ones to get the delivery rate right). I would give this treatment whether you can see any moss or not; any present will turn black almost instantly. You might be amazed at how much there is.
REPEAT TREATMENT IF NECESSARY
I dealt with moss treatment in great detail last year (see last autumn's lawn posts). But I didn't make it clear that we need to keep an eye out for moss re-establishing after a month or two. If it does, then repeat the treatment. You can do this as many times as necessary.
If you keep 'nipping it in the bud', you will keep it in check without disfiguring the lawn. i.e. the dead moss will quickly grow over, so there should be no need to rake.
RAKE OUT IF NECESSARY
If moss is really bad, then now is the time to kill it off and rake it out. There is still time for the turf to at least partly recover before winter. This way it will not look as unsightly as it would if left till later, or - even worse - next year.
19 August 2011
Cutting Back Hydrangeas
Cutting back the fallen hydrangeas last August seems to have worked. They have grown back and flowered well this year (see 'Pruning A Fallen Hydrangea').
Watering Technique To Control Botrytis In Fuchsias
I have had a real problem with botrytis on fuchsias this past year. Much has been learned. That's how it is with growing - trial and error - almost despair, at times. However, I noticed last winter that certain pots remained completely free of this disease. Why? Because I didn't need to water them. The compost surface dried out, leaving sufficient water down below to last a few months.
WETNESS OF COMPOST
The pots were given the maximum amount of water before October (when botrytis really became a problem due to colder temperatures), but the compost surface had enough time to dry out. The plant roots, as they grew, could then access water deeper in the compost. This way, these pots did not need to be watered again till growth recommenced the following year. And even if they did, they could be watered from the bottom by standing in a saucer of water for a few minutes.
This really worked last year. It was those pots that I didn't water in time - and so were left with a wet surface - which suffered.
COMPOST TURNS SOUR?
Many will tell you that wet compost turns sour. Yes it does. But, in my opinion, this only happens when it is too wet and consequently deprived of air. Adding some perlite and/or grit will help control this.
HOW MUCH WATER?
The limiting factor as to how much water can be given is the plant(s) itself. Fuchsia roots cannot tolerate over-wet conditions for long periods. So you need to give as much as you can without drowning the plant. Only experience can help here.
DON'T WATER TOO SOON
It is surprising how dry a compost can become before it affects fuchsias. In fact, they positively thrive on a drier one. But not TOO dry - otherwise the roots will shrink and cause permanent damage. It's a very narrow margin, but one that is worth discovering if you want to grow fuchsias well.
12 August 2011
Why Some Fuchsias Are Self-Branching
It's been bothering me. What I said last week about the multi-plant flowering unevenly (see 'Two's Company . . .'). It wasn't quite right. This multi-plant is not flowering unevenly because the cuttings have rooted at different times. It's because two of the plants contained flowering meristems, whereas the third one did not.
Once a plant stem 'decides' to flower, the apical meristem, contained within the terminal bud (growing tip), ceases laying down only dormant side shoots in new leaf axils and begins to produce flowers (or flowers and shoots). At this time, it ceases to be called an 'apical meristem' and becomes instead a 'floral meristem'. However, this change is not obvious; it only becomes apparent once flower buds can be seen. Until this time, it appears like a normal shoot tip, the young flower buds being there but too small to detect. So this is what has happened here. This change into flowering mode had occurred in two cuttings only. The third was a normal stem.
SELF-BRANCHING TYPES

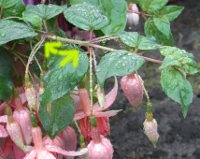
 The situation is even more confusing in fuchsias because some continue to lay down both flowers and shoots in their leaf axils. 'Genii' (left) lays down flowers (pink) and shoots (lime) at DIFFERENT nodes, whereas 'Hawkshead' (right) lays down both flowers and shoots at the SAME (but not all) nodes. These young dormant axillary shoots, once activated, allow these fuchsia stems to become 'self-branching', thereby developing the shrub vegetatively as flowering continues throughout the summer.
NON-SELF-BRANCHING TYPES
 Some fuchsias, however, once flowering has begun, cease laying down side shoots and lay down only flower buds (plus a pair of feeder leaves) in the axils of each consecutive new node. This continues for a few weeks until flowering has finished, at which time vegetative growth resumes, followed by another flush of flowers. Thus, the shrub stops developing during flowering, so must be built up previously. However, there is a plus in that the flowers are more visible (and therefore look more spectacular) because they are not covered by leaves, thereby making these plants more suitable for exhibition purposes. Note that 'Amazing Maisie' (left) produces two pairs of flowers at each node, along with two feeder leaves. This has the effect of making the plant appear more floriferous; it also makes it easier to shape for best effect.
Once a plant stem 'decides' to flower, the apical meristem, contained within the terminal bud (growing tip), ceases laying down only dormant side shoots in new leaf axils and begins to produce flowers (or flowers and shoots). At this time, it ceases to be called an 'apical meristem' and becomes instead a 'floral meristem'. However, this change is not obvious; it only becomes apparent once flower buds can be seen. Until this time, it appears like a normal shoot tip, the young flower buds being there but too small to detect. So this is what has happened here. This change into flowering mode had occurred in two cuttings only. The third was a normal stem.
FUCHSIAS LAY DOWN FLOWERS IN DIFFERENT WAYS
SELF-BRANCHING TYPES

 The situation is even more confusing in fuchsias because some continue to lay down both flowers and shoots in their leaf axils. 'Genii' (left) lays down flowers (pink) and shoots (lime) at DIFFERENT nodes, whereas 'Hawkshead' (right) lays down both flowers and shoots at the SAME (but not all) nodes. These young dormant axillary shoots, once activated, allow these fuchsia stems to become 'self-branching', thereby developing the shrub vegetatively as flowering continues throughout the summer.
NON-SELF-BRANCHING TYPES
 Some fuchsias, however, once flowering has begun, cease laying down side shoots and lay down only flower buds (plus a pair of feeder leaves) in the axils of each consecutive new node. This continues for a few weeks until flowering has finished, at which time vegetative growth resumes, followed by another flush of flowers. Thus, the shrub stops developing during flowering, so must be built up previously. However, there is a plus in that the flowers are more visible (and therefore look more spectacular) because they are not covered by leaves, thereby making these plants more suitable for exhibition purposes. Note that 'Amazing Maisie' (left) produces two pairs of flowers at each node, along with two feeder leaves. This has the effect of making the plant appear more floriferous; it also makes it easier to shape for best effect.
Multi-Plants Look Good Right From The Off
 Now is a good time to take cuttings of favourite plants, either as insurance against a bad winter, or perhaps just to increase stock. Take about six or seven shoot tip cuttings, a 3.5 inch potful of light soil or rooting compost (preferably the one we use on fuchsias), and insert five or six cuttings close to the edge, with one or two in the middle. No need to cover. These should root fairly quickly at this time of year.
 Making multi-plants this way was very effective last year. This is a multi-plant, made of pinks last August, in early October. I made one from French lavender, as well. Both have flowered very well this year as part of mixed containers.
Multi-plants in small pots are easy to store over winter. And they look good right from the off because the plants don't need to build up a framework of stems before they can flower well. The structure is already there. Each stem will very quickly bear a flower. And, once mature, these plants can look fantastic!
Bleach Seemed To Remove Botrytis From Fuchsia Stem
 Following a recent post on botrytis on this fuchsia stem, (see 'Troubleshooting Furry Mould On Fuchsia Stem'),
I can say that a drop of thick domestic bleach - the smallest drop that falls naturally out of the bottle - in a 500ml hand spray not only contained this disease, but actually seemed to remove it. I tried this on a couple of plants and the result was the same in both cases. You might also remember that I used kitchen cleaner with bleach, carefully applied, last year on the troubled triphylla. This also worked, and the plant survived without any obvious detriment.
Young fuchsia cuttings seem to take a bit of a pasting, though. And I'm sure it will damage the tender young root hairs. However, they are still living - just.
PREVENTION
Watering with one or two drops of bleach per gallon (4.5 litres) of water is said to give effective prevention against botrytis. But don't know if it will actually remove it.
BABY BOTTLE STERILANT
Chlorine has been used for years in the mushroom industry against bacterial blotch. Last year I tried baby bottle chlorine sterilant (supermarket own brand) at recommended strength. This seemed to work against the fungus, but caused some damage to the larger cuttings. Younger cuttings were damaged even more. However, these nearly all survived, of a fashion - without botrytis. I was going to do some tests with weaker concentrations, but haven't got around to it. Story of my life!
Remove Dead Leaves In Wet Weather
 This time of year can be dangerous to plants. Old dead leaves, already infected with botrytis (grey mould), left lying (or hanging) around is a recipe for future disease trouble - especially when compost becomes over-wet. These should be removed as soon as possible. In fact, best remove them even sooner to allow air to circulate within the plant (stagnant moist air is the killer).
Plants do not need many leaves to flower well. In fact, as you have seen previously on the geraniums (pelargoniums), they seem to use just those surrounding the young flower stems. Perhaps the lower leaves have some value. But this is not significant. For the extra risk involved in keeping them on the plant, any potential reward is too small.
MAKE A BIT OF SPACE
You don't have to denude the plant. Just make a bit of space. This will also enable better access to the debris. A long pair of tweezers is also a good investment for reaching the awkward places.
Too Cold For Tomatoes?
 The tomato plant is not doing well. All seemed to go well at first. Then leaves started rolling and growth became slow and stunted. Although there are a few flowers and fruits, things should be much better. They started to go wrong after I saw greenfly feeding on the stems. The growing tip rolled up like a clenched fist within days and never recovered.
SAME AS LAST YEAR
This is exactly what happened last year, the only difference being I have not detected any blight (last year's plants had to be destroyed).
 These normal leaves are from a cutting of 'Outdoor Girl', given by a neighbour. These plants (he gave me two) have defied all neglect and seem insistent upon forming normal plants.
STILL NO WISER
The fact that 'Outdoor Girl' is a reliable outdoor variety indicates I have been 'flogging a dead horse'. 'Alicante' and 'Ailsa Craig' (last year's variety) just will not grow in my garden, probably because it is too cold and draughty. Although, of course, the greenfly could have brought a virus? I'm still no wiser.
5 August 2011
Gibberellins Rampant Under August Skies
August in the UK is a difficult month for fuchsias. If the hot muggy weather doesn't allow botrytis to destroy plants, the sudden appearance of dark thundery skies followed by prolonged warm dull days produces long (leggy) growth through etiolation.
PROBLEMS INDOORS WITH CONTAINED AIR
Things are not so bad OUTDOORS where darkening skies (loss of sun) do lower temperatures more quickly. No. It's INDOORS where problems really occur. Contained air (either by walls or glass) does not cool down nearly quickly enough to accommodate reduced light; the plants 'assume' they have competition, so therefore need a sudden spurt of growth to outgrow this. Hence leggy plants.
Etiolation is caused by elongation of the stem's vertical cell walls, controlled by the growth hormones 'gibberellins'
Multi-Plant Breaking Unevenly
 I wasn't going to remove the growing tips at the ends of the 'Annabel' multi-plant shoots. But after removing some of the larger leaves to see what was happening down under, it is clear the axillary buds in the leaf axils haven't broken evenly. In fact, only those marked in pink seem to have developed; the ones marked red have not moved. I hope removal of the apical bud (growing tip) at the end of each stem will now improve matters.
As you can see, I have also used wire to pull some of the branches closer together. This is a good time to do this before the wood becomes too hard and brittle.
Because each of the shoots now has about eight (most have, some haven't) axillary buds (4 nodes x2), there is great potential. Even without further stopping, there should be about sixty to seventy flowering shoots produced. But this won't be till the end of the year, unfortunately. I should have stopped it sooner and potted it up earlier instead of leaving it too long in a small pot. It might have been flowering now. Never mind. Live and learn.
Two's Company . . .

 They say 'Two's company, three's a crowd'. I wonder if someone told my fuchsia multi-plants. For some reason, when produced from perlite-rooted cuttings, three plants will not grow together and produce even plants. Either one plant takes hold before the other two, or vise versa. As you can see, this affects both vegetative growth (left) and flowering (right).
This has happened each time I have placed three plants in a pot. Two have grown together. And they have ALWAYS grown together, whether larger or smaller than the third plant.
However, when I placed more than three rooted cuttings in a pot, multi-planting has worked, with all plants of similar size growing together. Strange.
The other strange thing is that, in the former case, although all three plants started at similar size, rooting occurred at differing times, thereby making the two groups uneven. i.e. for some reason one or two plants just would not root as quickly.
I suppose the obvious cause could be plants spaced too far apart. But I don't think it's as simple as this. Mysteries. Mysteries.
Not Virus Infection On Dahlias
 It doesn't look as if the dahlia leaf problem was caused by a virus (see 'Mottled Dahlia Leaf?'. New leaves are now looking quite healthy after feeding, and the leaf discolouration does not seem to have spread.
GIVEN FEED WITH TRACE ELEMENTS
 Dahlias are often short of trace elements at this stage of growth, and applying these usually significantly brightens flower colour. Seaweed feeds are very good. But I used good old 'Phostrogen' because its analysis shows it not only contains trace elements but is also rich in potassium, which is also beneficial for flower production.
ALSO SPRAYED FOR THRIPS
I also sprayed with thiacloprid to control thrips. This should also control aphids (which spread viruses) and other pests till the end of the season. Pity it doesn't also control snails!
Still No Roots On Dahlia Cup Cutting
 Still no roots showing in dahlia cup cutting taken six weeks ago. Not sure what this means. It has taken and is growing;it is also flowering. When cuttings are rooted in spring, roots are usually visible at the bottom of the pot within four weeks, often sooner. I know a 500ml (pint) beer pot is much deeper, but they should have got down there by now. What's the reason?
- dahlia roots are 'photophobic' (light-hating) and are keeping out of sight
- dahlias do not produce roots whilst flowering
- a pest is destroying the roots
29 July 2011
Notches In Leaves
 Beetles and weevils damage leaves by biting chunks (notches) out of them. Vine weevils - and sometimes chafer beetles - are a particular nuisance at this time of year.
Vine weevils love to lay eggs in pots of favourite plants. These eggs hatch into white maggot-like grubs with brown heads, which devour fresh white roots and subsequently kill the plants. Although vine weevils have a seasonal life cycle, in practice they can are usually present in some stage of development at all times of year.
CONTROL MEASURES
The adult weevils can get almost anywhere, and can even climb polished glass. So this somewhat limits control measures to surrounding pots with water (weevils can't swim!), greasing sides of pots, trapping adults with upturned seed trays or similar dark vessels (they shelter in them overnight), or chemical control.
Chemical Control
 I treat all pots and susceptible plants with thiacloprid. I know it's a carcinogen, but it gives good long-lasting control (several months) and also controls many other pests such as aphids and whitefly. But, most important - it kills vine weevil and chafer grubs.
Horizontal Dahlia Sport?
 This is the dahlia I planted horizontally to get it deeper in the ground. I wanted to get some adventitious roots all at the same depth; plus some extra stems. It's still early days. But the results so far are somewhat strange, to say the least.
After laying the plant in the hole and completely burying it, it took some while to emerge. But when it did, three shoots broke through the surface at roughly the same time.
However, as you can see (I hope), only one of the three is really romping away. And when I say 'romping', I mean 'ROMPING'. Considering this plant is a short variety, and considering it is on the dry side of the bed and has received absolutely no water from me, it is doing very well indeed - certainly much better than the other two.
Not only is the stem thicker, and the leaf much larger, the leaf is also a slightly different colour (it's lighter and greener - the others are bronze), leading me to suspect the plant might have thrown a sport (an uncharacteristic shoot on the parent plant). I don't know yet. Will have to wait see. However, it's not the only plant which has produced large leaves and thicker stems - one of the 'wheels' has, as well.
Dicot Stem Cross Section
 This is a cross-section (transverse section) of a typical herbaceous dicot stem. Its tissues are laid down in a characteristic manner.
EPIDERMIS
The outer layer, one cell thick, is the 'epidermis'. Some of these cells bear multi-cellular hairs or 'trichomes', which are beneficial for water conservation and defence. Because green stems can photosynthesise, the epidermis also contains 'stomata'. Just like leaves, the epidermis is covered with a waxy layer of cutin, the 'cuticle'.
CORTEX
The cortex comprises tissue located between the vascular blundles and the epidermis, often split into two layers. The outer layer is composed of collenchyma cells whose unevenly-thickened walls give flexible support to the growing plant. And, because it is a living material, can grow as the plant grows. The outermost collenchyma cells may contain chloroplasts, whose chlorophyll facilitates phososynthesis.
Below the collenchyma, the remainder of the cortex consists of unmodified parenchyma cells.
VASCULAR BUNDLES
In dicot stems, these are always arranged with the phloem towards the outside and the xylem towards to the centre. This has been described elsewhere (see 'Vascular Bundle Of Young Dicot Stem, Cross Section')
In dicots, the vascular bundles are arranged in a ring running the whole length of the stem, and connecting with the stele of the root and with the midribs of the leaf veins.
These bundles give much support, especially when a pericyle is present whose tightly-packed, lignified sclerenchyma fibres are extremely tough, forming a bundle, or cap, between the bundle and the cortex.
PITH
This is parenchyma packing material which forms the centre portion of the stem. In some plants, this is missing and the centre is hollow and often filled with water.
See also: 'Cross Section Of Young Dicot Root'
Vascular Bundle Of Young Dicot Stem, Cross Section
 This is a transverse section (cross-section) of a typical dicot stem vascular bundle. These are comprised essentially of phloem and xylem tissues which provide both conduction and support. In dicot stems, these bundles are arranged in a ring (see 'Dicot Stem Cross Section') which is separated from the epidermis by cortex tissue. Bundle vascular tissue reaches throughout the whole plant and forms characteristic patterns depending upon whether it is in the root, stem, or leaf. Only in the stem and leaf is it referred to as 'bundles; it forms the 'stele' in the root.
PERICYCLE
Although the xylem tissue's cell walls are supportive, further support is often given to dicot stems by a sheath of sclerenchyma fibres (the 'pericycle', 'bundle sheath', or 'phloem fiber cap') which sits above the phloem tissue. Although not present in all dicot stems, it allows herbaceous stems to flex easily in the wind without breaking.
PHLOEM TISSUE
Consists of sieve tubes, companion cells, phloem parenchyma and phloem fibres (see 'Plant Tissues'.
In vascular plants, phloem tissue carries manufactured food from sites of photosynthesis (mostly in the leaves) to non-photosynthesising parts (mostly the roots). It also carries food products from storage in the roots to any other part where it can be utilised. This two-way traffic (up and down) differs from xylem transport, which is only upwards.
Almost all the sugar is transported in the form of the carbohydrate sucrose (a disaccharide), because this is both relatively inactive and also highly soluble (so can be carried in high concentrations).
Phloem also transports certain processed minerals, particularly nitrogen and sulphur in the form of amino acids, phosphorus as phosphates and potassium ions. Trace elements and growth hormones are also carried.
VASCULAR CAMBIUM
This is a thin ring of cells separating the outer phloem from the inner xylem. It is responsible for secondary growth in older stems.
XYLEM TISSUE
Dead material consisting of thick,lignified (woody) material. The 'metaxylem' is easily identified by the large mature xylem vessels, fibres and parenchyma. The 'protoxylem' is spirally or annually thickened and is closer to the centre of the stem.
Xylem tissue conducts water and nutrients upwards from the roots to the rest of the plant. Analysis of xylem sap has shown that much of the nitrogen is not carried as nitrate or ammonium ions, but as manufactured amino acids. This must therefore have occurred in the roots. Some organic phosphates have also been found.
See also: 'Cross Section Of Young Dicot Root'
22 July 2011
Mottled Dahlia Leaf?
 Wonder what's caused this yellowing on this dahlia leaf? Haven't seen it before.
MAGNESIUM DEFICIENCY?
Yellowing between the leaf veins is often a sign of magnesium deficiency, so could be this in an early stage. Doesn't seem likely, but given a dose of trace elements just in case.
VIRUS?
Mottling is often associated with virus disease. But this is also unlikely, as I haven't seen it before, and haven't brought any new plants in. But could have been there all along and is now showing up because of recent stress (plants have never been watered, apart from rainwater)
THRIPS?
Seems strange that it is only now noticeable after much rain and thundery hot weather. Might be thrips (thunder flies) damage, though haven't seen any. Another mystery. Will have to wait see what develops.
Signs Of Over-Watering Triphylla Fuchsia
 The yellowing leaf tips of this triphylla fuchsia are a sure indication something is wrong. Because they have appeared following torrential rain, it is likely to be over-watering. Check the roots.
 Sure enough, this reveals poor growth at the base of the pot and patches of brown dying roots - a sure sign of over-watering. The compost is still dark and soggy.
REMEDY
Good job the weather has been cool, or damage could have been much worse. Had browning become so bad that the roots had begun to smell, then replacement of the bottom compost would be necessary. However, because we have tackled the problem early, just drying out on a paper towel, then replacing into pot, should sort things. It will not remove the yellowing, but new leaves should be fine. New roots will soon grow into the damaged areas.
PREVENTION
Adding more perlite (and even grit) to the compost (25%) might have prevented the problem by allowing better drainage and aeration. Protecting the plants by covering the foliage with clear polythene bags, as outlined last year, is also a great help.
All That Rain Wasted On Lawn
 It hardly seems credible. Three days and three nights. Almost incessant rain. Nearly 10cm (4 inches) in a week. Enough to get down at least a couple of feet. Maybe even deeper. Even in the driest soil. My lawn never ceases to amaze - parts are still almost dry.
 Of course, I should have allowed for the thatch. I should have known the rain would not penetrate, not without pricking a way through. After all, I've talked about it often enough. And anyway, it was too hard to use the spiking tool. Even now it's hard to push a fork in.
I could have gone out in the rain. I could have spiked it once the turf had begun to soften. But I would have got very wet. And I suppose I figured it would stop raining a while. It didn't. And now it's too late. The rain has gone. At least that which was most valuable. All that rain wasted . . . Blast.
Dahlia In A Cup
 I know it's not very clear. But this is a dahlia cutting in a 500ml (pint) plastic cup filled with soil. Although the cutting was pushed down the side of the cup (its stem was visible until the green algae formed), there is still no visible sign of any root development 32 days after planting. I know I didn't use rooting powder. But I'm sure it HAS rooted, because it's held firmly and is growing. Hope roots appear soon.
POT TUBERS
I thought it would be good to see how the roots and tubers develop (should they ever appear), just as we did with the potato. Incidentally, it's worth growing a few cuttings like this and keeping them in pots (3.5 inch). They over-winter very well, once dried, and take up little space.
Rooting Geraniums In Perlite And Water
ROOTING IN PERLITE
 It took me years to get around to using perlite on a regular basis. But it really is an excellent product. Just look at the roots on this woody geranium cutting. Kind of speaks for itself, doesn't it?
Because it is inert, and therefore contains no nutrients:
Cut stem just below a leaf node, then remove bracts. Insert it about an inch (2.5cm) into perlite and water, so water is just touching its base. Leave until roots appear, ensuring container does not run dry.
After trimming an old plant, I place about 5 cuttings into a small cup of perlite, fill to top with water, then just leave until roots are visible.
ROOTING IN WATER
 If you haven't got perlite, don't worry. Woody stems can also be rooted in plain water. But best to sterilize this in a microwave first (don't forget to let it cool before inserting cuttings). I haven't found this method as reliable as perlite, but it's still quite effective.
 It took me years to get around to using perlite on a regular basis. But it really is an excellent product. Just look at the roots on this woody geranium cutting. Kind of speaks for itself, doesn't it?
Because it is inert, and therefore contains no nutrients:
- New roots quickly proliferate in an attempt to reach a food source. This also happens to some extent with potting compost, which only has restricted nutrients.
- Woody stems can be softened without rotting. So perlite is ideal for semi-ripe and ripe cuttings.
Cut stem just below a leaf node, then remove bracts. Insert it about an inch (2.5cm) into perlite and water, so water is just touching its base. Leave until roots appear, ensuring container does not run dry.
After trimming an old plant, I place about 5 cuttings into a small cup of perlite, fill to top with water, then just leave until roots are visible.
ROOTING IN WATER
 If you haven't got perlite, don't worry. Woody stems can also be rooted in plain water. But best to sterilize this in a microwave first (don't forget to let it cool before inserting cuttings). I haven't found this method as reliable as perlite, but it's still quite effective.
Potato Tubers At Critical Water Stage
 Considering how little water it has had, I was surprised to see tubers developing on stem branches (red) attached to the potted potato plant. Just shows how determined plants are to survive. Potato tubers are bulky short portions of underground stems.
True roots can also be seen. At this stage, these roots gather as much water as possible to support tuber growth. This is the critical stage in potato development, for water requirements. Limiting water at this stage will drastically reduce crop yield.
Increasing Dahlia Flower Stem Length
 The stems on dahlia flower stems are usually quite long enough for domestic display purposes. However, if yours are too short - or if you just want larger blooms - removing the wing buds (marked pink) on either side (red) of the crown bud (lime) will help. Additionally, removal of a couple (or even more) developing lateral buds lower down the stem will help even more; but make sure you leave at least a couple for re-growth.
All the above is usually only necessary for exhibition. And it doesn't suit all cultivars. But it can be a real benefit to some. It's personal choice.
ENSURE WATER IS NOT LIMITED
If water is limited, size of all parts of a plant - especially the flowers - will be reduced. Plants 'cut their coats' accordingly. This is particularly important when the blooms are filling - and I would say even BEFORE the buds become obvious. Plants seem to lay down buds with greater size potential if adequate water is available when the buds are being formed in the floral meristem (floral meristem replaces apical meristem at flowering).
15 July 2011
Clothes Peg Weights Work Wonders On Fuchsias
 Clothes pegs hung on fuchsia leaves are wonderful for training them over the edge of baskets. Many fuchsia stems are either too lax - and consequently just droop over - or are too stiff to bend over naturally before they harden. Adding just small weights will gradually encourage them to conform. Use on the outer stems of a basket will thereby enhance appearance.
REMOVES DOMINANCE EFFECT
However, there's more to it than this. As a branch becomes more horizontal, the apical bud (at the end of the stem) loses its dominance over the lower axillary buds (red), thus allowing them to commence growth. Some fuchsias do this automatically, but most do not. Because the stem is horizontal, the new stems will grow vertically, thereby enhancing the bushiness of the plant and giving it some height - a necessary feature in attractive baskets. Meanwhile, because the plant has not been stopped (shoot tips not removed), the original branches will keep growing and producing even more axillary buds.
I will use this technique on the 'Multi-Plant' if all the buds do not start developing soon (some have, some haven't (although the variety used, 'Annabel', should be self-branching)). Growing fuchsias as multi-plants is supposed to remove the need for this practice. I want to see if this is the case. It probably is, because everything Ken Pilkington has described in his book on multi-plants seems to work 'as it says on the tin' - which is something of a revelation in this day and age.
Having been thoroughly frustrated with the multi-plant method, I am back to being an ardent fan. Funny how just a few days can make such a difference of opinion. We forget all the frustrations - just as we forget even the harshest winter after the first sunny day of spring.
Shading Plastic Cups Seems To Improve Growth
 It's been a poor year for fuchsias as far as I'm concerned. They just haven't grown. At least not for long periods. Then they have. Fits and starts the whole time. And the growth spurts seem to have coincided with warmer weather. This is strange, since fuchsias grow well in cool conditions (about 10 deg C (50 deg F)).
I had this great idea to grow cuttings in 200ml plastic cups because, being deep with low surface area, they seemed to offer great potential. But their greatest feature was that I could actually see the roots growing and how the plants were using water in the compost. It all seemed so ideal, just as lots of my ideas do at the time.
Alas, things did not turn out as planned. Whilst growing well in early spring, they suddenly stopped and hardly moved at all. After deducing this was because the compost was getting too warm in the strengthening sun, I popped the cup into a 3.5 inch plant pot to keep it cool. And guess what? They started growing.
Furthermore, I have also noticed that cuttings rooted in the centre of a perlite cup do so more quickly than those around the edge. This time I convinced myself it was somehow cooler in centre - another act of near lunacy when seen in the clear light of day.
Anyway, I read an article in the 'Science Daily Blog' last week (first published in December, 2008) which outlined that plant roots have a sensing mechanism to detect UV-B light levels. They then send signals which cause the plant to adjust its normal growth appropriately. I'm not sure exactly how this works, or in what way growth is adjusted. But it could nevertheless offer an explanation for fuchsia cutting growth: Perhaps it was the increased light intensity, not the temperature, which caused growth to slow down in both the compost and in the perlite. Still not sure, though. It could just as well be 'something in the air'.
Troubleshooting Furry Mould On Fuchsia Stem
This furry mould on a ripe (woody) fuchsia stem is caused by Botrytis, a pathogenic fungus. Botrytis is a problem with fuchsias in warm muggy weather and in cold damp, still air. I spotted this yesterday and sprayed with 'Systhane' (myclobutanil). Doesn't look like it's having much effect.
If left alone, the branches die back one by one, until the fungus has destroyed the whole plant. If caught early enough, it can sometimes be cut out. However, it is often too near to the base of the plant (usually on the main stem) for this type of control.
It often starts from old decaying plant material left lying on the surface of the compost, then travels across the compost to the main stem of the plant. It is also often found at the point where a branch has been cut back and bleeding has occurred, leaving sugary sap on the stem around the wound. This is ideal food for the fungus.
Cuttings in too wet compost can also suffer due to the organic matter in the compost, which feeds the fungus. Best to use sterile perlite and water at this time of year.
PREVENTION
It seems this disease can only be contained by preventative measures applied BEFORE the fungus penetrates the plant tissue. i.e. only CONTACT fungicides and husbandry techniques are effective.
- Myclobutanil (a systemic fungicide) does seem to work on botrytis, but as a PREVENTATIVE only. Spraying it on the foliage and compost surface BEFORE ATTACK will offer resistance, just as a contact fungicide will do. So will a drop of two of bleach (chlorine) per litre of water used in the same way. This prevents the spores from germinating. I tried watering the pots with chlorinated water last year but, at the concentration used, it was only successful on older, established plants.
- Keeping the foliage and compost surface DRY is most effective. Should watering be necessary (and it often won't be), it can be done from the bottom by standing the pots in a saucer of water for about 20 minutes.
- Do not cut back stems too soon after watering. Best if this can be done when plant is near wilting point, just before watering (allow wound to heal first!).
- All dead leaves and other debris should be removed as soon as possible, before they become infected.
- Ventillation is useful when plants are inside, especially in winter. But botrytis also affects plants outside in the summer months.
Potato Surface Roots Enter New Soil
 A few new roots (green) have this week entered the new soil (above the red line) - two are visible on the surface. I have been careful only to wet the soil surface by lightly spraying clean water. I'm not sure what this means, other than surface roots seem to have a determining effect on new root growth and direction. Looks like the potato plant is now finished with. Might be best to discard it anyway, since there is always a danger of virus disease build-up which might affect future plantings.
How Water Enters A Plant: Apoplast And Symplast Pathways
 Water enters plant roots (along a concentration gradient) through fine root hairs (see 'Apoplast And Symplast Pathways In Root A Hair') then makes its way across the root tissues (cortex, endodermis and pericycle (see 'Cross Section Of Young Dicot Root') towards the xylem, that part of the vascular system which distributes water and dissolved mineral salts throughout the plant.
THREE ROUTES OF TRAVEL
Water may travel across the root by one of three pathways:
- apoplast - within cell walls only (unselective)
- symplast - in cytoplasm, through plasmodesmata (selective)
- cell-to-cell (transmembrane pathway) - through vacuoles of each cell (selective)
 We have seen that a typical cell comprises an outer cell wall surrounding a partly permeable plasma membrane, enclosing cytoplasm and inner vacuole. We have also seen that the cytoplasm of adjacent cells is connected through 'gaps' in the cell wall called plasmodesmata.
APOPLAST PATHWAY
If once water enters the root hair, it travels from cell to cell, across the cortex, in the CELL WALLS ONLY, it is said to take the 'APOPLAST' pathway. Because cellulose is pervious and non-selective, both water and ALL dissolved minerals may be carried this way. Note that the plasma membrane (separates cell wall from cytoplasm) need not be crossed, not until the endodermis - a defensive ring of cells, one cell deep - is reached. So OSMOSIS need not be involved up to this point, only diffusion.

 At this point, the impervious Casparian strip blocks progress and forces both the water and mineral salts to cross the plasma membrane into the cytoplasm, where they can continue on the symplast pathway. However, not all mineral salts make it - the plasma membrane is selective and can filter out unwanted solutes.
SYMPLAST PATHWAY
If water passes from the cell wall through the plasma membrane to the cytoplasm, it can then travel from cell to cell through the plasmodesmata in the cell walls. This is called the 'SYMPLAST' pathway. Note that the plasma membrane, because it is partly permeable, can only be crossed passively by OSMOSIS. Passage of dissolved nutrients, because their molecules are too large, are blocked and cannot pass passively; they must cross the plasma membrane into the cytoplasm by active transport, a selective process; osmosis is not involved.
CELL TO CELL
Water can also enter the vacuoles (which are within the cytoplasm), then pass from vacuole to vacuole. This is called the 'CELL TO CELL' or 'TRANS MEMBRANE' pathway.
POINT OF INTEREST
It is commonly supposed that both water and minerals enter the plant cytoplasm as one process. They don't. Each enters independantly of the other; mineral salts can enter a plant even when no water is being absorbed. However, once inside the cytoplasm, minerals travel in solution.
TOXIC VEGETABLES
Although the endodermis prevents toxins and any other unwanted solutes from entering the stele of the plant, and hence travelling to the stems, leaves and fruits, these nasties may be present in the epidermis and cortex of the plant, taken in through the unselective apoplastic pathway. Since the cortex represents the bulky 'food' part of roots, we need to be extremely careful.
Apoplast And Symplast Pathways In A Root Hair
Plants take in water from the soil, along a concentration gradient, through uncutinized epidermal cells of their roots. Near the root tips (where most of the water is absorbed), these cells greatly increase their absorptive areas by extensions called root hairs. As water enters the cell (hair), it can take one of two routes depending upon whether or not it has entered the cytoplasm of the cell. These routes are called the APOPLASTIC and SYMPLASTIC pathways. APOPLASTIC PATHWAY
Because cellulose, the principal constituent of the cell wall, absorbs water like a sponge (think 'cotton wool'), water can travel from cell to cell - along with any solutes dissolved in it - via these cell walls WITHOUT crossing the plasma membrane to enter the cytoplasm of any cell. This is the APOPLASTIC pathway.
SYMPLASTIC PATHWAY
Water can also cross BOTH the cell wall AND the plasma membrane to enter the cytoplasm, then travel from cell to cell via the plasmodesmata in the cell walls. This route is called the SYMPLASTIC pathway. Because the plasma membrane is partly permeable, entry to the cytoplasm must be by OSMOSIS.
NUTRIENT SELECTIVITY
 APOPLASTIC PATHWAY
Because cellulose, the principal constituent of the cell wall, absorbs water like a sponge (think 'cotton wool'), water can travel from cell to cell - along with any solutes dissolved in it - via these cell walls WITHOUT crossing the plasma membrane to enter the cytoplasm of any cell. This is the APOPLASTIC pathway.
SYMPLASTIC PATHWAY
Water can also cross BOTH the cell wall AND the plasma membrane to enter the cytoplasm, then travel from cell to cell via the plasmodesmata in the cell walls. This route is called the SYMPLASTIC pathway. Because the plasma membrane is partly permeable, entry to the cytoplasm must be by OSMOSIS.
NUTRIENT SELECTIVITY
- There is a misconception that nutrients enter root hairs in solution. This is not strictly correct - it only applies to the apoplastic pathway, where the plasma membrane need not be crossed.
- However, in the symplastic pathway, both water and minerals (nutrients) must each cross the plasma membrane by a separate and independent process; one is PASSIVE the other ACTIVE.
- Water passes passively by osmosis.
- Minerals, on the other hand, must pass through the plasma membrane by ACTIVE TRANSPORT, a selective process.
8 July 2011
White Powder On Fuchsia Leaves
 Fuchsias have their own way of dealing with overfeeding - they're sick. That's what has happened here. Excess mineral salts have been exuded by guttation and have dried on the leaves, leaving a white powder which can be washed off with water.
Fuchsia Multi-Plant Now Doing Well
 It's taken long enough, I know. But the fuchsia multi-plant started last autumn is now doing well in its four inch (10 cm) pot . . . well, apart from a couple of plants, that is.
Begun with 9 shoot tip cuttings in a 2 inch (5cm) pot last autumn, all 9 are still with us. However, whilst seven plants are now growing at the same pace, as if they are all part of one plant, two of the plants are not growing so well. These two are not weak plants; they are just shorter after having stopped growing for a while after being stopped. Now they are growing, but not very evenly; one side shoot is growing whilst the other is not. I think I must have damaged some of the buds whilst taking out the tips. Should have left it a bit longer and done them all together.
I haven't stopped the rest of the stems yet. They now have about five nodes. Multi-plants are supposed to be self-branching. I hope they are.
Preventing Tuberous Begonia Stems Breaking
Tuberous begonia stems can be extremely brittle and easily break off where they join the tubers, especially when knocked or rocked by high winds. Discreet staking gives support and helps prevent this.
 Take care when inserting the cane that you do not damage the tuber. I usually insert them at an angle, so that the base is well clear of the side of the tuber. The stems can then be tied quite loosely (though with a slight tension on the stem), allowing room for stem thickening. As the plants grow, either insert more stakes as necessary, or replace with longer ones.
Feeds too high in nitrogen gives long growth, making the foliage top-heavy. Using high potash feed will both harden the tissues and produce shorter growth. It will also help flower colour and numbers. You don't need much - just one or two feeds will do. Tomato feed is high potash. But I always use 'Phostrogen' with every feed. However, although this produces wonderful plants, they still need staking, but not so much.
MAKE A SHOOT TIP CUTTING FROM THE OLD STEM
Provided you get to the broken stem in time, you can make a shoot tip cutting as shown in earlier posts, either using compost or perlite and water. Cut stem under water (to prevent air bubbles) about 6mm (1/4 inch) beneath a node. Then leave in water for about 4 hours. Some growers actually root in water, though I have never tried this - except for perlite and water, which seems to work well and was outlined recently.
The problem with begonias is that they only grow very slowly. So best to remove all flower buds on new plant, to give the new tuber as much chance as possible to develop before winter. I would again use 'Phostrogen' to produce good growth of both leaf and tuber.
Potato Update
After bringing potted potato plant back to wilting point to ensure the lower soil was dry enough, I added a layer damp soil to surface to see if surface roots could extract enough water for recovery. Because plant was still wilting one day later, I got nervous of plasmolysis and sprayed new soil with water so dampness went down about 6mm (1/4 inch). Plant started to recover.
If you remember, the last time I tried to damp just the surface, the result was the same. So it looks as if the tiny roots right beneath the surface (this doesn't seem likely) do not take in water and plant uses roots a little lower down (still in top 6 mm). Of course, it might just be that I didn't give roots long enough.
No sign yet of any roots growing into new soil. Will keep it damp and see what happens.
Dead Spots On Lawn
 Spots of dead grass, about 2 inches (5cm) diameter, on a summer lawn are usually caused by 'Dollar Spot Disease'. Gradually, these coalesce into larger dead patches which are very disfiguring.
This is a fungal disease in which the leaves of the finer grasses (especially those of creeping red fescue and cumberland turf) die back in hot muggy weather. Normally occurring in August in the UK, last weekend's weather will have caused the problem.
CONDITION NOT TERMINAL
The condition is more cosmetic than terminal. Rake out the dead grass. Once the weather cools down, apply a feed if necessary. Things should then be fine.
Note that small dead spots can also be caused by other things such as petrol drips.
Fluted Leaves On Dahlias
 These fluted leaves are on the 'drought resistant' dahlia started earlier in a tray (see 'Dahlias Started In Trays Are Short-Jointed')
Given that the plant has received no water from me whatsoever - even at planting - apart from a couple of inches or so of natural rainfall (dahlias usually need at least an inch per week; perhaps more), it is easy to suppose it is fluting its leaves because it is desperately thirsty.
And if I were to tell you it has still received no water from me and, furthermore, having stood under the blazing sun for another couple of days, it is still standing and not looking too bad, you might think I'm kidding you. I am not. Although heavy rain is imminent, as I write this it has not arrived.
When I first saw the fluted leaves, I thought the plant was short of water. The loose surface soil looked like dust. But the leaves were firm, not limp; and on digging down a couple of inches, I could see some moisture. Even so, I think I would have still watered the plant had I not been determined to see how the dahlias will turn out without giving ANY water apart from natural rainfall. It's been a bit of a bare-knuckle ride - but so far, so good.
We saw last year that begonias flute their leaves as protection against strong mid-summer sun. I haven't noticed fluting on dahlias before. But it looks like they might do the same thing - especially when water could soon be in short supply.
1 July 2011
Weeding Reduces Both Water Loss And Slug Movement
 We talked last year about the virtues Dutch hoeing.
SEALS IN WATER
Now, after the recent rains, when the weed seeds in the soil have germinated but not yet seeded, is a perfect time to use a Dutch hoe. Loosening the top half inch (2.5cm) or so of soil will not only kill weeds, but will also break the wicking (capillarity) link between the soil surface and lower layers, thus creating an effective mulch which will both insulate the soil and greatly reduce water loss - it effectively seals the water in.
REDUCES SOIL TEMPERATURE
Loose, airy soil dries very quickly and lightens in colour. Thus, more of the sun's heat is reflected; and what is not reflected cannot conduct down through the loose soil as easily. Hence, the roots can work more effectively.
CONTROLS SLUG MOVEMENT
Slugs do not like moving over loose, dusty surfaces which stick to them, preferring wet conditions. You will notice the difference immediately - they seem to completely disappear. However, they soon return once the surface is wetted again . . . more's the pity.
Insects Help Coriander Pollination
 Not only bees are useful in gardens; smaller insects are especially useful in assisting pollination of coriander flowers (as with tomatoes, misting with water and tapping the stems also helps).
Apart from the fact it has toppled over (like trees), presumably because it is top-heavy due to too much feed in the new compost (too much for this stage of growth, that is), the recently-potted coriander is doing quite well . . . considering.
I have only tied up half of the stems and left the other half horizontal, resting off the floor. The plant is still indoors. See what happens . . ..
Surface Potato Roots Do Seem To Absorb Water
 These wilting leaves on the potted potato plant indicate it is short of water. Good. I took the opportunity to test if the surface roots, described recently, will in fact take in water.
So, lightly sprayed surface with clean water . . . Nothing at first, even after 8 hours . . . But once water got down a quarter inch (6mm) or so, the plant did start to recover. I don't think much water got further down than this, but cannot be absolutely certain. Of course, I have no control. But it still gives some indication of the value of the surface roots in gathering rain showers.
Am letting plant reach wilting point again, then covering surface roots with damp garden soil to see what happens.
Slow-Release Lawn Feeds Create Problems
 Although slow-release lawn feeds have a lot going for them, they also create problems. I'm not referring to the fact that the grower loses nearly all control over the rate of food release to the turf (because they work best in wet, warm conditions and hardly work at all in cold, dry ones). No. There's another problem: They preclude work on the turf whilst they are active. And because some of them last over four months, this means for the whole summer.
Normally, this would not be a problem. But it is on my lawn. I can't rake out the old dead grass, which would help get air and water in to rejuvenate the turf, because if I do this I will also remove the remaining feed. Not ideal.
Cross Section Of Young Dicot Root
 This is a typical cross-section of a young dicot root taken in the region of root hair proliferation (see 'Plant Root Growth'), before lateral secondary growth has begun. Hence, the lateral meristematic tissue (cambium) is not yet present.
EPIDERMIS - Developed from the protoderm, it forms a cover, one cell thick, around the root's perimeter. In the region just back from the root tip, cells produce extensions as root hairs to increase the root's water-absorbing potential.
CORTEX - Developed from the ground meristem, these are typical 'fleshy' parenchyma cells with thin walls, large vacuoles and air spaces between cells, facilitating storage of food and water.
In roots of some plants (bog-type plants), some of the cortex cells are lost, producing even more air spaces 'aerenchyma', which allow gases to diffuse WITHIN the plant to and from the root tips.
ENDODERMIS - Surrounds the vascular tissue and can be seen as the innermost layer of the cortex. Unlike the epidermis, each cell wall contains a vertical ring of fatty suberin, called the 'Casparian Strip', making the wall impervious and thus keeping out unwanted solutes.
PERICYCLE - A layer one to several cells thick, between vascular tissue and endodermis. This is modified parenchyma which retains its capacity for cell division and produces the lateral roots which then punch their way out through the outer tissues.
VASCULAR TISSUES - PHLOEM AND XYLEM form an inner stele through the centre of the root, right up to the hypocotyl, where the root joins the stem. The structure then changes into that of a typical stem.
24 June 2011
Blight Danger
High temperatures (25 deg C) and humidity forecast this weekend. Best get tomato plant sprayed with 'Dithane' (mancozeb - a contact fungicide). But there's a problem in wet weather - it tends to wash off too quickly before temperatures high enough for blight to be a danger. This is what happened to tomatoes last year.
Minimizing Die-Back When Cutting Back Geranium (pelargonium) Stems
 Cutting back geranium (pelargonium) stems is not so straightforward as it sounds. Firstly, not every node will produce side shoots unless an axillary bud is visible. But geranium stems are often devoid of axillary buds, and any dormant buds are invisible. So we cannot just cut back to any node and expect new shoots to appear where we want them. Quite often, unsightly die-back (pink) left protruding into nowhere is the result of our efforts, try as we might.
This is why I recommend waiting till a strong new shoot is growing before cutting back to it see 'Cutting Back Geranium Stems'.
And even then I leave a good margin of error (red). This can be carefully cut away once our new branches are growing (lime - best if they're growing stronger than this). New cuttings can be taken from the off-cuts.
WHAT IF NO SHOOTS ARE AVAILABLE?
If a stem needs to be shortened and there are not side shoots, cut back about half way and hope for the best. After a few weeks, new shoots might have developed lower down the stem; if not, let them die back, then remove. We can't win them all . . ..
Subscribe to:
Posts (Atom)