I have had a real problem with botrytis on fuchsias this past year. Much has been learned. That's how it is with growing - trial and error - almost despair, at times. However, I noticed last winter that certain pots remained completely free of this disease. Why? Because I didn't need to water them. The compost surface dried out, leaving sufficient water down below to last a few months.
WETNESS OF COMPOST
The pots were given the maximum amount of water before October (when botrytis really became a problem due to colder temperatures), but the compost surface had enough time to dry out. The plant roots, as they grew, could then access water deeper in the compost. This way, these pots did not need to be watered again till growth recommenced the following year. And even if they did, they could be watered from the bottom by standing in a saucer of water for a few minutes.
This really worked last year. It was those pots that I didn't water in time - and so were left with a wet surface - which suffered.
COMPOST TURNS SOUR?
Many will tell you that wet compost turns sour. Yes it does. But, in my opinion, this only happens when it is too wet and consequently deprived of air. Adding some perlite and/or grit will help control this.
HOW MUCH WATER?
The limiting factor as to how much water can be given is the plant(s) itself. Fuchsia roots cannot tolerate over-wet conditions for long periods. So you need to give as much as you can without drowning the plant. Only experience can help here.
DON'T WATER TOO SOON
It is surprising how dry a compost can become before it affects fuchsias. In fact, they positively thrive on a drier one. But not TOO dry - otherwise the roots will shrink and cause permanent damage. It's a very narrow margin, but one that is worth discovering if you want to grow fuchsias well.
Showing posts sorted by date for query perlite. Sort by relevance Show all posts
Showing posts sorted by date for query perlite. Sort by relevance Show all posts
19 August 2011


5 August 2011
Two's Company . . .

 They say 'Two's company, three's a crowd'. I wonder if someone told my fuchsia multi-plants. For some reason, when produced from perlite-rooted cuttings, three plants will not grow together and produce even plants. Either one plant takes hold before the other two, or vise versa. As you can see, this affects both vegetative growth (left) and flowering (right).
This has happened each time I have placed three plants in a pot. Two have grown together. And they have ALWAYS grown together, whether larger or smaller than the third plant.
However, when I placed more than three rooted cuttings in a pot, multi-planting has worked, with all plants of similar size growing together. Strange.
The other strange thing is that, in the former case, although all three plants started at similar size, rooting occurred at differing times, thereby making the two groups uneven. i.e. for some reason one or two plants just would not root as quickly.
I suppose the obvious cause could be plants spaced too far apart. But I don't think it's as simple as this. Mysteries. Mysteries.
22 July 2011
Signs Of Over-Watering Triphylla Fuchsia
 The yellowing leaf tips of this triphylla fuchsia are a sure indication something is wrong. Because they have appeared following torrential rain, it is likely to be over-watering. Check the roots.
 Sure enough, this reveals poor growth at the base of the pot and patches of brown dying roots - a sure sign of over-watering. The compost is still dark and soggy.
REMEDY
Good job the weather has been cool, or damage could have been much worse. Had browning become so bad that the roots had begun to smell, then replacement of the bottom compost would be necessary. However, because we have tackled the problem early, just drying out on a paper towel, then replacing into pot, should sort things. It will not remove the yellowing, but new leaves should be fine. New roots will soon grow into the damaged areas.
PREVENTION
Adding more perlite (and even grit) to the compost (25%) might have prevented the problem by allowing better drainage and aeration. Protecting the plants by covering the foliage with clear polythene bags, as outlined last year, is also a great help.
Rooting Geraniums In Perlite And Water
ROOTING IN PERLITE
 It took me years to get around to using perlite on a regular basis. But it really is an excellent product. Just look at the roots on this woody geranium cutting. Kind of speaks for itself, doesn't it?
Because it is inert, and therefore contains no nutrients:
Cut stem just below a leaf node, then remove bracts. Insert it about an inch (2.5cm) into perlite and water, so water is just touching its base. Leave until roots appear, ensuring container does not run dry.
After trimming an old plant, I place about 5 cuttings into a small cup of perlite, fill to top with water, then just leave until roots are visible.
ROOTING IN WATER
 If you haven't got perlite, don't worry. Woody stems can also be rooted in plain water. But best to sterilize this in a microwave first (don't forget to let it cool before inserting cuttings). I haven't found this method as reliable as perlite, but it's still quite effective.
 It took me years to get around to using perlite on a regular basis. But it really is an excellent product. Just look at the roots on this woody geranium cutting. Kind of speaks for itself, doesn't it?
Because it is inert, and therefore contains no nutrients:
- New roots quickly proliferate in an attempt to reach a food source. This also happens to some extent with potting compost, which only has restricted nutrients.
- Woody stems can be softened without rotting. So perlite is ideal for semi-ripe and ripe cuttings.
Cut stem just below a leaf node, then remove bracts. Insert it about an inch (2.5cm) into perlite and water, so water is just touching its base. Leave until roots appear, ensuring container does not run dry.
After trimming an old plant, I place about 5 cuttings into a small cup of perlite, fill to top with water, then just leave until roots are visible.
ROOTING IN WATER
 If you haven't got perlite, don't worry. Woody stems can also be rooted in plain water. But best to sterilize this in a microwave first (don't forget to let it cool before inserting cuttings). I haven't found this method as reliable as perlite, but it's still quite effective.
15 July 2011
Shading Plastic Cups Seems To Improve Growth
 It's been a poor year for fuchsias as far as I'm concerned. They just haven't grown. At least not for long periods. Then they have. Fits and starts the whole time. And the growth spurts seem to have coincided with warmer weather. This is strange, since fuchsias grow well in cool conditions (about 10 deg C (50 deg F)).
I had this great idea to grow cuttings in 200ml plastic cups because, being deep with low surface area, they seemed to offer great potential. But their greatest feature was that I could actually see the roots growing and how the plants were using water in the compost. It all seemed so ideal, just as lots of my ideas do at the time.
Alas, things did not turn out as planned. Whilst growing well in early spring, they suddenly stopped and hardly moved at all. After deducing this was because the compost was getting too warm in the strengthening sun, I popped the cup into a 3.5 inch plant pot to keep it cool. And guess what? They started growing.
Furthermore, I have also noticed that cuttings rooted in the centre of a perlite cup do so more quickly than those around the edge. This time I convinced myself it was somehow cooler in centre - another act of near lunacy when seen in the clear light of day.
Anyway, I read an article in the 'Science Daily Blog' last week (first published in December, 2008) which outlined that plant roots have a sensing mechanism to detect UV-B light levels. They then send signals which cause the plant to adjust its normal growth appropriately. I'm not sure exactly how this works, or in what way growth is adjusted. But it could nevertheless offer an explanation for fuchsia cutting growth: Perhaps it was the increased light intensity, not the temperature, which caused growth to slow down in both the compost and in the perlite. Still not sure, though. It could just as well be 'something in the air'.
Troubleshooting Furry Mould On Fuchsia Stem
 This furry mould on a ripe (woody) fuchsia stem is caused by Botrytis, a pathogenic fungus. Botrytis is a problem with fuchsias in warm muggy weather and in cold damp, still air. I spotted this yesterday and sprayed with 'Systhane' (myclobutanil). Doesn't look like it's having much effect.
If left alone, the branches die back one by one, until the fungus has destroyed the whole plant. If caught early enough, it can sometimes be cut out. However, it is often too near to the base of the plant (usually on the main stem) for this type of control.
It often starts from old decaying plant material left lying on the surface of the compost, then travels across the compost to the main stem of the plant. It is also often found at the point where a branch has been cut back and bleeding has occurred, leaving sugary sap on the stem around the wound. This is ideal food for the fungus.
Cuttings in too wet compost can also suffer due to the organic matter in the compost, which feeds the fungus. Best to use sterile perlite and water at this time of year.
PREVENTION
It seems this disease can only be contained by preventative measures applied BEFORE the fungus penetrates the plant tissue. i.e. only CONTACT fungicides and husbandry techniques are effective.
- Myclobutanil (a systemic fungicide) does seem to work on botrytis, but as a PREVENTATIVE only. Spraying it on the foliage and compost surface BEFORE ATTACK will offer resistance, just as a contact fungicide will do. So will a drop of two of bleach (chlorine) per litre of water used in the same way. This prevents the spores from germinating. I tried watering the pots with chlorinated water last year but, at the concentration used, it was only successful on older, established plants.
- Keeping the foliage and compost surface DRY is most effective. Should watering be necessary (and it often won't be), it can be done from the bottom by standing the pots in a saucer of water for about 20 minutes.
- Do not cut back stems too soon after watering. Best if this can be done when plant is near wilting point, just before watering (allow wound to heal first!).
- All dead leaves and other debris should be removed as soon as possible, before they become infected.
- Ventillation is useful when plants are inside, especially in winter. But botrytis also affects plants outside in the summer months.
8 July 2011
Preventing Tuberous Begonia Stems Breaking
Tuberous begonia stems can be extremely brittle and easily break off where they join the tubers, especially when knocked or rocked by high winds. Discreet staking gives support and helps prevent this.
 Take care when inserting the cane that you do not damage the tuber. I usually insert them at an angle, so that the base is well clear of the side of the tuber. The stems can then be tied quite loosely (though with a slight tension on the stem), allowing room for stem thickening. As the plants grow, either insert more stakes as necessary, or replace with longer ones.
Feeds too high in nitrogen gives long growth, making the foliage top-heavy. Using high potash feed will both harden the tissues and produce shorter growth. It will also help flower colour and numbers. You don't need much - just one or two feeds will do. Tomato feed is high potash. But I always use 'Phostrogen' with every feed. However, although this produces wonderful plants, they still need staking, but not so much.
MAKE A SHOOT TIP CUTTING FROM THE OLD STEM
Provided you get to the broken stem in time, you can make a shoot tip cutting as shown in earlier posts, either using compost or perlite and water. Cut stem under water (to prevent air bubbles) about 6mm (1/4 inch) beneath a node. Then leave in water for about 4 hours. Some growers actually root in water, though I have never tried this - except for perlite and water, which seems to work well and was outlined recently.
The problem with begonias is that they only grow very slowly. So best to remove all flower buds on new plant, to give the new tuber as much chance as possible to develop before winter. I would again use 'Phostrogen' to produce good growth of both leaf and tuber.
 Take care when inserting the cane that you do not damage the tuber. I usually insert them at an angle, so that the base is well clear of the side of the tuber. The stems can then be tied quite loosely (though with a slight tension on the stem), allowing room for stem thickening. As the plants grow, either insert more stakes as necessary, or replace with longer ones.
Feeds too high in nitrogen gives long growth, making the foliage top-heavy. Using high potash feed will both harden the tissues and produce shorter growth. It will also help flower colour and numbers. You don't need much - just one or two feeds will do. Tomato feed is high potash. But I always use 'Phostrogen' with every feed. However, although this produces wonderful plants, they still need staking, but not so much.
MAKE A SHOOT TIP CUTTING FROM THE OLD STEM
Provided you get to the broken stem in time, you can make a shoot tip cutting as shown in earlier posts, either using compost or perlite and water. Cut stem under water (to prevent air bubbles) about 6mm (1/4 inch) beneath a node. Then leave in water for about 4 hours. Some growers actually root in water, though I have never tried this - except for perlite and water, which seems to work well and was outlined recently.
The problem with begonias is that they only grow very slowly. So best to remove all flower buds on new plant, to give the new tuber as much chance as possible to develop before winter. I would again use 'Phostrogen' to produce good growth of both leaf and tuber.
24 June 2011
Rooting Tuberous Begonia Cutting In Perlite
Perlite, an inert, porous, volcanic rock material, is excellent for rooting cuttings without a propagator. Its porosity and lack of nutrients keep cuttings damp and airy, and help them resist rotting.
TAKING THE CUTTING
 Select a healthy young stem with one medium-sized leaf (about 4 to 5mm (2 inches)); also including a smaller, opening leaf bud.
Cut stem with clean sharp knife about 5mm (3/8inch) below base of small bud
 Note: this photo taken after rooting; as you can see, small leaf has grown somewhat.
 This cutting rooted after 24 days. It would have been better left another week. But placed it in damp multi-purpose and kept light and cool.
* Rooting powder not necessary
See also: 'What Is A Semi-Ripe Cutting?'
TAKING THE CUTTING
 Select a healthy young stem with one medium-sized leaf (about 4 to 5mm (2 inches)); also including a smaller, opening leaf bud.
Cut stem with clean sharp knife about 5mm (3/8inch) below base of small bud
 Note: this photo taken after rooting; as you can see, small leaf has grown somewhat.
- Fill container with perlite and water so all perlite it wetted
- Trim loose bracts from base of cutting and insert into perlite* until base of lower leaf is below surface (be very careful not to damage base of stem). Base of lower leaf will be in contact with top of perlite.
- Pour out water until level is just beneath stem (ensures perlite damp but stem not actually immersed).
- Ensure damp perlite is contacting stem all way around.
- No need to cover.
- Place in a cool light spot, out of direct sunlight.
- Ensure container does not dry out too much.
- After 21 days check rooting by giving a gentle tug - if rooted, will be firmly set into perlite.
- Carefully remove. If perlite sticks to root hairs, leave it alone; it will give plant a better start.
 This cutting rooted after 24 days. It would have been better left another week. But placed it in damp multi-purpose and kept light and cool.
* Rooting powder not necessary
See also: 'What Is A Semi-Ripe Cutting?'
3 June 2011
Fixing A Broken Lupin Stem Complete With Basal Buds
USE A BASAL CUTTING
Stems can easily be broken off plants next to busy paths. Found a lupin branch on ground last week. Because it had several basal buds (see bottom left) and some base plate, I placed it in about an inch (2.5 cm) of perlite and water. Never done this before at this time of year (May); it's usually done in early spring; so may or may not work. About a week later, new shoots coming up from basal buds. Wasn't sure if they would or not, as buds could have been dormant. Need keeping in good light now till roots are evident.
NOT ONLY LEAVES CONTAIN CHLOROPHYLL
 Note there are no leaves (normal basal cuttings contain some basal plate complete with buds, stem and two or three leaves) to provide food by photosynthesis to support the growth process. However, there is about 15 cm (6 inches) of green stem - green because it contains the pigment chlorophyll - so this will supply the food. i.e. Green stems (or any green plant tissue) can photosynthesise, as well as leaves. Not everyone understands this.
 I haven't got a photo of the original broken stem. And I don't want to disturb the cutting till it's rooted. So here is the base of another stem, complete with basal bud (marked red) and base plate material (marked pink). It does look rather like a heel cutting, produced when a woody shoot tears away from a shrub or tree.
ROOTING MATERIAL
Although I have used perlite and water, moist soil or potting compost (either multi-purpose or special potting compost) can be used, especially if perlite or sand is added to aid aeration. I would insert the cutting near the edge (not too near or it will dry out) of the pot, with its bud(s) just beneath the surface; then carefully keep moist (I usually dribble water down the stem, so the base is kept damp after the excess is taken up by the rest of the compost (because it is drier)).
ROOTING STEMS IN WATER
 Many stem bases will also root in water. After leaving base of stem above in a cup or beaker of water (level shown by green arrow) for fift
 een days, new shoots (pink) and a new root (red) have developed. Water-rooted cuttings can be more brittle than perlite-rooted ones, but young plant can now be carefully transferred to moist soil or compost, so soil is at same level as water. Imperative to keep out of direct sunlight.
Fixing A Broken Branch Or Stem
Accidents happen all the time in the garden, nearly always to our favourite plants. Why this should be, I don't know. Another mystery. Anyway, enough said. How do we fix a stem if it breaks? It depends.
WOODY PERENNIALS
Branches rarely break away completely from the parent. They usually hang in limbo looking untidy, leaving the dilemma as to whether to bind it back in position or remove it completely and go from there. Some advice:
BIND IT BACK
Broken limbs, not completely severed, are rather like broken human limbs. Setting and binding them back into position early enough will usually work well. Of course, we don't use plaster of Paris on plant stems; we use garden twine, or wire - or even a pin or two - even splints, if necessary. The binding must be tight enough to bring the surfaces back into contact and to provide firm support. This is essential. Remember to remove binding once healing has occurred, or lateral secondary growth (stem thickening) will be impaired.
PROPAGATE NEW STOCK
Not so easy with woody tissue, but new plants can be propagated by layering (not covered yet) or by taking hard wood cuttings, or semi-ripe (even soft wood, in some cases) cuttings. It's a matter of using whatever method you are familiar with that works. These either are or will be dealt with elsewhere (use search box).
Because there is no secondary thickening (I'll be telling you about this later), these don't heal like woody plants. So they can't be bound and left. So must propagate new stock. Fortunately there are several options:
Surprising how often pushing a shoot tip into garden soil produces results (e.g. geraniums, fuchsias, dahlias). It's always worth a try. Works very well on broken branches torn away from stem and containing a heel (base of stem includes a little bark from main stem where it was torn away).
Perlite and Water
Gives results for most occasions. Very useful for semi-ripe tissue (starting to turn brown). Seems to work with almost anything. This was described last autumn when used to propagate flowering fuchsias.
Water
Plain water often gives results, especially on woody tissue. It can give brittle roots which are slow to establish when later potted into soil or compost. We used this last year to propagate a triphylla fuchsia. It can even be used on geraniums.
Compost
Although potting compost might be best, just ordinary multi-purpose seems to work quite well, especially if some sand or perlite is added to give aeration. Though, until recently, I have always used plain compost. This method has been described several times, especially propagating dahlias and fuchsias.
- woody perennials (trees, shrubs e.g. forsythia)
- tender perennials (will grow all year but frost-susceptible e.g. geraniums)
- herbaceous perennials (everything else which comes up from roots year after year e.g. lupins, delphiniums)
WOODY PERENNIALS
Branches rarely break away completely from the parent. They usually hang in limbo looking untidy, leaving the dilemma as to whether to bind it back in position or remove it completely and go from there. Some advice:
BIND IT BACK
Broken limbs, not completely severed, are rather like broken human limbs. Setting and binding them back into position early enough will usually work well. Of course, we don't use plaster of Paris on plant stems; we use garden twine, or wire - or even a pin or two - even splints, if necessary. The binding must be tight enough to bring the surfaces back into contact and to provide firm support. This is essential. Remember to remove binding once healing has occurred, or lateral secondary growth (stem thickening) will be impaired.
PROPAGATE NEW STOCK
Not so easy with woody tissue, but new plants can be propagated by layering (not covered yet) or by taking hard wood cuttings, or semi-ripe (even soft wood, in some cases) cuttings. It's a matter of using whatever method you are familiar with that works. These either are or will be dealt with elsewhere (use search box).
TENDER AND HERBACEOUS PERENNIALS
Because there is no secondary thickening (I'll be telling you about this later), these don't heal like woody plants. So they can't be bound and left. So must propagate new stock. Fortunately there are several options:
- shoot tip cuttings (used for tips of non-flowering stems (sometimes will work if flowering))
- basal cuttings (used if stem broken away from base (needs a bit of base plate with dormant buds)
- seeds (used when too late to propagate by other methods. problem that they might not come true, if from hybrid stock)
ROOTING MATERIAL
Garden SoilSurprising how often pushing a shoot tip into garden soil produces results (e.g. geraniums, fuchsias, dahlias). It's always worth a try. Works very well on broken branches torn away from stem and containing a heel (base of stem includes a little bark from main stem where it was torn away).
Perlite and Water
Gives results for most occasions. Very useful for semi-ripe tissue (starting to turn brown). Seems to work with almost anything. This was described last autumn when used to propagate flowering fuchsias.
Water
Plain water often gives results, especially on woody tissue. It can give brittle roots which are slow to establish when later potted into soil or compost. We used this last year to propagate a triphylla fuchsia. It can even be used on geraniums.
Compost
Although potting compost might be best, just ordinary multi-purpose seems to work quite well, especially if some sand or perlite is added to give aeration. Though, until recently, I have always used plain compost. This method has been described several times, especially propagating dahlias and fuchsias.
MORE ADVICE
This post is very basic. Best to research propagation of your particular plant. However, for what it's worth:- Always use as sharp a knife as possible (preferably a razor blade or craft knife) to cut a shoot tip cutting below a leaf node. A clean cut helps prevent cell damage, which induces rotting.
- Hormone rooting powder is often useful, though not usually necessary
- Keep cuttings in good light, out of sun and not too hot
29 April 2011
Taking A Begonia Shoot Tip Cutting
Now is a good time to take begonia shoot tip cuttings. The plants are still young and growing quickly, the air temperatures warmer, and there's still enough time for them to grow into nice plants.
 This is a plant we started early in the heated propagator. Removing it, once started, and placing in cooler conditions has helped it grow strong and healthy. If we want good-sized flowers, it's best to reduce the number of shoots to two or three.
 After removing a shoot tip about 5 cm (2 inches) long, carefully tear off the scales and cut the leaf to a size which will fit within the confines of a 3 to 3.5 inch pot (do not actually remove any leaves). This is important, since we are going to cover the pot with a plastic freezer bag and we don't want any leaf to touch the plastic.
The best time to take the cutting is first thing in the morning, preferably after the plant has been watered the previous night. If you cannot do this, stand the severed cutting in water for a couple of hours or so.
The growing point of the cutting is the smaller bud-like leaf (pink). Many growers cut just below this, but as you know, I prefer to have more leaf area, because I feel this will help it root quicker.
I am therefore cutting one node lower down and leaving the lower leaf on (it would normally be removed). So, to be clear, this cutting is actually one node lower down the stem than it need be and has an extra leaf.
After dipping in hormone rooting powder and knocking off the excess, bury the cut end in multi-purpose compost (you can use added perlite or grit, if you wish) from which drops of water just appear between the fingers when squeezed, but retract into the compost when released - water should not actually run down the fingers.
 Push into the compost until the small bud (containing the apical meristem) is almost completely buried (it can also be buried). The base of the stem should be in contact with the compost.
Dribble some water around the stem.
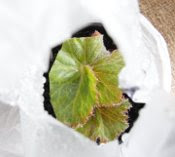
Cover with a freezer bag, into which a 2.5 cm (1 inch) 'V' has been cut, top centre. This is also very important; it helps avoid rotting.
Place in a well lit spot, out of direct sunlight.
If it starts to dry too much, dribble some more water, through the hole, around the stem.
Watch for excess condensation on the bag in the mornings. If large drops appear, open the hole further till there is no more than a mist. Also ensure that it's not too hot (preferably about 18 to 19 degrees C). This will help avoid disease.
The hole can gradually be torn further open after the first week, so that the top if fully open after about 14 days.
It should root in about 21 days, and should have started to grow.
 This is a plant we started early in the heated propagator. Removing it, once started, and placing in cooler conditions has helped it grow strong and healthy. If we want good-sized flowers, it's best to reduce the number of shoots to two or three.
 After removing a shoot tip about 5 cm (2 inches) long, carefully tear off the scales and cut the leaf to a size which will fit within the confines of a 3 to 3.5 inch pot (do not actually remove any leaves). This is important, since we are going to cover the pot with a plastic freezer bag and we don't want any leaf to touch the plastic.
The best time to take the cutting is first thing in the morning, preferably after the plant has been watered the previous night. If you cannot do this, stand the severed cutting in water for a couple of hours or so.
The growing point of the cutting is the smaller bud-like leaf (pink). Many growers cut just below this, but as you know, I prefer to have more leaf area, because I feel this will help it root quicker.
I am therefore cutting one node lower down and leaving the lower leaf on (it would normally be removed). So, to be clear, this cutting is actually one node lower down the stem than it need be and has an extra leaf.
After dipping in hormone rooting powder and knocking off the excess, bury the cut end in multi-purpose compost (you can use added perlite or grit, if you wish) from which drops of water just appear between the fingers when squeezed, but retract into the compost when released - water should not actually run down the fingers.
 Push into the compost until the small bud (containing the apical meristem) is almost completely buried (it can also be buried). The base of the stem should be in contact with the compost.
Dribble some water around the stem.

Cover with a freezer bag, into which a 2.5 cm (1 inch) 'V' has been cut, top centre. This is also very important; it helps avoid rotting.
Place in a well lit spot, out of direct sunlight.
If it starts to dry too much, dribble some more water, through the hole, around the stem.
Watch for excess condensation on the bag in the mornings. If large drops appear, open the hole further till there is no more than a mist. Also ensure that it's not too hot (preferably about 18 to 19 degrees C). This will help avoid disease.
The hole can gradually be torn further open after the first week, so that the top if fully open after about 14 days.
It should root in about 21 days, and should have started to grow.
1 April 2011
Coriander Re-Pot Increases Growth Rate And Leaf Size
The time has come to give the coriander roots more space - time for a re-pot (see last year's post). Although this is not absolutely necessary, a larger root run will vastly increase both growth rate and leaf size. And we need to get a move on now so we can cut the crop before it goes to seed, as it does in early summer.  If you want to keep a plant growing, keep the roots growing. Once this stops, growth stops. As you can see, the roots are beginning to fill the pot, so growth will be slowing down. Most growers re-pot in half inch stages, saying this helps fill the pot better. They also use additions to the compost, such as grit or perlite, to help avoid over-watering. I have never done any of this - I have always used plain multi-purpose compost. Provided it is not compressed too much, and provided it is allowed to dry out adequately between waterings, there should be no problems. I am not saying there are no benefits to compost additions - there will be. But growing, to me, is about keeping things simple and cheap. Re-potting can be done as per last year. A frost-free spot in the garden would also be ideal. If you want to cut costs, try mixing about half compost, half garden soil. Because of the severed root, I am not re-potting this pot. The severed root seems to be still alive, and the new root buds formed on the other half are starting to grow.
 If you want to keep a plant growing, keep the roots growing. Once this stops, growth stops. As you can see, the roots are beginning to fill the pot, so growth will be slowing down. Most growers re-pot in half inch stages, saying this helps fill the pot better. They also use additions to the compost, such as grit or perlite, to help avoid over-watering. I have never done any of this - I have always used plain multi-purpose compost. Provided it is not compressed too much, and provided it is allowed to dry out adequately between waterings, there should be no problems. I am not saying there are no benefits to compost additions - there will be. But growing, to me, is about keeping things simple and cheap. Re-potting can be done as per last year. A frost-free spot in the garden would also be ideal. If you want to cut costs, try mixing about half compost, half garden soil. Because of the severed root, I am not re-potting this pot. The severed root seems to be still alive, and the new root buds formed on the other half are starting to grow.
17 March 2011
Re-Potting Root-Bound? Geranium (Pelargonium)
Been recently getting a lot of limp, floppy, yellowing leaves after watering the geraniums in the house. Although they recover, and also produce large flowers, the plants are not as attractive as they could be. The yellow leaves fall off, leaving bare bases to the stems. Plants flower best when they are root-bound. But I am wondering if this has gone too far. Time to check.
 The pot is getting rather full of roots. And there is not much evidence of new growth; the fine feeder roots look old and tired - I don't think they can sustain the plant for another full season, not as they are.
Now is a reasonable time to re-pot the plant (spring). I know there are buds about to break open. But they haven't yet done so. And the plant may never stop flowering for the rest of the season. Growing is always a compromise.

 Gently brushed away old roots and compost to reveal the inner core and the main root system. Careful not to damage the new fine white roots growing out of the old stuff. This reduced root ball by about two thirds (left). Stood this in water for a few minutes. A drink will help sustain the plant till it can establish itself.
Until now, I have always used plain multi-purpose compost. Time for a change. Used a slightly damp multi-purpose:sand:perlite medium (same one as used on fuchsias), mixed in the ratio of 6:1:1. Carefully coaxed it into spaces around roots with a finger, tapping pot on floor and bashing sides as I went along. Then gently firmed, to give plant support.
I only did one of the two plants. So it will be interesting to see how the other one gets on.
The only thing that worries me about all this is that the over-watering symptoms seem to have occurred since re-commencing feeding after the winter, and since the weather started to warm up. This could be an indication of bacterial or fungal disease. But it seems unlikely. Let's see how things go for now. Time will tell. . ..
 The pot is getting rather full of roots. And there is not much evidence of new growth; the fine feeder roots look old and tired - I don't think they can sustain the plant for another full season, not as they are.
Now is a reasonable time to re-pot the plant (spring). I know there are buds about to break open. But they haven't yet done so. And the plant may never stop flowering for the rest of the season. Growing is always a compromise.
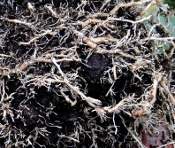
 Gently brushed away old roots and compost to reveal the inner core and the main root system. Careful not to damage the new fine white roots growing out of the old stuff. This reduced root ball by about two thirds (left). Stood this in water for a few minutes. A drink will help sustain the plant till it can establish itself.
Until now, I have always used plain multi-purpose compost. Time for a change. Used a slightly damp multi-purpose:sand:perlite medium (same one as used on fuchsias), mixed in the ratio of 6:1:1. Carefully coaxed it into spaces around roots with a finger, tapping pot on floor and bashing sides as I went along. Then gently firmed, to give plant support.
I only did one of the two plants. So it will be interesting to see how the other one gets on.
The only thing that worries me about all this is that the over-watering symptoms seem to have occurred since re-commencing feeding after the winter, and since the weather started to warm up. This could be an indication of bacterial or fungal disease. But it seems unlikely. Let's see how things go for now. Time will tell. . ..
3 March 2011
Fuchsias Seem To Root Well In My Soil: Should I Add Perlite?
 Sorting out the fuchsia cuttings taken last autumn, I came across these lovely roots on a soil-based cutting from last July. As you can see, there is lots of new white growth. I said last year that fuchsias seem to root well in my soil (unsterilized). I suppose this is because it is quite light (gritty), and not too acid.
I really like the look of these roots. And watering doesn't seem to be a problem with soil in the autumn. I didn't get problems with botrytis, as I did with soil-less compost - even with added perlite. Garden soil contains anti-pathogens which combat lots of plant fungal diseases.
The only problem is that it can tend to puddle, thereby preventing air getting to the roots. Perlite might solve this. It would help hold moisture whilst keeping the surface open.
But there is also the problem of unwanted pests with unsterilized soil.
10 February 2011
How To Germinate Seeds More Successfully
Strange how seeds germinate and grow in the wild as if by magic, even in seemingly impossible conditions, yet not when our two penneth is involved. And it's not just because we're growing them inside. If ever you have spilled a few grass seeds between the flags whilst seeding a lawn, you will known what I am talkling about. Why is it that grass seeds are so difficult to grow on a lawn (at least for me), where one would assume they have everything they need, whilst they never fail to grow between the flags, devoid of water and soil? I don't know - another one of those growing mysteries. But seriously, how can we improve our competence in this area? How can we germinate seeds more successfully?
UNDERSTANDING THE PROCESS
We have already looked at the structure of seeds and have seen that they are very-much-alive embryo plants complete with root, stem and leaf; yet amazingly these same seeds are able to maintain themselves in this state for long periods of time. How do they do this, and why?
SURVIVING THE WORST
Seeds are the way the Gymnosperms and Angiosperms (flowering plants) increase their presence whilst surviving conditions too severe and/or too restricted for normal growth. These might be climatic such as drought or frost; or they might be physical such as fire or flood; or they might involve other factors such as light quality, or soil condition, or competition.
Over millions of years, plants have adapted to survive the worst (and also to anticipate the worst, but that's another story). They have squared the circle by creating a form - the seed - in which they are very much alive yet apparently dead (didn't I always say they were clever?). The seed represents the DORMANT stage of a plant's life cycle. This is how they do it.
A HARD COAT AND A PARCHED THROAT
As seeds mature they lose water and develop a hard coat.
Drying down to about 14% greatly reduces cell respiration: that process which is essential to all life. And this allows the embryo to use less of the food store from the seed, thus increasing its survival potential.
The seed coat keeps out water and air, to maintain the dormant state. Often hormones (growth substances) are also involved. Abscisic acid (ABA) both induces and maintains dormancy. Another hormone, gibberellic acid, works the other way; it is often used commercially to break dormancy.
OTHER PROCESSES
It is hard to believe that a seemingly dead and insignificant seed can be constantly monitoring the light in terms of intensity, colour and duration. Yet it does (See 'Should We Dig In The Dark?'). Furthermore, it also monitors the level of carbon dioxide around it . . . And also the amount and type of nutrients . . . soil acidity . . . And . . so on. Seeds really are deceivingly complex little critters.
WHY DOES IT DO ALL THIS?
All the above is used by the seed to begin its growth journey from the right position, in the right soil, at the right time of year . . . etc . . . to give it the best chance of survival. After all, it only gets one chance. If it messes up, that's it: instant death; that's why there are so many seeds. We can learn a lot here: If we become familiar with a seed's natural environment, we can usually be successful by emulating them. This is the secret to propagating difficult seeds.
READ THE PACKET
However, whilst plant dormancy is a fascinating study, it is far too diverse and complex to go into here. Fortunately, as mere ordinary growers we only need to know a few essentials. This is because most of the seeds we sow in our pots, containers, and even in our gardens, will come out of their dormant state and commence active growth simply by supplying water, air and the correct amount of warmth. Oh, and I should add another factor: light.
And, before I forget, there is something which is vital to success, something which no one ever seems to consider mentioning: READING THE PACKET and FOLLOWING ITS INSTRUCTIONS - to the letter, if possible. This way, any little quirks the seeds might have will be catered for. However, having said this, it is surprising how much packets differ in instructions, even over quite significant things. For example, I was instructed (by the packet) to cover the basil seeds last year, only to discover from a reliable source that they should not be covered, just pushed into the compost (at last, an excuse!)
THE GERMINATION PROCESS IN DICOTS
As the dry seed imbibes water, the enzymes within it wake up and begin to work upon the food stores (oils, starches or proteins) and mobilise them to produce fuel for new growth. Rapid swelling occurs at this stage and the contents of the seed burst through the seed coat, starting with the root (the radicle). Using the food reserves, it is essential to access and secure a water supply.
After this, the shoot (plumule) stretches upward, often dragging the cotyledons (which now have taken the form of seed leave(s)) behind it. Arching and dragging in this way prevents damage to the tender new leaves.
The new plant uses phytochrome to determine light intensity. If it is too low (as it would be if surrounded by other plants), the hormone gibberellic acid is produced which induces stretching (etiolation) until sufficient light is available. The leaves remain small at this stage to waste as little food as possible, and only develop further once sufficient light is reached. At this time, the leaves begin to photosynthesise and produce food to fuel further growth. It is essential this stage is reached as soon as possible.
NOW . . . AT LAST . . . HOW TO SOW SEEDS
THE PERFECT SCENARIO
As growers, we need to think of ways to supply enough water at sowing for the seeds to imbibe and start growing, then provide an ideal environment in terms of water/air mix, temperature, light, and nutrient levels.
We are often told to soak trays of compost with water AFTER sowing seeds. Whilst I cannot say this is wrong, it is nevertheless where most novices go wrong. And the reasons are obvious:
From what we have just seen, soaking only satisfies the first part of seed growth - that of imbibing water. It is only necessary to begin the process. Furthermore, it tends to disturb the freshly-sown seeds too much, leaving some exposed and others at different depths, and therefore at differing light and carbon dioxide concentrations. Not a good start.
I would advise to soak, then drain the compost, but BEFORE the seeds are sown. After levelling and light tamping, the seeds can then be sown, and covered if necessary (read the packet) with fine dry compost shaken evenly from an empty plant pot, or similar.
As the water gradually soaks down under gravity, it will pull oxygen (vital for growth) into the surface to replace it. Combined with the water lost through evaporation, this will work wonders for the seeds, and in my opinion should be all that is necessary. However, some growers mix their seeds with a fine layer of sharp sand, or perlite or vermiculite. All this helps keep the seeds moist whilst avoiding drowning and thus causing the onset of fungal diseases such as 'pythium' or 'phytophthora' which cause damping off.
It doesn't matter how much water is in the compost BELOW the seeds, since the developing root need not enter it. It can stop growing once reached, then follow the level down as this water is removed.
APPLY NO FURTHER WATER
Clearly, if further water is applied too soon, it will occupy the pore space around the seed and thus remove its vital supply of oxygen.
Most novice growers, not realising any of this, apply water too soon and drown the seeds. For some reason, we have all been conditioned to believe that roots need to be immersed in water. It must be those bean and pea seeds we grew in jam jars at school. No matter. Whatever the cause, we would all do well to read and digest the above. Success with seeds should then be possible.
WHAT ABOUT COVERING?
Here we go again. Can I just say, there is one truth which all growers should have framed and hung above their bed:
DISEASE LOVES EXCESS HUMIDITY.
This is the cause, in some way or other, of almost all plant problems - at least as far as the novice is concerned.
I am a dry grower and avoid covering anything if at all possible, no matter what the gardening books might recommend. Needless to say, after soaking seed compost with water, as described earlier, I do not cover it (many growers cover with a sheet of glass). And I am pleased to say that the technique outlined has been virtually 100% successful. I like to see the top of the compost changing colour. That way I know it is still damp enough underneath but airy enough on the surface.
I know I am using a propagator at the moment (to propagate begonias), but that is only because it was too early to grow most things. You will find more success with seeds if you grow them in natural conditions at a natural time of year. Propagators can be fine, but they also can provide too much humidity and, surprisingly, too much heat. They can also provide a heat which is too even (some plants need a different night and day temperature of at least 5 deg C). Study the germination temperatures on the back of the packet carefully. You will be amazed at how many plants like it cool. Don't be in a hurry. You can't force plants.
COMPOST MIX
Many growers either buy in special seed compost, or mix coarse sand or perlite or vermiculite into multipurpose. This is a good practice, since it helps aeration and also reduces the nutrient level.
However, this blog is about GROWING AT LEAST COST. It is therefore my intention to show you how to achieve good results with what you have. I have no axe to grind. And you can be sure that I will not look down on you if, for example, you prefer to use your own soil, free from the garden. Indeed, if you look at last year's posts, you will see I did that on several occasions (I am even now using last year's compost and last year's seeds). Even so, I would - for now at least - recommend a good brand of fresh, multi-purpose compost, which we can use for all purposes.
UNDERSTANDING THE PROCESS
We have already looked at the structure of seeds and have seen that they are very-much-alive embryo plants complete with root, stem and leaf; yet amazingly these same seeds are able to maintain themselves in this state for long periods of time. How do they do this, and why?
SURVIVING THE WORST
Seeds are the way the Gymnosperms and Angiosperms (flowering plants) increase their presence whilst surviving conditions too severe and/or too restricted for normal growth. These might be climatic such as drought or frost; or they might be physical such as fire or flood; or they might involve other factors such as light quality, or soil condition, or competition.
Over millions of years, plants have adapted to survive the worst (and also to anticipate the worst, but that's another story). They have squared the circle by creating a form - the seed - in which they are very much alive yet apparently dead (didn't I always say they were clever?). The seed represents the DORMANT stage of a plant's life cycle. This is how they do it.
A HARD COAT AND A PARCHED THROAT
As seeds mature they lose water and develop a hard coat.
Drying down to about 14% greatly reduces cell respiration: that process which is essential to all life. And this allows the embryo to use less of the food store from the seed, thus increasing its survival potential.
The seed coat keeps out water and air, to maintain the dormant state. Often hormones (growth substances) are also involved. Abscisic acid (ABA) both induces and maintains dormancy. Another hormone, gibberellic acid, works the other way; it is often used commercially to break dormancy.
OTHER PROCESSES
It is hard to believe that a seemingly dead and insignificant seed can be constantly monitoring the light in terms of intensity, colour and duration. Yet it does (See 'Should We Dig In The Dark?'). Furthermore, it also monitors the level of carbon dioxide around it . . . And also the amount and type of nutrients . . . soil acidity . . . And . . so on. Seeds really are deceivingly complex little critters.
WHY DOES IT DO ALL THIS?
All the above is used by the seed to begin its growth journey from the right position, in the right soil, at the right time of year . . . etc . . . to give it the best chance of survival. After all, it only gets one chance. If it messes up, that's it: instant death; that's why there are so many seeds. We can learn a lot here: If we become familiar with a seed's natural environment, we can usually be successful by emulating them. This is the secret to propagating difficult seeds.
READ THE PACKET
However, whilst plant dormancy is a fascinating study, it is far too diverse and complex to go into here. Fortunately, as mere ordinary growers we only need to know a few essentials. This is because most of the seeds we sow in our pots, containers, and even in our gardens, will come out of their dormant state and commence active growth simply by supplying water, air and the correct amount of warmth. Oh, and I should add another factor: light.
And, before I forget, there is something which is vital to success, something which no one ever seems to consider mentioning: READING THE PACKET and FOLLOWING ITS INSTRUCTIONS - to the letter, if possible. This way, any little quirks the seeds might have will be catered for. However, having said this, it is surprising how much packets differ in instructions, even over quite significant things. For example, I was instructed (by the packet) to cover the basil seeds last year, only to discover from a reliable source that they should not be covered, just pushed into the compost (at last, an excuse!)
THE GERMINATION PROCESS IN DICOTS
As the dry seed imbibes water, the enzymes within it wake up and begin to work upon the food stores (oils, starches or proteins) and mobilise them to produce fuel for new growth. Rapid swelling occurs at this stage and the contents of the seed burst through the seed coat, starting with the root (the radicle). Using the food reserves, it is essential to access and secure a water supply.
After this, the shoot (plumule) stretches upward, often dragging the cotyledons (which now have taken the form of seed leave(s)) behind it. Arching and dragging in this way prevents damage to the tender new leaves.
The new plant uses phytochrome to determine light intensity. If it is too low (as it would be if surrounded by other plants), the hormone gibberellic acid is produced which induces stretching (etiolation) until sufficient light is available. The leaves remain small at this stage to waste as little food as possible, and only develop further once sufficient light is reached. At this time, the leaves begin to photosynthesise and produce food to fuel further growth. It is essential this stage is reached as soon as possible.
NOW . . . AT LAST . . . HOW TO SOW SEEDS
THE PERFECT SCENARIO
As growers, we need to think of ways to supply enough water at sowing for the seeds to imbibe and start growing, then provide an ideal environment in terms of water/air mix, temperature, light, and nutrient levels.
We are often told to soak trays of compost with water AFTER sowing seeds. Whilst I cannot say this is wrong, it is nevertheless where most novices go wrong. And the reasons are obvious:
From what we have just seen, soaking only satisfies the first part of seed growth - that of imbibing water. It is only necessary to begin the process. Furthermore, it tends to disturb the freshly-sown seeds too much, leaving some exposed and others at different depths, and therefore at differing light and carbon dioxide concentrations. Not a good start.
I would advise to soak, then drain the compost, but BEFORE the seeds are sown. After levelling and light tamping, the seeds can then be sown, and covered if necessary (read the packet) with fine dry compost shaken evenly from an empty plant pot, or similar.
As the water gradually soaks down under gravity, it will pull oxygen (vital for growth) into the surface to replace it. Combined with the water lost through evaporation, this will work wonders for the seeds, and in my opinion should be all that is necessary. However, some growers mix their seeds with a fine layer of sharp sand, or perlite or vermiculite. All this helps keep the seeds moist whilst avoiding drowning and thus causing the onset of fungal diseases such as 'pythium' or 'phytophthora' which cause damping off.
It doesn't matter how much water is in the compost BELOW the seeds, since the developing root need not enter it. It can stop growing once reached, then follow the level down as this water is removed.
APPLY NO FURTHER WATER
Clearly, if further water is applied too soon, it will occupy the pore space around the seed and thus remove its vital supply of oxygen.
Most novice growers, not realising any of this, apply water too soon and drown the seeds. For some reason, we have all been conditioned to believe that roots need to be immersed in water. It must be those bean and pea seeds we grew in jam jars at school. No matter. Whatever the cause, we would all do well to read and digest the above. Success with seeds should then be possible.
WHAT ABOUT COVERING?
Here we go again. Can I just say, there is one truth which all growers should have framed and hung above their bed:
DISEASE LOVES EXCESS HUMIDITY.
This is the cause, in some way or other, of almost all plant problems - at least as far as the novice is concerned.
I am a dry grower and avoid covering anything if at all possible, no matter what the gardening books might recommend. Needless to say, after soaking seed compost with water, as described earlier, I do not cover it (many growers cover with a sheet of glass). And I am pleased to say that the technique outlined has been virtually 100% successful. I like to see the top of the compost changing colour. That way I know it is still damp enough underneath but airy enough on the surface.
I know I am using a propagator at the moment (to propagate begonias), but that is only because it was too early to grow most things. You will find more success with seeds if you grow them in natural conditions at a natural time of year. Propagators can be fine, but they also can provide too much humidity and, surprisingly, too much heat. They can also provide a heat which is too even (some plants need a different night and day temperature of at least 5 deg C). Study the germination temperatures on the back of the packet carefully. You will be amazed at how many plants like it cool. Don't be in a hurry. You can't force plants.
COMPOST MIX
Many growers either buy in special seed compost, or mix coarse sand or perlite or vermiculite into multipurpose. This is a good practice, since it helps aeration and also reduces the nutrient level.
However, this blog is about GROWING AT LEAST COST. It is therefore my intention to show you how to achieve good results with what you have. I have no axe to grind. And you can be sure that I will not look down on you if, for example, you prefer to use your own soil, free from the garden. Indeed, if you look at last year's posts, you will see I did that on several occasions (I am even now using last year's compost and last year's seeds). Even so, I would - for now at least - recommend a good brand of fresh, multi-purpose compost, which we can use for all purposes.
11 November 2010
Taking Geranium Cuttings
 I thought I had published this article in July. Sorry. I've amended it slightly.
Pot geraniums (pelargoniums) are one of the easiest of all plants to propagate from shoot tip cuttings. There is still time to do this if you have a spot which gets some sun. Don't use rooting powder or any form of propagator - Just cut off about 7.5 mm (3 inches) of stem (flowering or non-flowering), carefully tear away the lower leaves and leaf bracts, then push them into slightly moist soil or compost. To avoid disease, use the compost as it comes straight from the bag (add some perlite or sand if you wish); do not add water.
Removing any developing flower buds will speed growth, since more food will be available for structural development. Keep them in good light.
GETTING THEM TO BRANCH BENEATH THE SURFACE
 If you take care not to damage the axillary buds when removing lower leaves and leaf bracts, they can develop into new shoots and push up through the compost as if by magic. This has the effect of keeping the initial branching as low as possible, hence producing a bushier and more attractive plant.
You can then induce further branching by pinching out the shoot tips after every 2 or 3 nodes (places where leaves join stem).
Give the as little water as possible (water from below when necessary, never from above) over winter to avoid disease.
ROOTING IN PERLITE AND WATER
Geraniums will also root very well in perlite and in water. See 'Rooting Geraniums in Perlite and Water'.
See also 'A Cut Below Average' . Click 'Geranium' category to see all geranium posts.
21 October 2010
What is a Semi-Ripe Cutting?
 As plant stems age, they ripen (become harder). The youngest wood, just beneath the shoot tip, is very light and tender; the oldest wood, at the base of the stems, is harder and more woody in colour. Semi-ripe wood is the stuff between the two (in this case, red).
 As far as cuttings are concerned, older wood is more difficult to propagate because it does not root so easily. Whilst some recommend hormone rooting powder, semi-ripe fuchsia cuttings will root without it in perlite kept moist with water. Simply insert about 1.25 cm (half an inch) of the cutting into damp perlite up to the second pair of leaves (make a hole first if necessary).
Keep moist by adding water to the container until it is just beneath the cutting. Roots appear in about two to three weeks at room temperature. Check for these by gently tugging the cutting.
Easy-Water Compost
If you don't like the idea of sterilizing soil in your microwave (and who can blame you?) and you find multi-purpose compost difficult to water, then you can lighten it with perlite/vermiculite. Perlite is especially good, since it is stable and holds on to moisture whilst allowing the compost to breathe.
Perlite/Compost Mix
For something with a little more weight, try:
Perlite/Sharp Sand/Compost Mix
Perlite/Compost Mix
- 1 part perlite
- 3 parts multi-purpose compost
For something with a little more weight, try:
Perlite/Sharp Sand/Compost Mix
- 1 part perlite
- 1 part sharp sand
- 6 parts multi-purpose compost
14 October 2010
Lifting Border Geraniums in Autumn
Although they will stand some slight frost, it is usually wise to be safe and lift border geraniums (pelargoniums) in time.
TREATMENT WITH FUNGICIDE
This is the first time I have ever treated my plants with a fungicide before lifting. I removed all infected leaves, then sprayed the foliage with 'Systhane Fungus Fighter' and allowed it to dry. I am concerned about the fungal leaf spot.
 For clean soil/compost, I usually wash off all soil from roots before re-planting.
Plants can then be left to dry out, or - if light is adequate - can be grown over winter. In this case, I would cut them back by about one third after roots have had a week or two to get established, then make cuttings . Roots can be trimmed, too.
WHAT ABOUT COMPOST?
Multi-purpose compost can be used (especially when perlite or sharp sand (or both) has/have been added). But I have found soil to be the best medium in which to place the roots of over-wintering plants.
TREATMENT WITH FUNGICIDE
This is the first time I have ever treated my plants with a fungicide before lifting. I removed all infected leaves, then sprayed the foliage with 'Systhane Fungus Fighter' and allowed it to dry. I am concerned about the fungal leaf spot.
 For clean soil/compost, I usually wash off all soil from roots before re-planting.
Plants can then be left to dry out, or - if light is adequate - can be grown over winter. In this case, I would cut them back by about one third after roots have had a week or two to get established, then make cuttings . Roots can be trimmed, too.
WHAT ABOUT COMPOST?
Multi-purpose compost can be used (especially when perlite or sharp sand (or both) has/have been added). But I have found soil to be the best medium in which to place the roots of over-wintering plants.
5 October 2010
Semi-Ripe Fuchsia Cuttings Rooted in Perlite
 After three weeks, this cutting is just starting to throw new roots and is ready for pricking out in compost before they get too long.
 Mulit-purpose compost will do on its own. But I have thrown in some perlite (the white objects) to help aeration. This will allow me to compress it as necessary without restricting air passage. Perlite is really good for this. You can buy it in most garden centres.
After spraying lightly with water, the cuttings will develop if left in a light - but not sunny - place.
Subscribe to:
Posts (Atom)