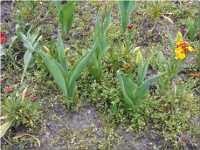
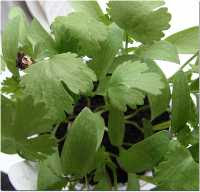
Learning how to water plants to increase growth in pots, container or garden - especially how to water roots and tubers. Specialities: root growth or tuber growth of lawns, fuchsias, geraniums, dahlias and begonias.
29 April 2010
It's Hard Growing
TOUGH LOVE
Unlike the dark green luscious plants you buy from a nursery, plants grown under a harsh regime are tough, wiry and well-adapted to survive in most conditions. Restricting water, and feeding with a high potassium feed seems to produce an abundance of early flowers. Such plants are also more able to resist disease and harsh winters.
In the old days, growers used to dig up fruit trees and severely prune the roots to stimulate heavy crops.
Although I have never seen it explained, we need to understand that flower (and thus fruit) production is done to produce seeds. It seems the plant is able to determine a high probability of death and react accordingly by producing more seeds (and hence more flowers and fruits).
This technique of fright does not only apply to plants. It is used in the mushroom industry, as well. Growers induce mushroom fruiting bodies by suddenly and drastically reducing temperatures for a short time (usually overnight).
STUNTED GROWTH
Many people say that if you let plants wilt they will be stunted. Although this is probably true in many respects, I don't think it is the rule. If the geranium is stunted, it does not appear to be. Furthermore, I was once told of a farmer who deliberately planted his cabbages out into dryish soil to induce wilting, and therefore root production. He would not have done this if it produced small tough cabbages. Indeed, I know just the opposite was true.
There is also much to be said for this sort of growing in the garden. Plants which might otherwise need staking because they have lots of lush, soft and weak growth are able to stand upright all by themselves. This saves lots of work, I can tell you.
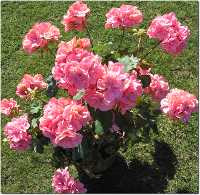
Going back to the geranium, I only give this tough regime over winter, or on young cuttings. Now is the time to really water them - when they are flowering profusely. Actually, if the water is given just as the flowers are developing, it will induce massive flowers, as well. The plant must know it has enough water and react accordingly.
But, having said this, I still use the soaking method to water them. And I hardly ever feed them.
Summer Feeding a Lawn
If you followed the spring feeding recommendations, you should now have a lawn with some strong healthy roots, encouraged by the Phostrogen All Purpose Plant Food (N:P:K, 14:10:27).
At this time of year, cool season grasses virtually cease growing roots and concentrate on leaf growth. Consequently, it is a good idea to give a different feed (a high nitrogen one) which will support this.
Since there is still a high risk of prolonged dry weather (if only!), we need to be careful not to scorch the lawn by giving too much nitrogen feed (it is mostly nitrogen that does the scorching).
I find that liquid lawn feed is ideally suited to this situation, since it can be given in small accurate doses as and when required. Because it is rapid-acting, we can almost do this on a day-by-day basis if necessary. Liquid feed is far more flexible than granules in this respect.
Phostrogen Soluble Lawn Food (N:P:K, 38:5:5) is ideal. Not only is it easy to apply with a watering can or hose feeder, it also contains iron and so gives the lawn a beautiful rich dark green colour(at least I think it's beautiful) and helps keep the moss at bay (iron salts destroy moss).
I know it only lasts for 1 month (granular feeds last 6 to 8 weeks), but I have found it to be well worth the effort. And if in doubt, it can be given at half rate every 2 weeks (I said it was controllable). Furthermore, because it can enter the grass through both the leaf and the roots, the results can be seen almost immediately, rather than waiting 2 weeks for granules, which work only through the roots. It is also more independent of the weather.
Furthermore, because there are no nitrates in the feed (it is organic), we do not need to worry about it being leached down from the soil into the water supply. After attaching itself to the clay and humus in the soil, it should support enough growth to produce a tightly-knit luxurious turf. The only drawback is that this turf will still need cutting (Nothing's perfect, is it?). But I always think a lawn is improving when it needs cutting.
I am using this feed at half rate, for now, because of the dry soil. This will give me some growth and colouring but also some insurance against scorching if the weather turns hot and dry.
If you are averse to cutting and think your turf is thick enough, but like the idea of rapid greenup, then I suggest you go for one of the new iron-rich granular feeds. These contain 2% iron sulphate to colour the grass, plus some feed to keep it ticking over and healthy. Although I have never used these feeds, I do not expect the greening effect to be long-lasting.
Dahlia Shoot Tip Cuttings After 5 Days
Although part of this problem is caused by too much temperature fluctuation, it should be understood that the idea of keeping up the humidity is to cut down water loss from the leaf until it has time to develop roots.
After 5 days, each cutting should have formed a callus (scab) which will seal the stem base, thus allowing greater ventillation.
Although the conventional way is to virtually exclude shoot or stem cuttings from the atmosphere for the full duration (some growers go to the extent of soaking them constantly in fungicide to prevent disease), I prefer to keep them open - and dry - if possible.
Nor am I too accommodating of the technique of putting the cuttings around the side of the pot (so that they will get more air) either, since this makes covering the pot difficult without the leaves touching the freezer bag and becoming diseased (because they will be constantly wet).
I have played safe by covering the cuttings. There is a good chance they would have survived without covering. Many times I have stopped (removed the apical meristem at the tip of the shoot to induce branching) dahlias and just pushed the shoot tip (effectively a rough cutting) into the nearly-dry soil, only to find them struggling to survive, and usually succeeding - without any propagators or special equipment - outside in dry warm summer air. I always stick things into the soil if there is any chance at all of survival, and have been rewarded with many free new plants this way - even ouside in the dry summer air.
I don't want you to look at the lettuce cotyledons here. If you look in the bottom left hand corner, you will see a couple of fuchsia tips I pinched out about 10 days ago. I popped them in with the ungerminated lettuce seeds to see what would happen. As you can see, although they are not in the peak of health, they are nevertheless surviving - or at least I think they are. I wouldn't be at all surprised to see them perking up soon and growing into healthy new plants. And this is in a westerly window, in dry air, facing the evening sun without protection. Isn't nature wonderful!
I have had cuttings wilt and play dead for several days before jumping into life. The only thing I would say is that they have not faced the hot mid-day sun.
Although our dahlia cuttings should survive quite well without the freezer bags, we must remove them gradually, as the cuttings will now have acclimatised themselves to humid air. What I usually do is open them up gradually, cutting the top off completely after about 14 days, by which time they have started to take on a healthy glow, with red leaf edges. This is a sign they are going to take. They seem to do well like this without any fungicides or special treatments.
I recommend that you keep trying new things, stretching the boundaries, and just observe what happens. You will probably receive some pleasant (and controversial) surprises. You will also develop 'green fingers', complete with a feel for and a love for plants.
Pruning Forsythia
No matter how I try, I always seem to lose out on flowers, in one way or another.
The theory is simple:
Shrubs which flower early in the year (usually before July) produce new wood during that year and this bears flowers the following year. Because it is produced early in the year, it has time to harden off before winter. However, we need to be quick and prune as soon as the flowers have faded.
Shrubs which flower in the second half of the year do not have time to harden their new wood before winter, so to avoid damage they are best pruned in late winter or early spring of the following year. They will then bear flowers on this new wood.
It all sounds so simple. Not for me. I have tried all ways. I just never seem to get it right; if I cut back any earlier there would be no flowers. And not only this, professional gardeners treat pruning as some sort of arcane art - some sort of secret they mustn't divulge. Arcane art or not, if you are thinking about doing some pruning, can I give you some advice?
Think again. Do you really really have to do it?
A good principle in growing is the old adage: IF IT AIN'T BROKE, DON'T FIX IT.
So don't prune before you really have to. And bear in mind that many shrubs do not need pruning.
However, if you really must, then understand why you are doing it. Is it:
- To restore flowering vigour?
- To shape or repair the shrub?
By all means feel free to follow your own judgement. Go to the library and take out a good textbook on pruning. If you know the name of your shrub, detailed instructions can be found. Follow them carefully.
RESTORING FLOWERING VIGOUR
Some shrubs (e.g. hydrangeas and roses) need young vibrant stems to produce their best flowers. As the stems lengthen, the flowers gradually become smaller and smaller. Giving these plants a really hard pruning re-invigorates them. And the harder we prune them, the more they like it. They will supply you with exhibition quality blooms (this applies to most plants, in my experience).
Contrary to consensus, you don't really need to know anything about pruning to deal with this situation.
All you need do is cut back one or two of the oldest, most gnarled stems down to about 15cm (6 inches) above the ground each April, whether they are flowering or not. You will probably lose the flowers on these stems (that's why only one or two), but you will hardly notice, especially if they are outside stems. Don't worry about damaging the plant. You are likely to do more good than harm (because you are inducing production of new wood).
SHAPING AND REPAIRING
Thinning
All plants need air circulating freely amongst their leaf canopies. To facilitate this, the best shape is long, almost parallel, vertical stems, each with just a few side branches. Cut off all branches which cross each other, especially the thinner ones (and the dead ones) which look untidy - cut these right back to the stem, being careful not to cut or damage the stem. Just leave a few branches. It might look horrific at first, but the new thinner look will soon grow on you.
Shaping
Sometimes branches become damaged or misplaced by the wind. Cut these back as far as necessary to restore the shape.
If the plant is becoming too large, consider whether you can just cut back a few stems this year, followed by more next year, and so on. If you want to reduce the shrub's size, do not cut these stems right back; ironically, this usually gives them so much vigour that they might even be taller by next year. No. Cut them to just below the required height.
If you want to use clippers or a hedge trimmer to trim them all over, bear in mind that you will probably lose a year's flowers. But you will not do any permanent damage.
As you can see, I usually get too carried away when I eventually get around to pruning. But this forsythia will soon fill in with new wood. And there should be enough old shoots left to get at least some flowers next year.
22 April 2010
multiplant
Used razer blade (anything sharp enough to make a clean cut) to cut near base.
Carefully removed lower leaves (Step 2)
Removed corner from a medium freezer bag.
- Mixed some multi-purpose compost with water so just changing colour (Removed all lumps and rubbish first)
- Loosely filled cup with compost
- Made out a label and put it in pot
- Inserted cutting to about 2.5 cm (1 inch) deep (It is important to keep compost loose enough so cutting just supported but air can get down to base of cutting)
- Carefully covered with freezer bag and secured with elastic band. Gave plenty of space over cutting. Important that leaves do not touch side of bag, as they will soon get diseased
- Placed in warmish (18-20 deg C) light spot. My spot not so warmish due to recent cold weather. Might be a problem
Cuttings should be ready in about 3 weeks. Need to watch condensation on sides of polythene. It should just be a little misty, not too much.
Note that I have not used hormone rooting powder. Dahlias will root without it, especially this time of year when young tissue is full of hormones.
It is well worth having a go at taking dahlia cuttings. This principle of taking shoot cuttings can be used for many plants.
Potting Dahlias
Had a problem with lumps in compost. They stopped the knife going through it. I wanted to slice down compost between seedlings. Turned out a bit messy, as you can see.
Would really have been best to have done this job just before the true leaves appeared. This is me being clever again.
Using square pots saves on space. It means we can get about one third more plants in the same worktop space, than if we had used round pots.
Rose Blackspot Treatment
Dithane is very good for blackspot (the best fungicide I have found), and very economical too. Will miss it next year when it is taken off the shelves.
19 April 2010
An Untity Bed
Weeds have uncanny survival strategies which in many ways puts them head and shoulders above our cultivated plants:
They tend to germinate very quickly, enabling them to spring into life and get established first, allowing them to grab the food, water and often the light.
They usually have very short life cycles, enabling them to flower and produce seeds - many thousands of seeds - quickly - several times per year.
They tend to germinate at different times. i.e. They do not all germinate at once, unlike our cultivated plants. Many are left in the soil to re-infect later crops.
A FURTHER PROBLEM
Because these plants are very close together, it is impossible to get at the weeds - either with a hoe, a weedkiller, or even by hand (it is impossible to step into the bed without damaging the tulips and wallflowers).
If you have a bed which has been badly affected with weeds, plant by all means, but LEAVE SUFFICIENT SPACE BETWEEN THE PLANTS to run a Dutch hoe between them.
AND ANOTHER ONE
Even if it were possible to get at the weeds, any treatment would disturb the weeds and cause them to drop even more seeds.
I cannot stress how important it is, NEVER TO ALLOW WEEDS TO FLOWER AND PRODUCE SEED. Keep attacking them. Don't despair if your efforts seem to no avail at first; you will soon see a difference.
But just a small delay before planting can allow you to get rid of many weeds.
Re-Potting Coriander
I find it best to use an empty pot of the same size to make the hole in the compost. It is easier to add compost around it when it is empty. This compost is rather too wet. I was afraid of drier compost collapsing into the hole when I removed the pot (Ideally, the compost should be just changing colour).
There is a good root growth here. Take care not to disturb the sides of the hole when inserting plant. And give sides of pot a good tapping and light downward bashing onto work top to make sure compost has made good contact with roots. If the tap root is running around bottom of pot, it should be broken off. This will encourage development of secondary fibrous roots.
This process usually makes a fantastic difference to growth rate.
How to Break Down a Heavy Clay Soil
There are two ways to deal with any heavy soil:
- Leave it to the frost
- Let it dry out completely
LEAVE IT TO THE FROST
The best way to have handled a clay soil like this, especially during the winter we have just had, would have been to let the frost deal with it. Constant freezing and thawing would have broken down these large lumps of clay through expansion and contraction. This would have left it in a more manageable state.
For some reason, this ground has been turned over too late. Best to do the digging (or ploughing) before the hardest part of winter sets in, whilst the ground is still dry enough (or frozen enough) to stand on without causing compaction.
LET IT DRY OUT COMPLETELY
As clay dries out, it bakes harder and harder, shrinking in the process. Eventually, it fractures into large sticky clods which are seemingly impossible to break down further (If you look carefully, you can see these fractures just showing).
The golden rule with clay soil (or any other heavy soil, for that matter) is NEVER ATTEMPT TO WORK IT DOWN TOO FINELY UNTIL IT HAS DRIED COMPLETELY.
Yes, I know what you are thinking: 'If you can't break it down now, how are you going to do it when it has baked even harder?'
Simple - WATER IT. Get the hose pipe and give it a good soak (or let the rain do it for you, but you will have to be quick to respond).
The action of the water will release the ionic (chemical) bonds which are binding the clay platelets (the clay's equivalent of particles) together. It will then crumble in your hands. In other words, in the garden, all you need do is rake the surface. It will break down into a wonderful tilth as if by magic.
TOO EASY! WHAT'S THE CATCH?
This will only work if the soil is COMPLETELY DRY. Partial dryness, as in the photograph, is no good. And these clods are too large to dry out before the next rain.
The only way to work this soil is to break it down in stages:
Firstly, encourage the fissures (cracks) to split completely by using a fork or a spade. Break it down into lumps about the size of a small fist if you can. This will allow the sun and air to get into it better. Leave it to dry out.
Then come back to it when it has completely dried, and water it.
Don't be afraid to leave a few clods on the surface, if you have to. The seeds and plants will work around them to a large extent, and there should be some hot dry weather ahead to complete the process.
Most novice growers break down soil too much, causing it to pan (seals the surface) during the first heavy rain.
It's the old story: Don't be in too much of a hurry. Nature seems to have its own way of dealing with things.
15 April 2010
Lettuce in Container
I am going to grow outside in a container, but because of slugs, and because I want to demonstrate that lettuce can be grown in a pot, I am leaving on window sill at about 15 deg C (59 deg F).
Might be a problem here. Lettuce can fail to germinate at high temperatures. And I am not sure whether or not it requires changing night and day temperatures, as many seeds do.
Instructions say to plant outside, and with this, combined with fact I am still using up old compost (the stuff that failed with the basil), we could have problems. I really am a glutton for punishment.
I am using old compost in container outside. When seedlings are big enough (assuming they germinate!), will plant them out here (around spring onions in centre). Have gone through compost looking for slug eggs and any other predator, but found nothing.
Put some of the new organinc slug pellets (based on ferric phosphate) on floor around base of container to kill slugs harbouring underneath it (the smell attracts them out when it is dark).
Container also has a good wide lip which should be more difficult for slugs to cross.
I am trying out this new copper tape around container. Supposed to be very good. It gives slugs an electrostatic shock if they try to cross it.
Been careful not to put container too close to anything that slugs can use as a bridge.
Only used a few seeds for now. Packet contains about 1250 seeds and it cost 50 pence. So should get a bit of value here.
Spring Onions As Well
Removed top 3cm (half inch) of compost in centre of container, thinly scattered a few spring onions, then replaced compost.
Should go nicely with the lettuce.
Not planting tomatoes as they are cheaper in the shops in the summer.
Choosing a Lawn Feed
This is what you need to ask yourself:
Do you want to incorporate a weed killer and possibly also a moss killer?
Do you want to apply it as granules or as a liquid?
If you choose granules, can you distribute it evenly?
How long do you want one application to last?
INCORPORATING WEED AND MOSS KILLERS
It seems to be the norm now to apply selective weedkillers (kill weeds and leave grass) and mosskillers with every application of fertilizer, whether the lawn needs these or not.
I do not agree with this practice. I only ever apply fertilizer to my lawn. Yes, I do use weed killers - and moss killers, as we have seen already. I only use these as and when necessary.
But there are things to consider.
Firstly, the cost. It seems wasteful to pay to weed the whole lawn when all we have is a few odd weeds which can easily be dealt with using a bottle of spot weeder - or even pulled up by hand.
Secondly, weed killers can all too easily get into flower borders. I have lost more than just flowers before now, I can tell you.
Thirdly, excess weed killer gets into the water supply.
Fourthly, using a weed killer too often helps weeds to become resistant. Using a moss killer too often increases the lawn acidity (this is usually a good thing, but might cause a problem on utility lawns based on Perennial Ryegrass).
GRANULES OR LIQUID
Unless you have a spreader, you might find it difficult to spread granules evenly without scorching, especially if the applied at less than 35 grams per square metre (1 oz per sq yd).
I always used spread granules by hand, because I found traditional spreaders more trouble than they were worth. They always seem to drop fertilizer where I don't want it, causing scorching; and cleaning and setting them is just too much trouble.
I bought a hand-held spinner last year and was very impressed with it. It seems to spread granules well, even at low application rates. However, it is rather difficult to control the width. So it might not be suitable for using with weed and moss killers incorporated.
FREQUENCY OF APPLICATION
Fertilizers last for different lengths of time.
Liquids last the shortest time, and usually need applying at monthly intervals. These are usually the quickest acting, since they can be taken in through the leaf as well as the roots.
Granules usually last for 6 weeks; but the more expensive ones last nearly twice that time because they also incorporate some slow-release granules (needless to say, they cost nearly twice as much, but have the advantage that they do not scorch so easily). Rain, or its equivalent, is necessary to get them down to the roots. They are slower acting than liquids, and take about 2 weeks to show an effect.
If you are lucky, you might be able to buy slow-release granular feeds which last upto 18 weeks.
WHICH TO CHOOSE
I find liquids the easiest to use, especially on small lawns. These can be bought as granules or as liquids, each of which is diluted with water and applied with a watering can.
Amazingly, liquids also seem to be the cheapest way of applying lawn feed, even though they need applying more often.
Because liquids need replacing each month, it is easier to accommodate a drought by missing an application. There can be a real problem if a drought occurs just after applying granules, even if they are washed in.
I prefer my liquid feeds to include some phosphorus(P) and potassium(K). It is possible to buy straight nitrogen liquid feeds based on urea (N:P:K 46:0:0). Note that it is not the 46% nitrogen which is the problem. Although this might sound really high, don't forget it will be diluted. No, it is the lack of P and K, to feed the roots and strengthen the turf, that bothers me.
I would definitely recommend liquids. These can also incorporate weed killers and moss killers if required.
13 April 2010
Update on Seeds After 43 Days
Coriander First Feed
Watered coriander-in-a-cup last Saturday. Included a few drops of Baby Bio, a nitrogen feed. Really coming on now.
Basil out of Propagator
Basil are just coming through now after placing in propagator. Must have been too cold before. Not thrilled with results, but then we don't need many plants. At least we have now got the possibility of getting plants. Not been watered yet.
Dahlias Right Size for Transplanting
Again, not thrilled with results. Some seeds have not germinated. I spaced these seeds out to about 2.5 cm (1 inch) apart, so we could let them develop longer before transplanting (splitting them up and spacing them out so they have more room to develop). Will leave them a bit longer yet, as are not yet overcrowded.
Not been watered yet. Would last another week or so, but as they look a little pale, I will give them a nitrogen feed. I am going to give a light watering with Baby Bio (10.6:4.4:1.7) at 5 drops per half litre (pint). This should give them a bit more vigour, then I can later start feeding them a high potassium feed of Phostrogen to help flowering.
Assessment of Seeds-in-Cups
After setting out in March to demonstrate a virtually fool-proof low-cost method by which to grow seeds on a window sill, I have to say that things have not turned out as expected. The Basil, which is supposed to be easy to grow, has hardly grown, even after helping it along in a propagator. The Coriander, on the other hand, which is supposed to be difficult, has virtually romped away. The Dahlia seeds have grown steadily.
Although I had hoped to be showing you cups bursting over with young plants (so I am disappointed from this respect), things are not all bad.
Positives:
We at least have plants.
There has been no disease.
The plants are strong and healthy.
The costs have been negligible. i.e. They have been profitable to grow (something which, in my opinion, is too often overlooked).
Negatives:
Germination has not been as good as expected. The cold start to the season could have much to do with this. Even now, things are not really growing outside as they should.
Assessment of Costs
After the plastic cups, the biggest cost was the seeds. However, I still have most of them left, and if they are kept dry will be O.K. next year.
I used old compost which had been opened in the garage for about two and a half years. This is not ideal and could also be much of the trouble. But at least it didn't cost anything, as it should have been thrown out before now.
But the real point here is that we have succeeded in producing plants profitably - something which is very difficult to do by textbook methods. And this technique should be repeatable by even the most un-green-fingered among us. It should be almost fool-proof, though I cannot, of course, guarantee this.
This means that some more young gardeners have reached the first step of the growing ladder. Although things might still be difficult, we have now cleared the biggest hurdle.
P.S. Things are going much better with our watering of Geraniums. I hope to show you the results soon.
The Real Lesson
This is that it pays to follow the instructions to the letter when dealing with seeds. It is worth re-stating that the objective is to find a one-size-fits-all technique for growing. Seeds are particularly precarious and can require all sorts of special treatments. So to have achieved anything at all is almost a miracle.
The point is that with my methods, you will not get it right all of the time. But you should get by most of the time. If you need more specialised advice, there is lots of it on the Internet and in the local library. But I find this is overwhelming. It overwhelms me - And I am not a beginner.
I hope these simple exercises will help you get into growing. If only you can make a start, it could be very rewarding, in more ways than one.
Spring Walk
Spotted first hawthorn flowers. Seem to be earlier this year.
Young leaves seemed to be growing before my eyes, as were these Horse Chestnut leaves.
Winter seems far away now. Strange how soon we forget it as soon as the sun starts shining.
10 April 2010
Vine Weevil Spraying
Although it might still be a little early, I don't want to give them any chance. I have sprayed up under the underside of the leaves so that the chemical will dry on there, not get washed off, and produce lasting protection. This chemical is also systemic (it is taken into, and moves around, within the plant), so spraying the underside also helps uptake, because it is sprayed directly onto the leaf pores through which it can enter the leaf.
It might still be a little early. I find that adult Vine Weevils prefer tender young leaves, which are only just developing on the Pieris but only develop after flowering in the Rhododendrons. At this time it is difficult to spray without some spray getting onto the flowers and thus poisoning the bees. By the time it is safe to spray, it is too late; the damage has been done.
Ideally, I like to spray the leaf buds just as they are opening. This way, the chemical is on the leaf edges where the weevils feed.
This treatment is not the standard one, which is pouring the insecticide onto the roots to kill the grubs (which can do the real damage). But I find the cost of doing this to be prohibitive. Spraying the leaves is far more cost-effective, provided all the adults can be killed.
However, it is worth treating pots of Fuchsias and other vulnerable plants by douching the roots.
This chemical provides long-lasting control for up to 2 months.
I will treat them again in a few weeks.
8 April 2010
Understanding NPK
NPK relates to the amount of Nitrogen(N), Phosphorus(P) and Potassium(K) which a fertilizer contains as various compounds.
- Nitrogen(N) supports (and also seems to stimulate) leaf growth
- Phosphorus(p) supports (and also seems to stimulate) root growth
- Potassium(K) supports (and also seems to stimulate) flower growth
You might have noticed that up till now, we have been interested in developing roots in our lawn. I did not recommend a traditional high nitrogen feed (which promotes leaf growth) so early in the year, but recommended an autumn feed containing a lower nitrogen level. The idea here is to hold back leaf growth to develop the roots as much as possible.
Soon we will stop feeding the roots and concentrate on growing green turf (i.e. leaf growth). For this we need a higher nitrogen feed.
How do we know what is in the feed?
Fertilizer manufacturers, by law, have to print an analysis on the container. Usually this is on the side, but in some cases it is underneath.
This autumn lawn feed contains 4%N, 4%P and 12%K. The NPK ratio is 1:1:3 (divide through by the lowest number). This feed contains equal amounts of nitrogen(N) and phosphorus(P). If you are wondering why the autumn feed contains so much potassium(K), it is to strengthen the grass against frost.
This spring lawn feed from the same manufacturer contains 15%N, 3%P and 3%K. The NPK ratio is 5:1:1. This feed contains five times more nitrogen than any other nutrient. It is ideal to promote leaf growth.
I said that we could use 'Phostrogen' in place of an autumn lawn feed. The analysis of 'Phostrogen' is 14-10-27. The NPK ratio is therefore 1.4:1:2.7. Notice that although 'Phostrogen' contains 14% nitrogen, versus 4% for our autumn lawn feed, the ratios are very close: i.e 1.4:1:2.7 versus 1:1:3. This is why it is an effective substitute. The percentages appear so different because they are applied at different rates.
I don't know if you are now more or less confused. But the point is that we want to try to give nutrients in the amounts needed by the plants. Too much of the wrong one is wasteful; it can also cause a build up in the soil, which can lead to other problems.
As far as we as novice growers are concerned, it is only important that we appreciate that there are different fertilizers for different purposes, and to try to apply the correct one at the correct time.
It is the amount of nitrogen in a fertilizer which can cause the most problems. Nitrogen is also used in far larger quantities than the other nutrients, so is most likely to become deficient. We shall see later how to watch for this.
Thank you for being so patient. Next time you are in your garden centre, look at the different fertilizer analyses and try to understand how they relate to their uses. I had better shut up now.
6 April 2010
Weed Control Part 2
Non-chemical control
Ask most people how they weed their garden and they will tell you they wait until the last moment (until the weeds are full of seeds), then get down on their knees, usually on wet ground, and dig into the soil surface around the weeds with a hand fork. Having loosened the soil, they proceed to pull out the weeds by hand.
I have tried for years to tell people that not only is this the most laborious and time-consuming method, it is also very inefficient. Needless to say, my efforts have been in vain. They carry on with the same technique. It's as if they need to suffer to feel worth their stripes; they just could not live with themselves if they didn't suffer.
So, in case what I am about to reveal falls once more on deaf ears, I want you to know that I understand. Nevertheless, I am going to tell you anyway:
This implement is called a 'Dutch' or a 'D' hoe. As far as I am concerned, it could be the most valuable tool in any garden tool shed (Yes, I know it doesn't look very valuable, but hear me out).
Hand forks are useful in that they loosen the soil, thereby not only allowing weeds to be removed more easily, but also causing the surface layer to dry out. This drying starves young weeds of vital moisture down to a depth of upto 10 centimetres (4 inches), which slows down growth. Add this to the fact that the soil looks more attractive after weeding, and it has to be said that it is not all bad for this method.
As far as I am concerned, the problems are really five-fold:
Firstly, too much loosening causes unnecessary water loss from the soil, depriving not just the weeds but also our plants. And of course, because young weeds can usually survive with less water than our cultivated plants, this process actually favours weed production (especially if the weeds have ripe seedheads. A new crop of weeds is planted as the old ones are handled).
Secondly, deep digging often disturbs the roots of our valuable plants.
Thirdly, valuable top soil clinging to the roots of the weeds is lost, unless these weeds are recycled through home-made compost.
Fourthly, digging brings up old weed seeds which have been buried too deep to germinate.
Fifthly, digging with a hand fork does little to kill those weeds too small to be pulled (and sometimes seen). All it really does is move them around, and slow down the growth process a little due to reduced water availability.
Consequently, weeding this way becomes a never-ending (and dreaded) task, which might need repeating at weekly, or even daily, intervals.
WELCOME TO THE NINETEENTH CENTURY!
I don't know exactly when the 'Dutch' hoe was invented. I am supposing it must have been around since the Industrial Revolution. It has been used extensively in horticulture ever since.
A 'Dutch' hoe can be skimmed back and fore at varying heights beneath the soil surface. Using it just beneath the soil surface cuts through most weed stems between the root and the soil surface.
With annual weeds, regeneration is impossible. The root will die back into the soil.
With perennial weeds, whose roots store food, they might throw up new growth, but any food reserves will soon be depleted and persistent treatment will kill the young weeds. Older weeds will also be weakened and eventually die off (I sometimes help them along with a little Glyphosate weedkiller applied with a hand spray).
DISADVANTAGES
This technique can be a bit strenuous first time, especially if the soil has become really compacted. But it will be much much easier next time.
It does tend to leave either a flaky or dry powdery surface. But this is ideal for conserving water and deterring slugs.
It is possible to acidentally chop through the stems of our dearly beloveds. But a narrow 10 centimetre (4 inch) blade helps avoid this. I find that this size of blade will remove most weeds in my garden. Yes, it may not get to all the weeds; but nothing is perfect, is it?
TIME SAVING
The time saved versus the hand digging method is absolutely colossal. Once you have the weeds under control, any garden can be quickly skimmed over. A job that might have taken hours can be done literally in minutes - and far more efficiently!
LABOUR SAVING
There is no need to bend down. Small weeds will quickly shrivel to nothing if left on the surface on a dry day. This method might look a bit unsightly at first, but if you come back the next day, it should be hard to find any dead weeds. I don't know where they go to. This is one of those eternal mysteries of this world. But go they do.
WATER SAVING
This technique is especially beneficial for water conservation, particularly around young plants with immature root systems.
WEATHER CONDITIONS
Although best done on a dry sunny day, it is effective in any weather.
What are you waiting for? Now is the time to get on top of weeds, before they become too established and shed seeds. Get out there and start hoeing!
5 April 2010
Weed Control Part 1
My advice on weed control is simple: NEVER LET THEM FLOWER AND DROP SEEDS - EVER!
If, instead of looking at them through the window, we could summon up the courage to go out and pull them up or chop them down as soon as we see their flower heads developing, then we would be well on the way to controlling this problem.
And if, along with this, we could refrain from digging, things would improve even quicker. Digging not only chops up weed roots, often producing many new plants (on perennial weeds such as dandelion, thistle etc), it also brings buried weed seeds to the surface where they can germinate. I very rarely dig my garden, not without a good cause, at least.
Probably the most common mistake novice growers make is to turn over a patch of ground which has been covered in weeds for generations, then sow it or plant it immediately. What invariably happens is that the weeds spring up first. And by the time new growers realise that they are looking at a wonderful crop of weeds, these have often become well-enough established to make removal virtually impossible.
Can I give a word of advice:
Don't be in a hurry. In the above situation, leaving the freshly-dug ground exposed without planting for just a few weeks will be long enough to germinate most weeds. Let them grow to a height of about 2 to 3 centimetres (1 to1.5 inches), then wage an all-out attack, preferably when the surface soil is dry.
How?
Chemical
Non-chemical
CHEMICAL
When applying weedkiller, it is advisable to use one which will not enter the soil. This enables us to sow or plant almost immediately.
There are two useful weedkillers available to the public in the UK:
Diquat (Sold under the brand name 'Weedol')
Glyphosate (Sold as 'Tumlbeweed', 'Roundup', Supermarket Own Brands etc)
Each has its own characteristics:
Diquat
Contact - kills anything green it touches. Not absorbed into plant. Does not kill roots
Quick-acting - works almost instantly
Works in cooler temperatures. Plants need not be growing actively
Toxic
Glyphosate
Systemic - absorbed into plant and moves around inside it. Kills roots
Slower-acting - takes several week to kill weed
Needs warmer conditions when weeds growing actively
Toxic
As you can see, Diquat is the only weedkiller which will work quickly enough in the cooler spring conditions. Glyphosate can be used on the difficult perennial weeds which later re-germinate.
WARNING:
Although Diquat might appear to be a blessing from Up Above, we need to bear in mind that it is TOXIC. If it must be used, gloves should be worn, and care taken that it does not come into contact with the skin or eyes. Also take care not to inhale any fumes.
Having said that, it is fantastic for killing difficult annual weeds such as chickweed among roses. Since it only kills green tissue, it does not affect the woody stems of the roses but kills the chickweed within a day.
It is also useful for killing long grass so that it can be burned.
However, I still do not recommend its use.
GLYPHOSATE
I find a mixture of glyphosate in a hand sprayer (an old kitchen or bathroom cleaner spray bottle) is useful for spot weeding difficult perennial weeds such as dandelion, docks, thistles, bindweed etc. Although it takes time to work, even in warm weather, it is nevertheless effective.
However, since it is non-selective and will affect all plants, it cannot be used on a lawn.
Nevertheless, since it is inactivated upon touching the soil, it is useful for weeds under hedges and around shrubs, providing it is not actually sprayed onto them.
I am not really sure about its toxicity. I used to think it was safe for pets. But I am now having doubts. Perhaps you can enlighten me. Best to assume the worst and keep the pets away. Again, gloves should be used during use, along with precautions mentioned above.
WEATHER CONDITIONS
Follow instructions carefully, especially with regard to concentrations and appropriate weather conditions. Weedkillers should not be used in windy or wet conditions.
2 April 2010
Roses now after hard pruning in autumn
Will have to reduce these if I want big roses, but not sure yet which ones to remove. It is not hard to do: just rub off with thumb. But I never like killing buds - or killing any form of life, for that matter. However, it looks as if it will have to be done. Will have to remove some more dead wood, as well.
I normally cut roses down to about 30 cm (one foot) in autumn, just to stop them rocking in the winds, then cut them again to about 6 inches in early March. Last year was first year I had ever cut them back so much at this time. The idea was to get them a bit earlier.
It is just something else that has gone wrong with the garden. However, all is not bad. At least there are strong new shoots developed. Its the little puny ones I need to get rid of.
P.S. Cutting back old tired roses really hard (as I have done) rejuvinates them. They suddenly start throwing strong new shoots from around base. These are the best forms of shoots and they produce big luscious blooms.
Progress on seeds after 32 days
It is difficult to see if the compost has shrunk much, since it is so dry and powdery on top. However, the cup feels really light, lighter than it was at sowing. Yes, it is definitely time to water.
FIRST WATERING
After boring another hole into the base of the cup, I gave just over 1/3 cup of tap water, then left to drain.
Expect seedlings to really start putting on some growth now as the new cells take up water and expand.
NOT FEEDING YET
To encourage the roots to keep developing, searching the compost for food,
I have not given any more food yet, apart from what was initially in the compost.
BASIL APPEARS
Original Basil seeds are germinating in propagator. Hurray!
None of seeds has done well this week in cool conditions. Expect things to buck up a bit from now on.