Learning how to water plants to increase growth in pots, container or garden - especially how to water roots and tubers. Specialities: root growth or tuber growth of lawns, fuchsias, geraniums, dahlias and begonias.

Showing posts with label soil. Show all posts

22 July 2011

Signs Of Over-Watering Triphylla Fuchsia

yellowing triphylla leaf tips The yellowing leaf tips of this triphylla fuchsia are a sure indication something is wrong. Because they have appeared following torrential rain, it is likely to be over-watering. Check the roots.

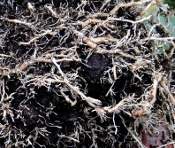
overwatered pot rootsSure enough, this reveals poor growth at the base of the pot and patches of brown dying roots - a sure sign of over-watering. The compost is still dark and soggy.

REMEDY
Good job the weather has been cool, or damage could have been much worse. Had browning become so bad that the roots had begun to smell, then replacement of the bottom compost would be necessary. However, because we have tackled the problem early, just drying out on a paper towel, then replacing into pot, should sort things. It will not remove the yellowing, but new leaves should be fine. New roots will soon grow into the damaged areas.

PREVENTION
Adding more perlite (and even grit) to the compost (25%) might have prevented the problem by allowing better drainage and aeration. Protecting the plants by covering the foliage with clear polythene bags, as outlined last year, is also a great help.

1 July 2011

Weeding Reduces Both Water Loss And Slug Movement

Dutch hoeWe talked last year about the virtues Dutch hoeing.

SEALS IN WATER
Now, after the recent rains, when the weed seeds in the soil have germinated but not yet seeded, is a perfect time to use a Dutch hoe. Loosening the top half inch (2.5cm) or so of soil will not only kill weeds, but will also break the wicking (capillarity) link between the soil surface and lower layers, thus creating an effective mulch which will both insulate the soil and greatly reduce water loss - it effectively seals the water in.

REDUCES SOIL TEMPERATURE
Loose, airy soil dries very quickly and lightens in colour. Thus, more of the sun's heat is reflected; and what is not reflected cannot conduct down through the loose soil as easily. Hence, the roots can work more effectively.

CONTROLS SLUG MOVEMENT
Slugs do not like moving over loose, dusty surfaces which stick to them, preferring wet conditions. You will notice the difference immediately - they seem to completely disappear. However, they soon return once the surface is wetted again . . . more's the pity.

17 June 2011

Slug Eggs

Found this group of presumably over-wintered slug eggs in a container. Slug eggs resemble little dark yellow pills about 3mm diameter. Although laid in groups in a damp spot just beneath the soil/compost surface, they are also laid amongst the roots and tubers of over-wintering plants and are a particular problem with dahlia tubers because the slugs hatch out just as the tender young shoots are emerging from the tuber. Slugs can do massive damage to young plants in a very short space of time - they need watching, especially in damp, warm conditions.

If buying plants from a nursery, do not confuse slow-release fertilizer granules with slug eggs. They are about the same size, but slug eggs are definitely dark yellow.

Potato Surface Root Proliferation

potato surface root proliferationOver the past week or so, fine curly roots have proliferated just beneath soil surface (some are ringed red). However, it's not clear where these are originating. And this activity seems to be mostly above troughs in main root wave. But where main root comes closer to surface, there is little sign of it (right). Although these new roots are clearly visible through side of pot, they cannot be seen from above. i.e. they do not seem to penetrate soil surface.

PURPOSE OF ROOTS
no roots at crest of potato rootNot sure what purpose these roots serve, but presumably they gather water from light rain showers, which hardly penetrates into soil. Should think they can also extract condensation formed overnight at soil surface from water vapour rising from below. Probably quite a lot of water to be had this way.

Had no idea potatoes were so efficient at extracting water (if that's what these roots are for). But concerned about:
  • what happens if surface dries out - do roots survive and remain effective?
  • what happens when roots disturbed by surface weed control - how quickly do they re-grow, if at all?
  • what happens when potatoes earthed up - how quickly can they reach new surface?
  • do they make mulching less effective (not so much in potatoes but in other crops)?
  • implications for top dressing

WHEN SURFACE DRIES OUT
Very few commercial soils have constantly damp surfaces. Are these roots damaged by drying? Presumably not - not if their purpose is to harvest rare showers in dry soil.

WEED CONTROL
Surface hoeing could be a real problem and present much damage, at least in the short term. But most of weed control in potato drills is done by covering small weeds during 'earthing up' process. Would seem essential not to let weeds get too large to be covered this way.

MULCHING - IS IT ALWAYS EFFECTIVE?
Because mulching materials tend to be coarser than soil, it's likely these roots cannot proliferate to same extent, if at all, perhaps leaving a dry barrier between soil surface and atmosphere - one which light rain showers could not penetrate.

As already outlined, if the top couple of centimetres (inch) or so of soil surface is loosened by cultivation it forms a natural barrier (mulch) to water loss (see posts on weeding and water conservation). Therefore, all mulching really does is delay the drying process; it is probably not much more effective than the soil's own natural mulch (formed when loosened surface insulates and reduces loss due to wicking). Bearing in mind surface roots, we need to ask the question: 'Are there are circumstances where mulching might be ineffective?'

TOP DRESSING
It's always assumed feeds need working into surface. Might do more harm than good.

Any views about all of this?

3 June 2011

Dahlia Tuber Wheels Produces Several Shoots

dahlia tuber wheel produces rootsSeveral shoots are now visible on one of the dahlia tuber wheels planted in April (see 'Can A Dahlia Tuber Wheel Produce New Plant Vigour').


Although we now know the technique works, there have been two problems:
  • slugs
  • poor nutrition in deeper holes
SLUGS
Wet warm weather is perfect for all kinds of slugs and snails. I had earlier treated the bed with organic slug pellets and therefore assumed it was clear of the pests. Unfortunatley not. Small garden slugs did great damage in the deeper holes, almost from the off. Had to revert to Metaldeyde pellets, which cured the problem (although, in fairness, I have to say that organic pellets seemed to work on the delphiniums earlier. a problem with organic pellets is that because the slugs go away to die, it's impossible to tell whether or not they have worked - until it's too late.)

POOR NUTRITION IN DEEPER HOLES
It's very easy to become too enthusiastic when trying out new concepts and ideas. This was such a case. As you can see, the leaves are rather pale, so this could indicate a lack of nutrients (it could also be other things, such as cold - or just because it's new growth).

I think this is because I got clever and failed to place the tubers on multi-purpose compost (I was short of it at the time), as recommended. This would have supplied all the nutrients necessary for healthy strong growth, as it did last year. Soil is most fertile in the upper 'A' horizon, usually within the first 15 to 20 centimetres (6 to 8 inches) where the micro-organisms are most active (due to adequate air).

THE GOOD NEWS SO FAR
Because several shoots are now growing up through this fertile 'A' horizon, the adventitious roots produced on the new stems will have easy access to soil nutrients in this area, something they otherwise would not have done. Thus, using this technique offers a kind of insurance policy against poor conditions.

27 May 2011

Bedding Plants: Common Mistakes - Part One

The last weekend in May is traditional planting time in the UK for summer bedding plants. Amazingly, something which should be straightforward often ends in failure. Here are some of the common mistakes:
  • poor quality plants
  • wrong weather conditions
  • wrong time of day
  • poor watering technique
  • feeding at wrong time
  • wrong feed
  • poor after-care

POOR QUALITY PLANTS

They say one cannot make a 'silk purse out of a sow's ear'. How true. Start with good strong plants, avoiding:
  • end-of-line bargains (unless you know you're doing)
  • plants which do not look healthy (leaves should be unblemished and uniformally green)
  • dehydrated plants (leaves should be erect, not limp)
  • weeds growing in pot
Many add pot-bound plants (thick roots growing strongly through base of pot) to the list. You can actually use these. But demand a discount, because there will be a growth set-back once you have cut them out of the pot (never pull plants out by holding their stems or leaves - after slicing off protruding roots level with base of pot, invert pot onto palm, then push base of pot with thumb of other hand; you might need to cut around rim with a knife first, but avoid this, if possible).

WRONG WEATHER CONDITIONS
Visit a garden centre during a spell of rainy weather and it will be devoid of customers. Some gardeners are like those couples in ornamental weather houses - you know, the ones attached to catgut who only venture out when the weather is about to turn dry and sunny. Yet a prolonged spell of overcast, showery weather provides near perfect conditions for planting, especially if the soil has received sufficient water to get down a foot or two.

Work with the weather if you can. Choose an overcast day, then rush out and plant between the showers - it pays dividends (if you can avoid contracting pneumonia)

If the weather is too hot and rain is forecast, delay planting till then. Have everything prepared. And DON'T FORGET THAT HOT, CLEAR WEATHER OFTEN MEANS OVERNIGHT GROUND FROST, so cover plants at night with horticultural fleece till they are hardened off (fleece is also good for shading from sun)

WRONG TIME OF DAY
Humans being humans, we cannot resist rushing out in the burning mid-day sun to put our plants in the ground, as if we are somehow doing them a favour. No! No! No! Plants are averse to burning sun and even to heat. The best time to plant is at the end of the day, preferably when rain forecast (you will need to watch out for slugs). This was covered last year in 'Resisting the Heat'.

POOR WATERING TECHNIQUE
Most of this has been covered elsewhere (click 'starters' link at side). But what I want to tell you is this:
  • As much water should be given to your plants BEFORE planting as possible. This is not generally understood.
  • No matter how careful you are, there will always be some impairment to root functioning caused by the disturbance.
  • Also, roots need air around them to function well. So waterlogged soil is no use.
Before Planting
Therefore, give your plants a good soaking at least four hours before planting. This will give time for enough water to be taken up to sustain establishment after planting, and also to allow any excess water to drain away from around the roots, thereby allowing them to function well right from the off.

Make sure the ground is thoroughly wetted, down to at least 30cm (1 foot), if possible. As I have told you elsewhere, dry ground is notoriously difficult to wet. Make sure any water you apply does not run away through cracks in the soil, or even run off the soil surface.

After Planting
Preferably do not apply water; otherwise, give a good dousing. Then refrain from watering as long as possible (even to wilting point). Plants can sense moisture levels; as these diminish they send out roots to look for it. If water is given too early, the roots become lazy and do not develop, consequently leaving the plants more drought-susceptible.

Beware of panning or puddling the soil surface, especially on clay or silt soils in hot sunny weather. This mud dries hard and seals out air vital for root development. If this happens, allow to dry, then break up the hard surface.

Ongoing Watering
DO NOT WATER ON A DAILY BASIS. Leave the soil to dry out for at least a few days. As water is taken up by the plants, air is drawn down to the roots to take its place. Repeated soaking followed by drying encourages a good root system (remember the geranium?). As a rough guide, let surface dry out down to about 5cm (2 inches) between waterings, then apply 5 litres per square metre. A fine watering rose and gentle pressure should be used.

FEEDING
DO NOT APPLY ANY FEED WHATSOEVER at this stage. There is no way of knowing how much feed is already in the compost; there is also no knowing whether or not dry weather will return.

PLANTING TECHNIQUE

Gently firm plants into loose soil with knuckles, so they are adequately supported. Do not apply too much pressure, try to avoid damaging roots and do not handle by stems or leaves. Watch out for slugs and frost.

P.S. Most of the above has already been dealt with in the earlier posts of last year. It's worth having a look.

14 May 2011

What If You Don't Make Compost, What Then?

Pick up any gardening book and you might be forgiven for thinking that if you don't make compost you can't grow plants in a garden. Of course, in reality this is an exaggeration; the choice is not so stark. Nevertheless, there is still a consensus which believes home made compost is necessary to improve a soil's structure and water retention properties. Well. Take it from me: It's not.

There are other ways to improve soil structure, and even to nourish plants. And I'm not talking about compost bought in from a local authority, or spent mushroom compost, or even composted horse manure. Of course, all these have their uses. And you will know the latter is a particular favourite of mine; it's absolutely wonderful for flowers, if applied early enough*.

No. I'm talking about the old multi-purpose and ericaceous composts sitting outside in pots and containers. And I'm talking about the old lawn rakings which I suggested you bag up. Each of these makes an excellent soil conditioner and will help all soils hold onto far more water and nutrients.

And don't forget that every time you put bedding plants in your soil, you are adding multi-purpose compost. It all adds up. And it's extremely beneficial. This is because it's not the soft green plant material which builds humus (essential to build soil structure). No. It's the old woody (containing lignin) material and other such almost indigestible stuff - which is very difficult to break down, even in a normal compost heap - which makes humus. And you don't need much of it. Just a little can work wonders on a difficult soil (sand or clay).

JUST BURY IT ALL
What hardly anyone mentions is that the soil can make its own compost. It's Nature's own waste disposal system. If waste material is buried (best to chop it up a bit first), and provided there is some free nitrogen and moisture in the soil (there is in most), soil fungi can get to work making humus through enzyme action (soil bacteria will also break down the other stuff, as well).

WHY ADD HUMUS
Humus in soil not only improves water holding capacity, but also imparts an electrical property called a 'cation exchange capacity', which allows soil to hold on to nutrient ions (because they possess an opposite electric charge), which might otherwise be lost through leaching. Its sticky nature will also bind the smaller soil particles into crumbs, thus aiding drainage and aeration.

* If horse manure is stacked (at least 1 metre square stack), then watered and turned every other day, it will break down into fine compost within a couple of weeks. As the stack cools down (it can reach 85 degrees Centigrade[**] (185 degrees F)), it will begin to cure and remove any excess ammonia. When the now dark straw is about half-covered with white actinomycetes, no smell of ammonia should remain. In this state, it can be used on plants at any time of year, either in the garden or in pots.
[** Need a larger stack to do this. Ideally, stack should be at least 2 metres wide, and 1.5 metres high. This will help keep the heat in whilst allowing some aeration. ]

21 April 2011

Producing Drought-Resistant Dahlias In Shallow Soil

Although dahlias are one of the easiest flowering plants to grow, because they develop very quickly they need a good supply of water. So most growers water their plants very often. But if the roots can access damp soil, this watering will be greatly reduced. I am going to show you how I achieve this.

As you will have seen from previous dahlia posts, two things will help here:
  • planting tubers deeper in soil
  • helping plants develop a larger root system (not dealt with here; see last year's posts on dahlias, watering and water conservation)
One or the other is a real benefit. But we want to have both (if you haven't already done so, please read: 'How To Produce Drought-Resistant Dahlias', posted on 24th March 2011 and 'Dahlias Need Stronger Light', posted last week, 14th April 2011).

PLANTING TUBERS DEEPER IN SOIL
With normal fertile (dark in colour) soil, this is no problem - just dig a deeper hole and bury. Simple. However, things are rarely so straightforward. Lots of growers have to contend with shallow soil. It might not be physically possible to dig a deep hole; or there might be a shallow depth of FERTILE soil (i.e. soil is deep but soon changes to a lighter colour of infertile subsoil) What then? And don't even think about a pick and shovel! Although, I don't know, you could dig a hole and fill it with potting compost. It has been known. But these would be a desperate measures.

Obviously, all we can do is try to get the tubers as low as possible. But this can be a problem, especially with those large clumps of tubers - you know, the ones in soil we awakened.

depth of dahlia tubers below surface is 4 inchesThese clumps are enormous. As you can see, even when stood in a 30cm (12 inch) hole, the shoots are only 10 cm (4 inches) below soil level. Before we go any further, we should be very clear about something:

IT'S THE SHOOT BUD DEPTH THAT MATTERS, NOT THE TUBER DEPTH

Whilst 10 cm (4 inches) is the recommended depth for dahlia tubers, unfortunately this is TOO SHALLOW for our purposes. If we want to reduce watering, we need to somehow get the shoots lower - preferably at least 20 cm (8 inches) below ground.

dahlia tuber levelsSorry. It's not a very clear photograph. But the large clump on the right is a clump of awakened, unsplit tubers - as they were stored over winter. The tray on the left contains the tuber we put there recently. In order to level the shoot buds in both cases, I had to stand the tray on a house brick. The red line represents the level of the base of the the tray. Everything below the red line needs reducing, all 40 cm (8 inches) of it. How?

Clearly, separating the clumps and planting the tubers flat in trays, as you have seen, is good. And we could still separate the clumps into single tubers. Why not do this? Well, it's getting too late*. The clumps will have quite a bit of root growth in their soil, and if we removed this, it would waste time re-growing. Best keep disturbance to a minimum.


sliced dahlia tuber on side, cut end downwardsDivide clump by slicing down between buds (try to get at least one strong bud on each piece) with a sharp knife or spade. This photo shows a slice laid on its side, cut-end downwards. It can be planted like this. Don't worry about the buds pointing sideways, not upwards: they'll soon turn upwards; and the roots downwards.

Yes. O.K. But this is a smaller clump. We've lost some buds. There won't be as many flowers, will there?

No. But there is a way: Make a dahlia tuber wheel.


DAHLIA TUBER WHEELdahlia tuber wheel

Once the tuber clump has been carefully sliced into thinner sections, it can be re-constructed in a different dimension. Lay the slices, bud ends inward, out like the spokes of a wheel in the bottom of the hole (this one is on the surface). This way, no buds are lost from the original, yet we have achieved our purpose: THE BUDS ARE NOW AT ABOUT 17.5 cm (7 inches) deeper in the soil. How about that, Ben Murphy?

FEEDING
Last year, I laid the tubers on muliti-purpose compost in the bottom of the hole. This provides nutrition to get a good start, then extra water-holding capacity. It's a good policy. I recommend it. However, I haven't used compost, this year - only a handful of bonemeal, as outlined in other posts (please read them all, if you can - including last year's).

Some growers recommend laying tubers on a bed of garden compost. This, in my opinion, is not a good idea. Chances are, it will be too strong and will burn the delicate young root hairs, especially in dry soil. If you want to use garden compost - or any other type of feed - make sure it is kept at least 5 cm (2 inches) away from the roots - and offset to the side, if possible, so the tap root (which goes straight down) does not have to grow through it. I usually scatter a handful of bonemeal around the edges of the hole. This way, the lateral feeder roots are encouraged to search for it. Roots will always select the right course, given the opportunity.

COVERING
Carefully cover over tuber and young shoots with soil from hole. But only to a depth of about an inch. If you can position the shoots on the sunny side of the hole, the rapidly-emerging shoot (due to warmer soil) will have shorter growth.

WATERING
Water covered tuber well to settle soil for a good start. Then only water again if absolutely dry. This will encourage strong root growth.

* This refers to rooted single tubers. If coming straight from the packet, just dig a hole and pop them in. Note that they are best laid on their side, as this gets the shoots lower.

17 March 2011

Re-Potting Root-Bound? Geranium (Pelargonium)

Been recently getting a lot of limp, floppy, yellowing leaves after watering the geraniums in the house. Although they recover, and also produce large flowers, the plants are not as attractive as they could be. The yellow leaves fall off, leaving bare bases to the stems. Plants flower best when they are root-bound. But I am wondering if this has gone too far. Time to check.

geranium roots out of pot before treatmentThe pot is getting rather full of roots. And there is not much evidence of new growth; the fine feeder roots look old and tired - I don't think they can sustain the plant for another full season, not as they are.

Now is a reasonable time to re-pot the plant (spring). I know there are buds about to break open. But they haven't yet done so. And the plant may never stop flowering for the rest of the season. Growing is always a compromise.


inside geranium root ball after old feeder roots have been removedroot ball reduced in sizeGently brushed away old roots and compost to reveal the inner core and the main root system. Careful not to damage the new fine white roots growing out of the old stuff. This reduced root ball by about two thirds (left). Stood this in water for a few minutes. A drink will help sustain the plant till it can establish itself.

Until now, I have always used plain multi-purpose compost. Time for a change. Used a slightly damp multi-purpose:sand:perlite medium (same one as used on fuchsias), mixed in the ratio of 6:1:1. Carefully coaxed it into spaces around roots with a finger, tapping pot on floor and bashing sides as I went along. Then gently firmed, to give plant support.

I only did one of the two plants. So it will be interesting to see how the other one gets on.

The only thing that worries me about all this is that the over-watering symptoms seem to have occurred since re-commencing feeding after the winter, and since the weather started to warm up. This could be an indication of bacterial or fungal disease. But it seems unlikely. Let's see how things go for now. Time will tell. . ..

3 March 2011

Fuchsias Seem To Root Well In My Soil: Should I Add Perlite?

fuchsias rooted in soil last autumnSorting out the fuchsia cuttings taken last autumn, I came across these lovely roots on a soil-based cutting from last July. As you can see, there is lots of new white growth. I said last year that fuchsias seem to root well in my soil (unsterilized). I suppose this is because it is quite light (gritty), and not too acid.

I really like the look of these roots. And watering doesn't seem to be a problem with soil in the autumn. I didn't get problems with botrytis, as I did with soil-less compost - even with added perlite. Garden soil contains anti-pathogens which combat lots of plant fungal diseases.

The only problem is that it can tend to puddle, thereby preventing air getting to the roots. Perlite might solve this. It would help hold moisture whilst keeping the surface open.

But there is also the problem of unwanted pests with unsterilized soil.

10 February 2011

Wetness Of Compost

If you look at last year's posts, you will see that I made a really big thing about watering. This is because, in my view, it is the crux of growing, the most important thing to master. It is also where almost all novices (and even some professionals) go wrong. Considering it is so critical and we mentioned it so much, it's strange that I never got around to defining some sort of standards which can easily be referred to for all occasions.

So I thought it about time I did just that, and indicate what I mean by a light, medium and heavy watering, both for propagating seeds and cuttings in compost, and for growing plants in pots.

COMPOST FOR SEEDS AND CUTTINGS

light watering
Mix water into compost thoroughly, squeezing constantly with fingers to ensure even distribution. After mixing, pick up a handful and squeeze quite hard. Water should be heard, and might just be visible at maximum pressure. However, water should not run out between the fingers, and should retract when grip released. Compost should form a ball which holds together upon release but which breaks up easily when poked. Hand should be left slightly damp but not wet.

This mix is ideal for taking cuttings and for use in a propagator.

medium Watering
Mix water with compost as before and clench a handful. This compost should release water through fingers when squeezed hard. But this release should stop when grip is released. Hand should be left wetted.

This is a very useful level of wetness and is ideal for many purposes when growing plants.

heavy watering
Compost is wetted and mixed until no more water can be added, then allowed to drain. It is then said to be at field capacity, an important factor in plant growth which we shall be discussing later on. Care should be taken not to add too much water, since drainage water will remove valuable nutrients (to avoid this, I catch drainage water and add back to compost as soon as possible).


WATERING POT PLANTS

light watering
Fill the space (usually about 1.25 cm (1/2 inch)) between compost surface and top of pot with water and allow to soak in. Watch that water does not run down side of compost, especially when it is dry. Dishing the surface helps avoid this. Tepid water also soaks in better than cold. A drop of eco-washing detergent can also be added as a wetting agent: this will help 'lubricate' the compost.

Use this level for winter watering, or any time plants are not in full growth.

medium watering
Two light waterings (i.e. about 2.5 cm (1 inch) of water). Compost must be allowed to drain.

This level is used when plants are in full growth but not in flower.

heavy watering
Soak pot either by immersion or by adding water, then allow to drain. This technique is useful if compost is becoming dry, since it ensures no dry spots are left. I water cyclamens and some geraniums (pelargoniums) this way. But all plants benefit from this technique occasionally, since it washes all old unused salts out of compost and makes way for a fresh start. It is essential that the pot is allowed to drain before putting back on a saucer, since we do not want the delicate root hairs immersed in water, especially with water sensitive plants like fuchsias.

This level of watering is usually only given when plants are flowering and in full growth.

27 January 2011

Not Thrilled With Multi-Purpose Compost

Although I have been growing with multi-purpose compost for several years now, I have to say I am not thrilled. Things don't seem to have gone nearly so well as they did with the old sphagnum peat-based stuff (this was considered environmentally unfriendly).

Of course, I could be imagining all this, but results now seem patchy and inconsistent. And it doesn't seem to change colour evenly as it dries, so it makes watering more difficult. And it's full of lumps and bits of debris . . ..

STICK TO ONE TYPE: KEEP IT SIMPLE
If you are new to growing and wondering what type of compost to buy, I would say buy a small bag of a branded multi-purpose; then, once you are satisfied, buy a larger one. Although there seems to be a type of compost for every purpose, thus making for more successful growing, I find it best to keep it simple and stick to one type (see below), then thoroughly get familiar with using it. This policy is also good financially, since it will save a small fortune; it will also avoid much waste. As far as this blog is concerned, for normal growing, each time I refer to 'compost', I am referring to 'multi-purpose'.

WATCH OUT FOR LIME-HATING PLANTS
You need to be aware that there are those lime-hating plants such as azaleas, camellias, rhododendrons etc. which will not thrive in ordinary multi-purpose. Should you wish to grow these, use 'ericaceous' compost. This is multi-purpose without the added lime.

13 January 2011

Horse Manure Wonderful For Spring Flowers

If you want to give your flower beds a real treat this year, if you want polyanthers as big as footballs (well, perhaps not quite), well-rotted horse manure is the stuff. Although many would disagree, I have found it to be absolutely wonderful.

I used to (I can't get it at the moment) apply it towards the end of January so that its goodness had time to soak in before growth commenced in earnest in February. It doesn't seem to burn the roots at this time, because they are still dormant or partly dormant, or because there is more moisture in the soil, or perhaps even because there is less free ammonia - anyway, whatever the reason, it's good stuff.

Just scatter it around the plants without actually touching them, so that the ground is just covered. The easiest manure to use is that based on wood shavings rather than straw. This is both easier to spread and more attractive to the eye. You don't need to dig it in, although you can do. If left on the surface, it will gradually become accommodated. The lignin in the shavings is good for soil structure since it helps build humus. Now, if only I could find another supply . . ..

18 November 2010

Checking the Drainage

As you know, I have now lifted and stored some of the dahlias. But I usually leave some in the ground all winter. They seem to survive very well like this, especially if planted deep (at least 10 cm) and get some sun during the day. The sun thaws out any frost and prevents it penetrating deep into the soil during any weeks of continuous 24 hour bouts of freezing temperatures, usually in late December-early February when days are shortest. If storage is a problem, you can do this as well, with one proviso: the soil must not become water-logged.

What causes water logging? - Poor drainage.

How do you know if you have it? Dig a narrow hole about a spade deep and watch it. If it doesn't drain within about 8 to 10 hours after a bout of heavy rain, then drainage is a problem. If it doesn't rain, tip in a bucket of water. (Incidentally, if it drains too quickly, this indicates another problem - too-light soil (remedy by adding clay or compost)).

FACTORS CAUSING POOR DRAINAGE

High Water Table
As winter approaches, the water table gradually rises and can even reach the surface causing bogginess, even permanent puddles of wataer. This problem usually occurs with low-lying land; it does not affect most gardens since it is low enough beneath the surface. However, if you have this problem, you should think about a drainage system. Unless you do this, your plants will never do well (unless, of course, they are bog plants).

Heavy Soil
Heavy soils, such as clay, do not drain fast enough in times of continual rain. Dahlia roots (and also those of many other plants, especially bulbs and corms) do not like this and will quickly rot. Planting in sand will help to keep the cold wet earth away; it will also improve drainage by keeping the soil open. Adding compost, sand, or horticultural grit will help to improve the drainage.

Hard-Pan
If you live in a new property (or an older one), the garden might have been created by dumping topsoil onto what was effectively a building site compacted by heavy traffic. As the surface water seeps down, it is prevented from getting away by this layer and thus creates a false water table.

Hard-Pan can be cured by penetrating the pan, the more places the better. Although double-digging is best, just loosening the soil in spots close to each other will have a large effect. If you do double-dig, try to avoid mixing the subsoil (usually the lighter soil) with the topsoil (the darker soil), since it is invariably infertile. After removing the first spadeful, try to loosen the lower layer without lifting it out; this will allow the water to get through.

14 October 2010

Sterilizing Soil in a Microwave Oven

sterilizing soilDue to cool spots, I find it best to spread very damp soil out evenly on a plate before heating in a microwave. About 8 to 10 minutes per litre should be sufficient to kill most creepy-crawlies and soil fungi.

Place kitchen towel over soil before starting, then heat until soil is just beginning to dry out amid much steam.

Leave it all to cool naturally, watching for any sign of life.

9 September 2010

Testing the Soil Acidity

testing soil pHBefore applying the top-dressing, I added some limestone to remove the soil acidity after testing the pH (acidity level) with an electronic meter. This is not an exact science. But it does give some indication, especially when the average of a few samples is used.


pH 7.0 is neutralA ph of 7 indicates neutral. As the pH goes lower, soil becomes more acid; and vice versa.

About pH 6.5 suits most (but not all) plants. Calcifuges (lime-hating) plants, such as rhododendrons, azaleas, etc. grow best at pH levels below 5.5 (because the pH scale is logarithmic, a one unit drop represents a tenfold decrease, so pH 6 is ten times more acid than pH7; but pH 5 is 100 times more acid). Calcicoles (lime-loving) are generally found on limestone soils, where the pH is above 7.0.

Lawns are slightly complicated. Normal utility lawns (which are often comprised of only perennial ryegrass) like a neutral to slightly alkaline soil (pH6.5 to 7.5). However, if the turf contains luxury grasses (as most do), these prefer a lower pH of about 6.5.

Persistent moss is often an indication of a too acid soil.

11 May 2010

Lumps and Bumps

lumpy soilJust in case you're wondering, can I make something quite clear: This is not the lawn! No, it's a field of spring corn.

This lumpy soil has stood up to the recent rains very well, unlike the one we saw last week. This is almost certainly because it contains more humus (formed from organic matter), which gives it structure.

Before planting seeds, many of us think it is necessary to break down soil almost to dust. Not so, as you can see. Provided there is enough food in the seed to sustain growth until the young shoot (plumule) can reach light, lumps can be accommodated quite easily. In fact, they are a good thing, because they help maintain structure. Even very fine seeds would germinate in a soil such as this, although perhaps not so well as they would in a finer one (Bet you're glad to hear that!).

Another common misconception is that all stones need removing. A surface containing small stones can be a very good thing, especially if the soil has a tendency to pan. As soil dries, it shrinks away from the stone edges leaving gaps, thus allowing air and water to penetrate where it could not before. i.e. It keeps the surface open.

4 May 2010

Panned Soil

, beAs you can see, the recent heavy rain followed by sun has baked this soil surface into a hard crust (pan). This is partly because there is little structure in the soil to resist this, but mostly because it was broken up too finely before planting.

This pan needs to be broken up immediately, since it is preventing oxygen getting down to the roots. And roots cannot take in water without oxygen, contrary to what we might suppose. It is also preventing other essential gaseous exchange.

A Dutch hoe is an ideal tool to use, since this will also kill off any small weeds which might be gaining a hold.

To give a soil more structure, we can add organic matter to it in spring. This will be broken down by the soil micro-organisms to form humus which has the effect of sticking the finer particles together to form larger ones (crumbs). Not only do these allow gases to access and leave the soil more easily, but they also resist this panning.

19 April 2010

How to Break Down a Heavy Clay Soil

heavy clay clodsHeavy clay soil like this presents many problems, especially at this time of year. What on earth do we do with it? How can we break it down into a fine tilth so that we can sow or plant?


There are two ways to deal with any heavy soil:
  • Leave it to the frost
  • Let it dry out completely

LEAVE IT TO THE FROST

The best way to have handled a clay soil like this, especially during the winter we have just had, would have been to let the frost deal with it. Constant freezing and thawing would have broken down these large lumps of clay through expansion and contraction. This would have left it in a more manageable state.

For some reason, this ground has been turned over too late. Best to do the digging (or ploughing) before the hardest part of winter sets in, whilst the ground is still dry enough (or frozen enough) to stand on without causing compaction.


LET IT DRY OUT COMPLETELY

As clay dries out, it bakes harder and harder, shrinking in the process. Eventually, it fractures into large sticky clods which are seemingly impossible to break down further (If you look carefully, you can see these fractures just showing).

The golden rule with clay soil (or any other heavy soil, for that matter) is NEVER ATTEMPT TO WORK IT DOWN TOO FINELY UNTIL IT HAS DRIED COMPLETELY.

Yes, I know what you are thinking: 'If you can't break it down now, how are you going to do it when it has baked even harder?'

Simple - WATER IT. Get the hose pipe and give it a good soak (or let the rain do it for you, but you will have to be quick to respond).

The action of the water will release the ionic (chemical) bonds which are binding the clay platelets (the clay's equivalent of particles) together. It will then crumble in your hands. In other words, in the garden, all you need do is rake the surface. It will break down into a wonderful tilth as if by magic.

TOO EASY! WHAT'S THE CATCH?

This will only work if the soil is COMPLETELY DRY. Partial dryness, as in the photograph, is no good. And these clods are too large to dry out before the next rain.

The only way to work this soil is to break it down in stages:

Firstly, encourage the fissures (cracks) to split completely by using a fork or a spade. Break it down into lumps about the size of a small fist if you can. This will allow the sun and air to get into it better. Leave it to dry out.

Then come back to it when it has completely dried, and water it.

Don't be afraid to leave a few clods on the surface, if you have to. The seeds and plants will work around them to a large extent, and there should be some hot dry weather ahead to complete the process.

Most novice growers break down soil too much, causing it to pan (seals the surface) during the first heavy rain.

It's the old story: Don't be in too much of a hurry. Nature seems to have its own way of dealing with things.